This article applies to Team and Legacy editions.
Centercode's Recruiting tool is designed to make user acquisition feature-rich and flexible while staying reliable and consistent. You'll create Project Recruitments within your projects that use various Invitation Types to bring in users, and track invited candidates via Project Recruitment Pools.
Table of Contents
- What is Recruiting?
- How do I invite users to my community and project?
- How do I add users to my project without their interaction?
- How can I verify a user's account information and confirm they've received the product?
- "User already exists in this invitation type"
- Where can I search for users I've invited?
- How do I send follow-up email invites to users I've already invited?
- "This project recruitment is not available"
- "Your filter matched inactive results which are not shown"
- How do I control the community recruiting experience for new users?
- How do I change my landing page text?
- How do I set the teams users get added to when they join?
- How do I know who has been invited to join my community or project?
- How does "Not Interested?" work?
- Why can't my users see the project they've been added to?
- Why are my users getting the "page you are attempting to access is unavailable" message?
- Why can't my users see content, surveys, or other resources when signing in?
- What are "sourceless users"?
- How can I prevent certain users from joining any projects?
- How do I change the opportunity name shown on my community home?
- How do I personalize recruiting emails and invitations?
- Why are my users landing on an "Enter a key" page?
What Is Recruiting?
Recruiting is a set of connected tools that handle all the ways users join your community or project.
Recruitments are customizable landing pages that place users on selected teams. The platform includes both Community Recruitments (for new users) and Project Recruitments (to add existing community members to projects).
Invitation Types represent where your users come from. They attach to Project Recruitments and direct candidates to the recruitment's landing page via a custom URL, email list, or other method.
Recruitment Pools hold users who have been invited but haven't yet joined. They let you track and nurture candidates through to conversion.
How Do I Invite Users to My Community and Project?
Use Invitation Types to generate candidate pools, then invite candidates to your community and/or project. The Invitation Type directs candidates to a Project Recruitment, which controls the landing page, destination teams, user limits, and more. Read more about Invitation Types.
How Do I Add Users to My Project Without Their Interaction?
Quick Invite supports this. Use both checkboxes under Advanced Options to skip sending an invitation and automatically push the account into your project. This is only available if the invitee already has a community account. Read more about Quick Invite.
How Can I Verify a User's Account Information and Confirm They've Received the Product?
Use an Account Verification notice type to have users verify any account-level information collected at account creation. Read more about notice types.
To confirm users have received your product before testing begins, use the Product Verification feature in the Users section of your Management navigation bar. Read more about Product Verification.
"User Already Exists in This Invitation Type"
This message means the user has already been added to the invitation type's pool. Each user can only appear once per invitation type.
Where Can I Search for Users I've Invited?
Invited candidates remain in your Recruitment Pools until they click through the invitation and join. Read more about managing Recruitment Pools.
How Do I Send Follow-Up Email Invites to Users I've Already Invited?
Go to Community Management or Project Management, click Recruiting, then click Moderate candidates on the relevant Project Recruitment or Invitation Type. Click Email to send emails to all candidates, or filter first to target a subset.
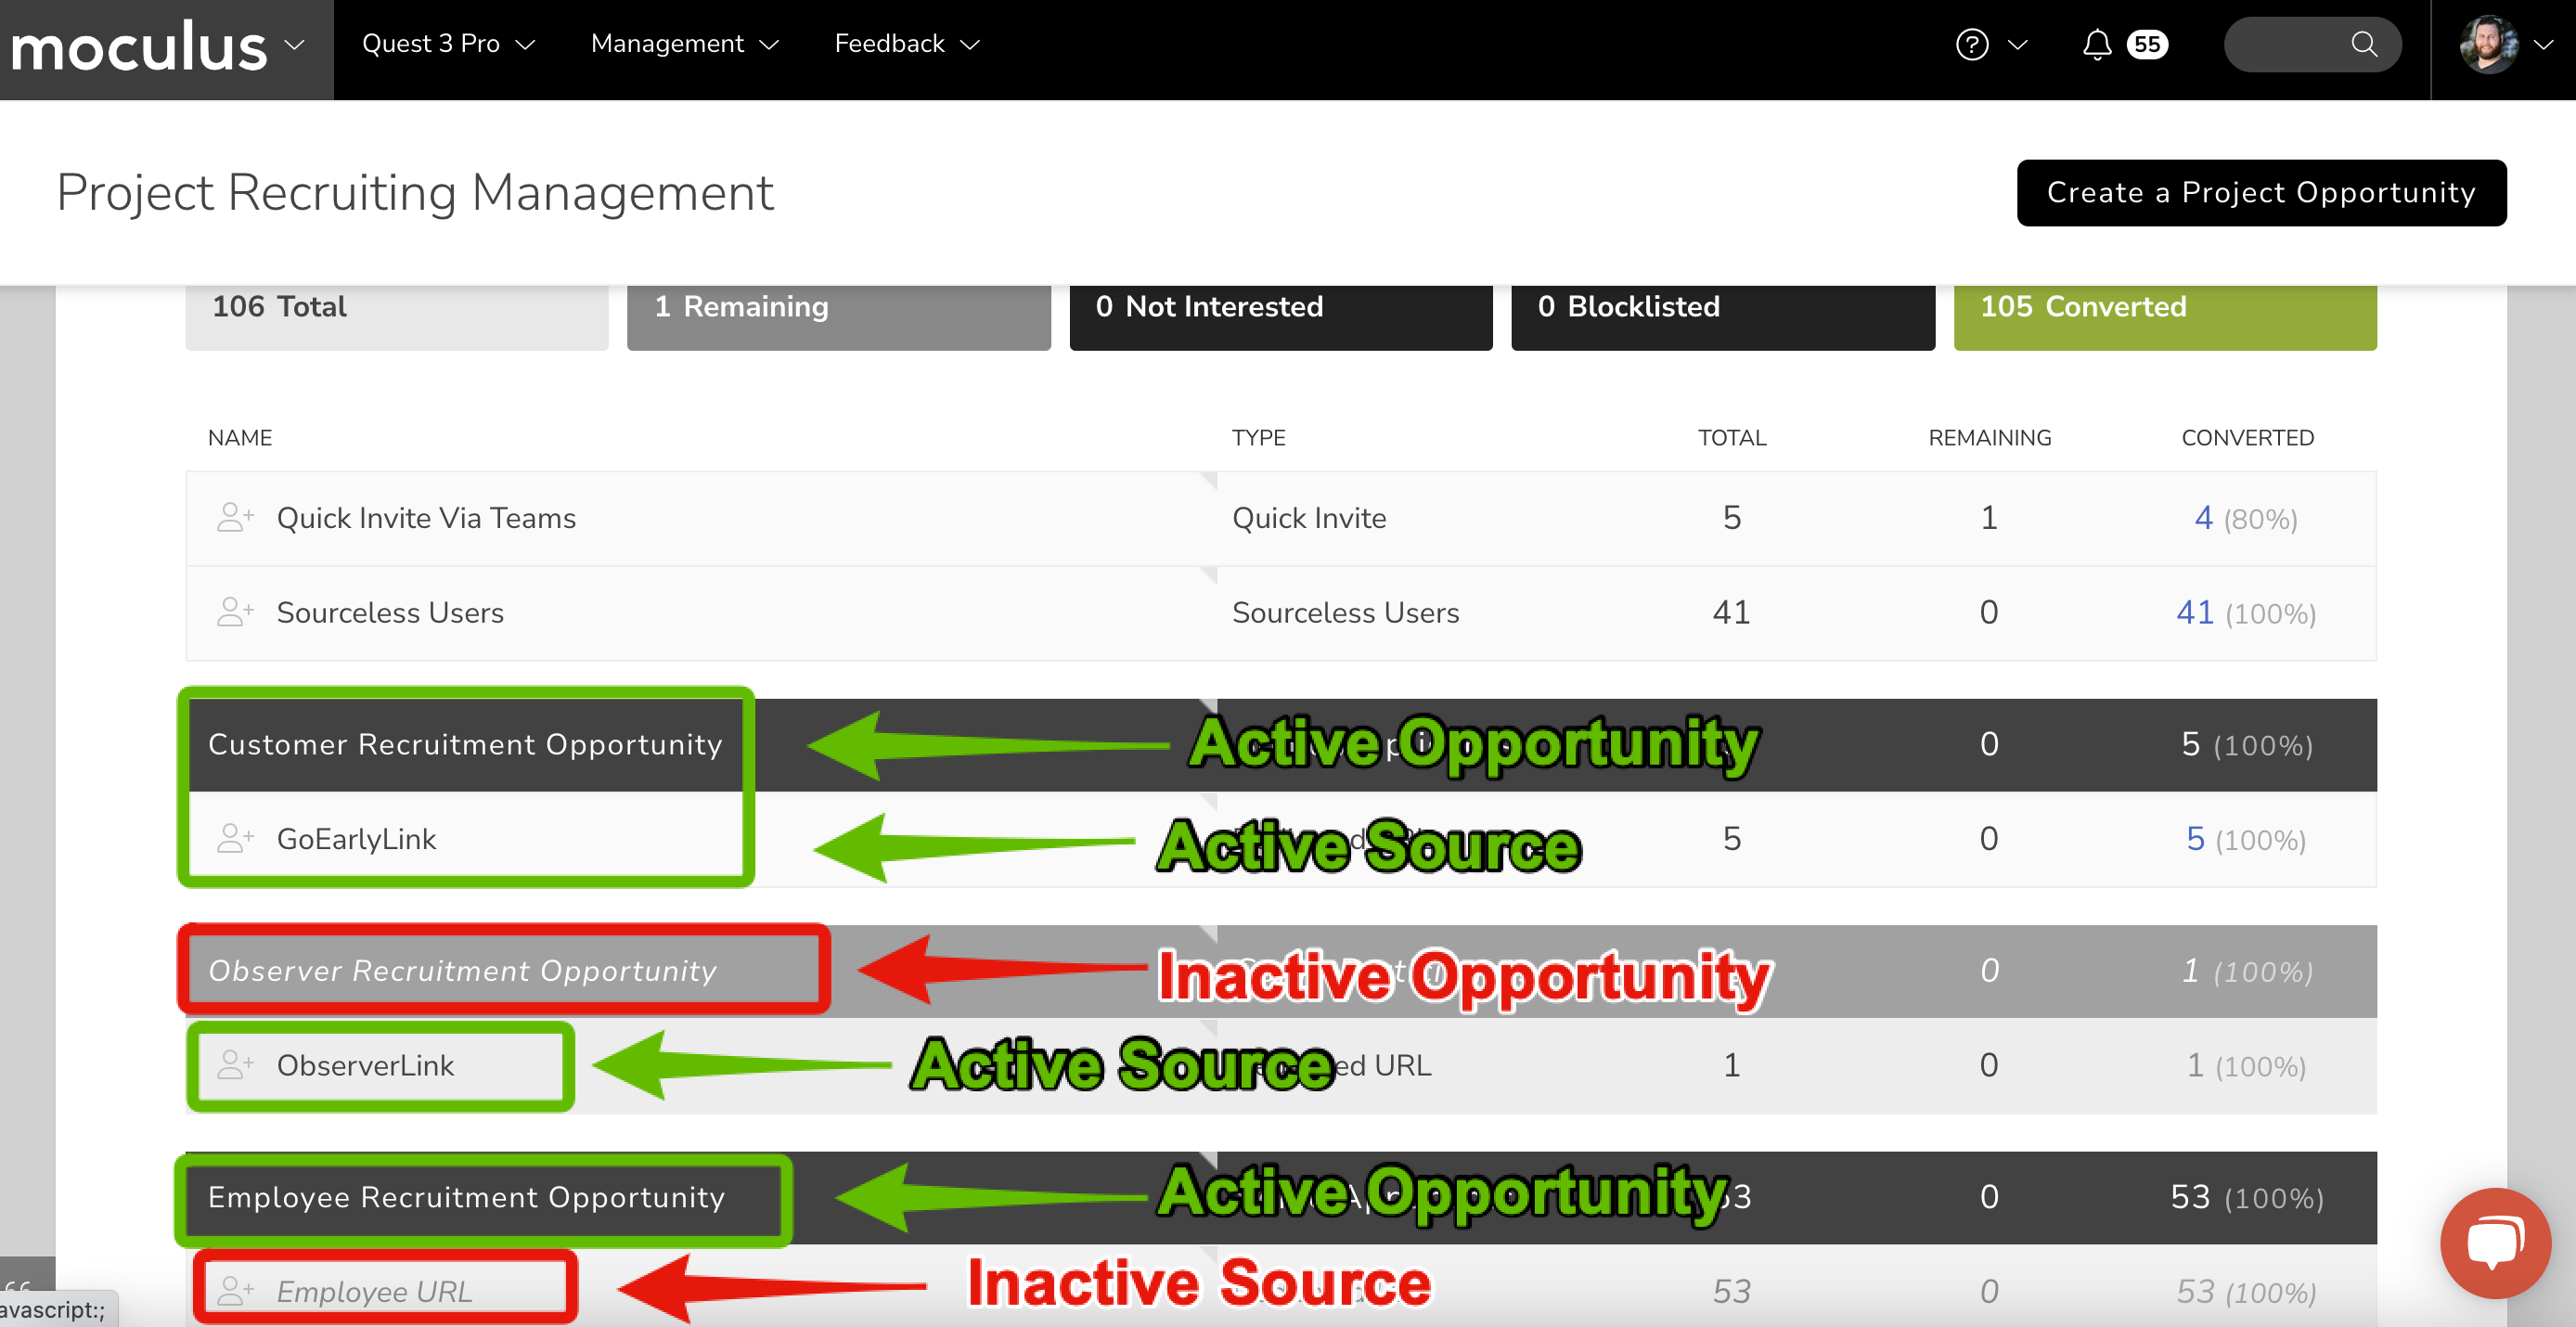
"This Project Recruitment Is Not Available"
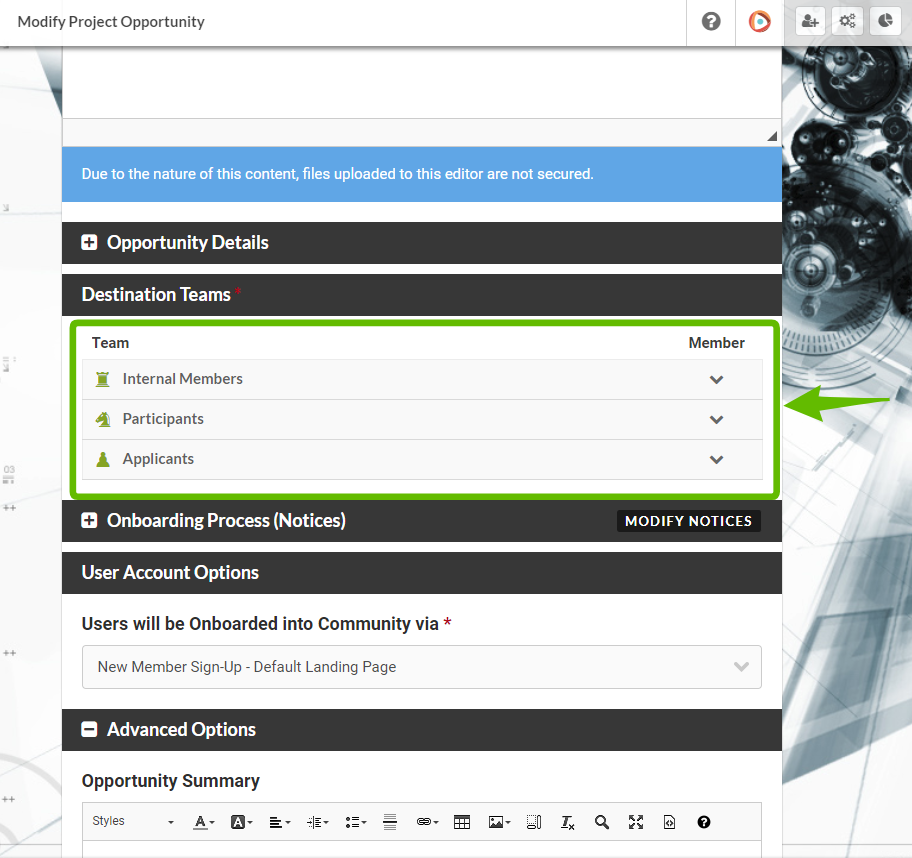
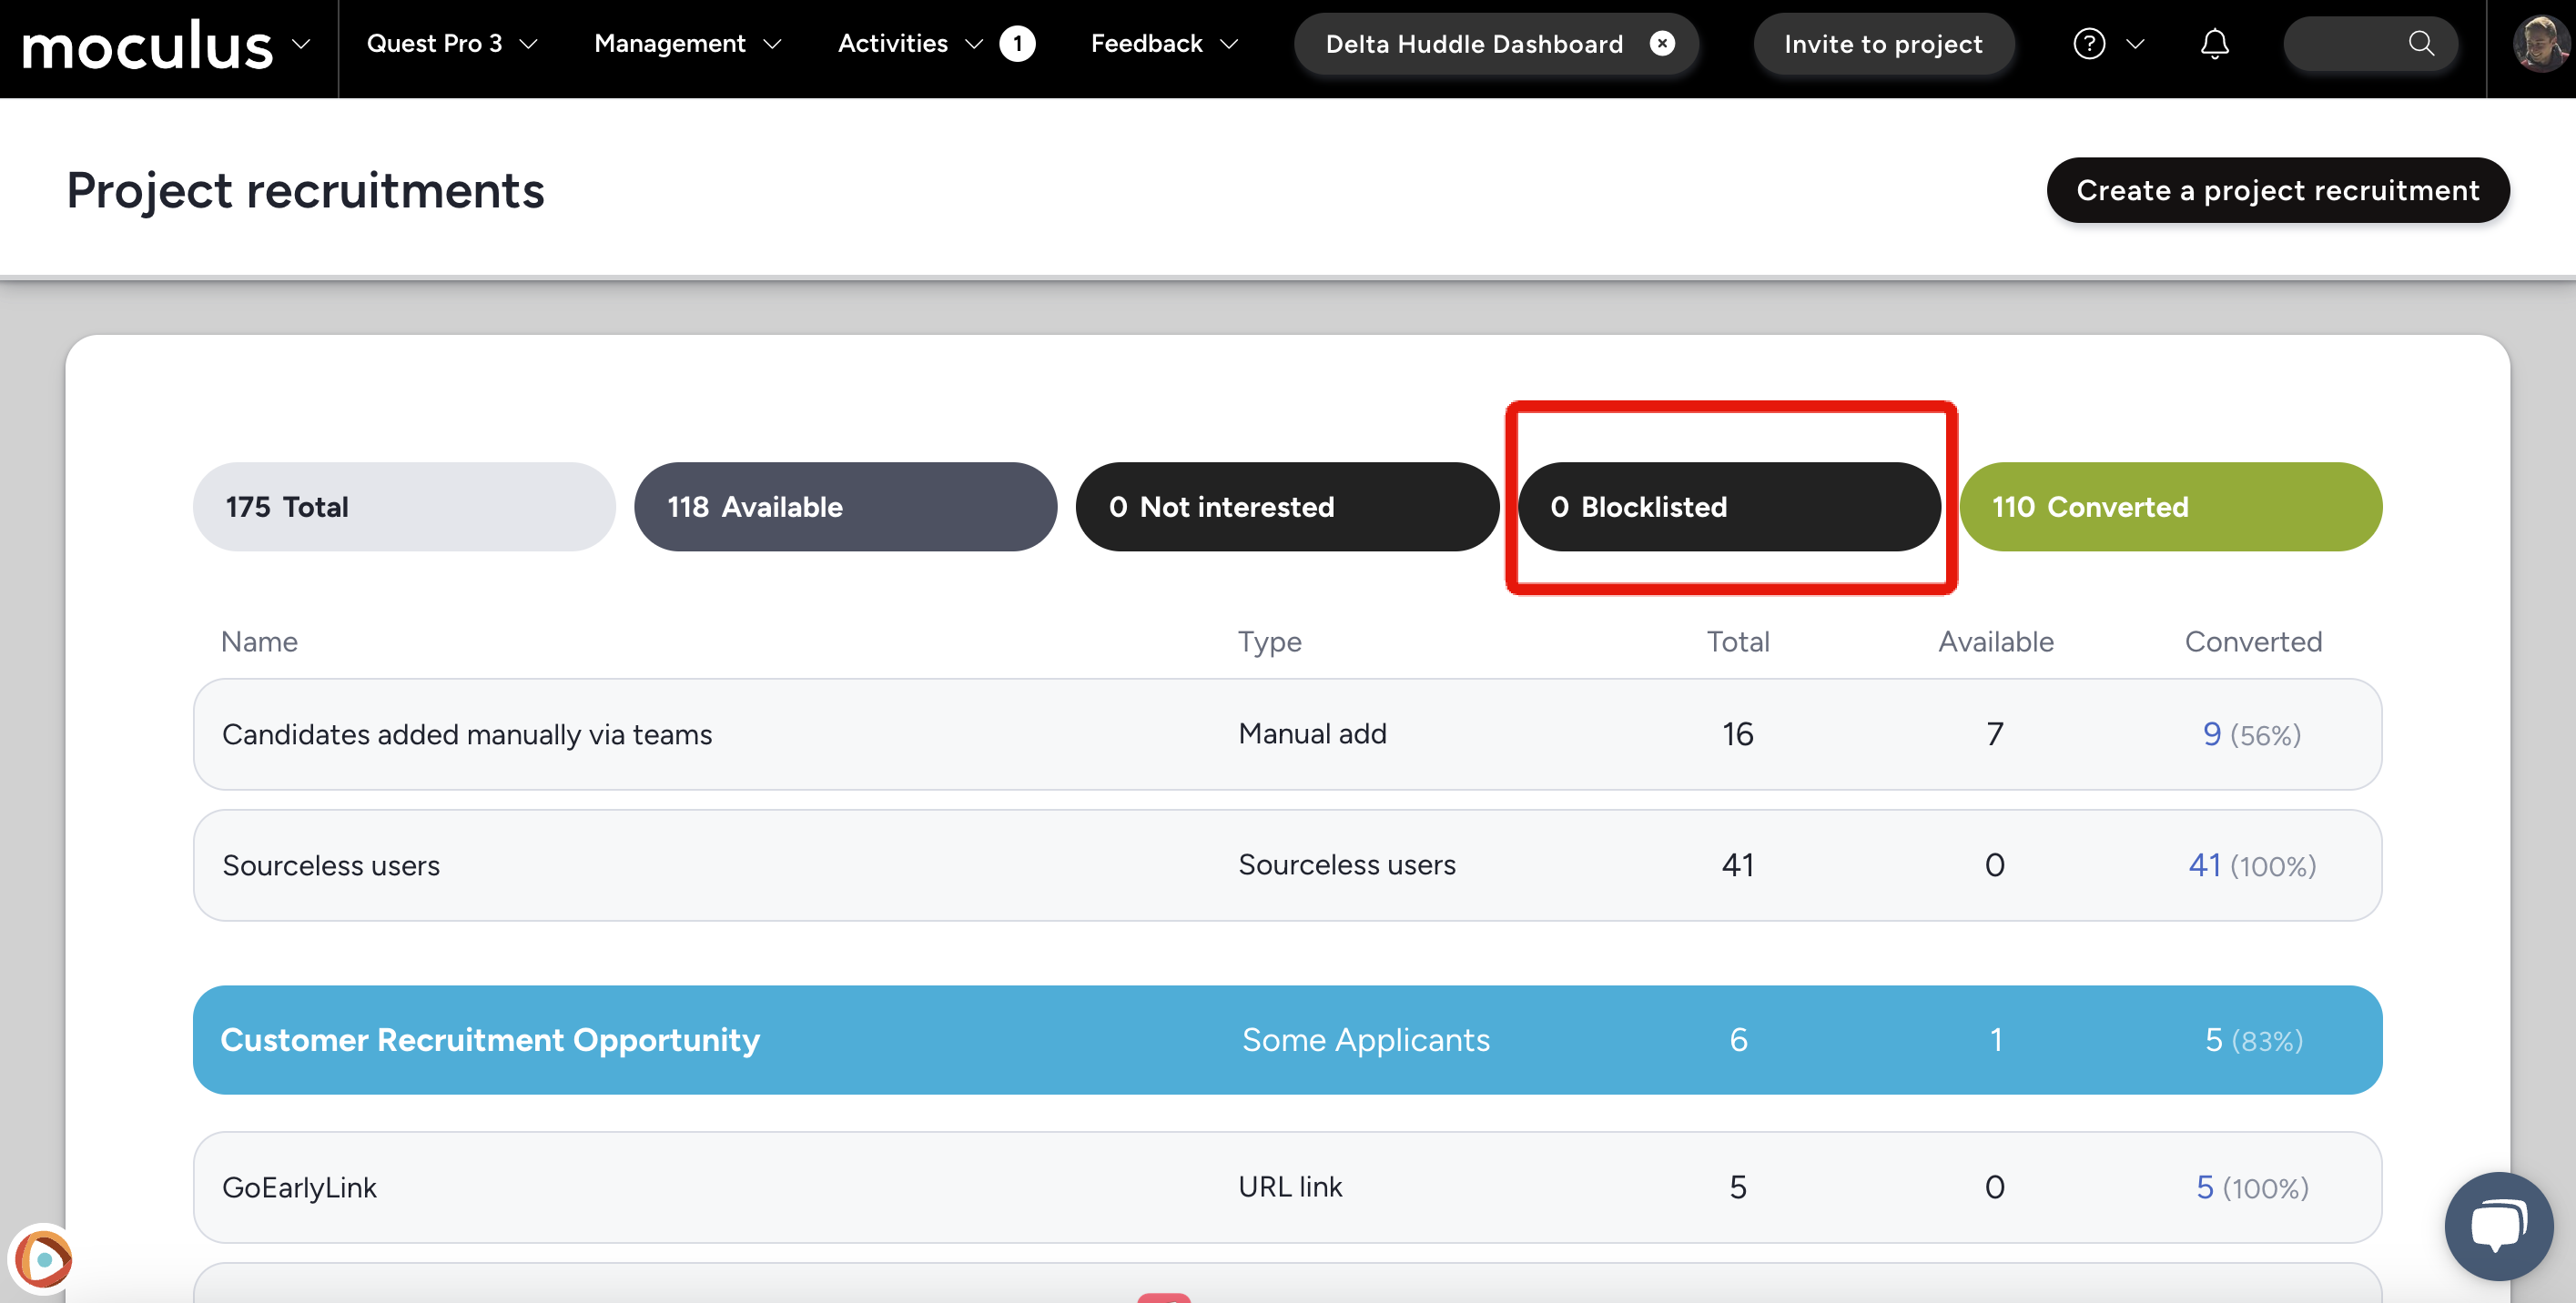
This message appears when a recruitment is inaccessible due to one of three reasons: it has reached its expiration date or user limit, it has been toggled inactive, or its destination teams have been deleted.
For expiration and user limit issues, click into the Recruitment and scroll to Advanced options. A blank expiration means the opportunity never expires. A blank user limit means unlimited users can join. Both are blank by default.
For inactive recruitments, hover over the opportunity or invitation type and click Toggle status.
For missing destination teams, click into the affected recruitment and select new destination teams. An indicator of missing teams is that all team types are collapsed.
Note: Users who join via Project-level Recruitment must first access your Community-level Opportunity to create their accounts. If your Project Recruitment has no expiration date or user limit, check the Community Recruitment for those settings.
"Your Filter Matched Inactive Results Which Are Not Shown"
This means your opportunity or invitation type is currently inactive. Hover over it and click Toggle on/off to reactivate.

How Do I Control the Community Recruiting Experience for New Users?
In your Project Recruitment, the Users will be recruited into community via setting references available Community Recruitments for new accounts. This controls how incoming candidates create their accounts if they don't already have one. Read more about the Recruiting tool.

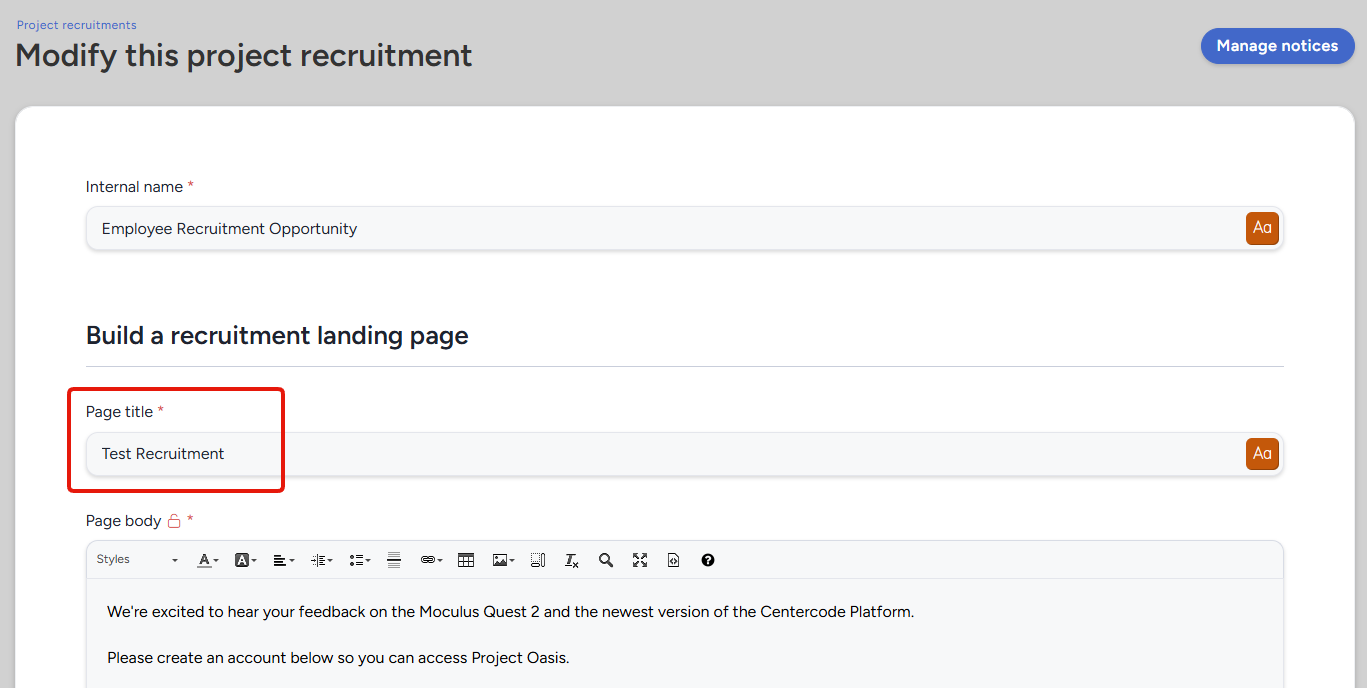
How Do I Change My Landing Page Text?
Landing page copy is controlled by your Project Recruitment. Click into your Recruiting tool and modify the recruitment to update it. Read more.
How Do I Set the Teams Users Get Added to When They Join?
Your Project Recruitment controls the destination team users are added to when joining your community or project. Read more.
How Do I Know Who Has Been Invited to Join My Community or Project?
Your Project Recruitment's Pool Management dashboard shows invite statuses including how many times each candidate has been emailed. Read more about Recruitment Pools.
How Does "Not Interested?" Work?
Candidates who click "Not Interested?" in a recruiting email or on the recruitment landing page are automatically excluded from future invites for that Project Recruitment.
Why Can't My Users See the Project They've Been Added To?
If users accepted an invitation but can't see the project on their community homepage, they're likely missing the Access Project role within that project's Roles settings. Read more about access control.
Why Are My Users Getting the "Page You Are Attempting to Access Is Unavailable" Message?
This message appears when a resource is missing the appropriate Team Access in its basic settings, or has an expiration date that has passed. If users can't see their projects on the community homepage, they're likely missing the Access Project role. Read more about access control.
Why Can't My Users See Content, Surveys, or Other Resources When Signing In?
There are two areas to check. First, review the resource's Team Access and confirm the notice is enabled for the desired teams. Second, review the notice chain order.
1. Confirm the desired teams have Notice enabled in the resource's Team Access settings.
2. Click Community or Project Management > Notices.
3. Locate the resource that isn't appearing and drag it to the correct position in the notice chain.
4. Use the Preview notice chain tool to confirm the order looks correct for your teams.
What Are "Sourceless Users"?
Sourceless users are users who were added via Recruiting but whose associated Project Recruitment and/or Invitation Type was later deleted.
How Can I Prevent Certain Users from Joining Any Projects?
Configure a Recruitment Limiting Filter on the Program. This filter identifies specific criteria and blocks any accounts matching those criteria from joining projects in that program, adding them to a blocklist for that source.
To create a Recruitment Limiting Filter:
1. Click your Community logo > Community management > Programs and projects.
2. Click into the program.
3. Click Basic settings in the upper right.
4. Under Recruitment limiting filter, click the + icon.
5. Set your filter criteria and click Submit.
Note: the filter prevents matching users from joining through Recruiting tools. Users who meet the criteria after already joining are unaffected.
How Do I Change the Opportunity Name Shown on My Community Home?
The title shown on the opportunity button on the community homepage is set by the Page title field in the related Project Recruitment. Once a user is on a member team in your project, the button simply displays the project codename.
How Do I Personalize Recruiting Emails and Invitations?
Use the special recruiting dynamic tag %%Firstname|Default Value%% to personalize invitations. If the recipient already has a Centercode account, their first name is inserted automatically. If not, the default value is used as a fallback. Replace "Default Value" with something friendly, like "there" or "friend."

Why Are My Users Landing on an "Enter a Key" Page?
Users land on this page when the key tied to their invite link has expired. This typically means they're using an email invite link or an "Invite user" link that was sent more than two weeks prior. Resending the email will get them a fresh, usable invite link.