This article applies to Team and Legacy editions.
Note that while Centercode’s integration features are intended to be approachable by a Customer Validation Professional, you might need to enlist help from an internal technical resource and refer to our vocabulary and troubleshooting documentation .
Through Enhanced Integrations, Centercode offers functionality allowing your third-party system to seamlessly receive, parse, and send data back to Centercode. In addition to sending entire feedback tickets (bugs, improvements, etc.) to your tracking system via Enhanced Integrations (or specifically to Jira), Centercode can also update targeted fields. A typical use-case for this type of integration would be to sync specific Centercode feedback data with tickets in your external bug tracking system.
The principles included in this guide apply to any API-capable endpoint by leveraging Webhook Macros. In this example, we’ll be updating targeted fields with existing bug reports in Jira.
In this guide, you will:
- Create (or identify) an API Key in Centercode
- Create a PUT Webhook Request in Centercode
- Review Webhook logs to troubleshoot in Centercode
In order to configure both sides of this integration, you will need:
- Access to an existing API Key or Community Manager access to create a new one
- Project Manager access in the project of your choice (or your project template)
- A Jira Administrator account or assistance from your Jira Administrator
Preparing Centercode to listen for your external system
1. Creating an API Key
From the Centercode side, the first step in any API integration is to ensure that you have an API Key available within your Centercode Community. While this integration doesn’t use an API key, your integration features won’t be visible unless one is available.
If necessary, create a Community API Key by following steps outlined here.
-
2. Creating a Feedback Webhook Macro
Webhooks are leveraged by Macros to allow you to take action upon your users and feedback. Macros create a single instruction that includes a set of actions to complete a desired task. In this example, we’re updating the Occurrences field of an existing bug ticket in Jira in order to keep engineers updated with how many users experience the issue. This ticket was created by Centercode’s first-class Jira integration, so the Jira ID is a datapoint within Centercode.
From the Project Homepage:
- Click Feedback in the upper navigation bar
- Click in your desired Feedback Type
- Click the Switch to Advanced View button (top right corner) if necessary
- Click Feedback Resources
- Create a new Macro
- Click Trigger Webhooks
At this point, technical help may be necessary - please work with a developer (and/or Centercode)
- Click Web Request to select PUT
- Plug in your specific Jira parameters in the static Jira API Endpoint URL with the Jira ID Dynamic Tag. Jira’s static API Endpoint URL is jira.com/rest/api/2
e.g. https://<company>.jira.com/rest/api/2/<tickettype>/<JiraTicketID>
e.g. https://<company>.atlassian.net/rest/api/2/<tickettype>/<JiraTicketID> - Include authorization credentials in Header (detailed below)
- Select JSON from the Content Type dropdown
- Add your JSON Body (detailed below)
- Add Dynamic Tags corresponding to your feedback form (detailed below)
- Select Show in Feedback Management and any other Additional Options (detailed below)
- Click Submit
You’ve just created your Webhook Macro to update Jira field(s)!
-
Headers for authorization
Jira’s API endpoint is static and authenticates through your header token. Headers allow you to define additional static values sent with each request. Not all API calls require headers to be defined, but Jira does. In this example, we’re converting username and password to be used with Basic Auth. This is done by with base64 encoding, which can be done easily through Postman or a Basic Authentication Header Generator. Below is an example of what to add to your header:
Authorization Header Example:
Authorization: 2nt6cs2EyDmF4keNNV6cvAIP
-
The JSON body
JSON is a computing language that’s used to transmit data to and from systems. This text field is what is going to be sent to from Centercode to your third-party system.
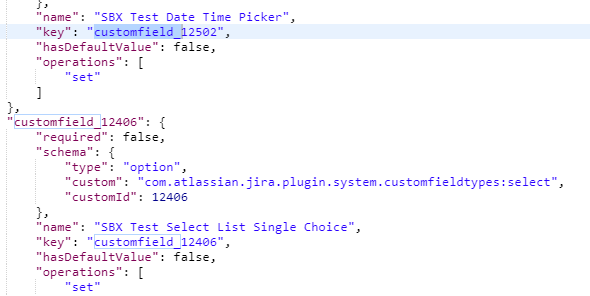
Since the specific Jira ticket is dynamically defined in the API Endpoint URL, you’ll want to target the exact field(s) you want to update. In this example, we’re targeting a Jira bug ticket’s custom field called Occurrences and updating it with the Dynamic Tag information, indicated with ((double-parentheses)).
{
"fields": {
"customfield_12402": ((Occurrences))
}
}
Using your feedback webhook macro
Once your Webhook Macro is configured, you may use it to send feedback data to your external system at any time.
3. Using your webhook
Like any Feedback Macro within Centercode, you can use your Address Validation Macro manually (individually or in bulk), via automation on ticket submission or modify, or on an automated schedule (click here).
Bulk Manual Trigger
To trigger manually, start at the Project Homepage:
- Click the Feedback and click your desired Feedback Type in the upper navigation bar
- Create a Filter to target specific feedback categories, statuses, etc. if desired
- Under Action, select your Webhook Macro
- Click Perform Action
You’ve just sent your data to your third-party system
-
4. Reviewing your webhook results
If you find that fields in your third-party tracking system haven’t been updated, you’ll want to review the Webhook’s logs to troubleshoot issues. You’re offered the individual Feedback tickets your Macro was applied and their individual Status Code results. Please see this article for Status Code definitions.
From Feedback Management:
- Click Feedback resources
- Hover over your Macro and click Macro log
- Hover over the Feedback ticket and click Macro webhook log

Notes
- Please note that when sending a Post request to your Centercode API endpoint, the JSON body must be JSON encoded.
- Updating a Jira ticket requires that you are able to dynamically target that ticket via Jira ID. Jira ID is automatically captured by Centercode's dedicated Jira Integration feature, or can be added to your bug form without this integration.
- To find the JSON for your custom field, you can utilize a GET request and input the following: https://<company>.jira.com/rest/api/2/issue/createmeta?projectKeys=<projectID>&expand=projects.issuetypes.fields