Table of Contents
- What is a macro?
- How do I create macros?
- How do I create a feedback macro?
- I've created a macro. How can I run it manually?
- How can I trigger a macro when submitting a user profile or survey?
- Can I schedule macros to run at a later time or date?
- Can I set macros to trigger based on an event?
- How can I automatically segment my users into teams via a macro?
- How can I make sure a macro only runs once per user (or feedback)?
- How can I check why my macros might be failing?
What Is a Macro?
A macro in Centercode is a single object that performs a sequence of predetermined outputs or actions. Macros automate repetitive tasks at a click, on a schedule, or in response to certain events. For example, you can create a macro that adds users to a participant team, removes them from all applicants teams, and emails an acceptance letter all in one command.
Macros don't run on their own. They need something to tell them when to run, like a schedule, trigger, notice, or other event.
Centercode macros are organized by the target of their action.
User macros impact individual users in your community or project. Common use cases include emailing users, adding a rank or comment, adjusting teams, or removing users.
Feedback macros impact individual feedback tickets and/or the user account that submitted them. Common use cases include scoring users for submitting feedback, modifying the public/private status of a ticket, or adjusting a ticket's workflow status.
Notice macros are user macros injected into the notice chain. They trigger when users access your community or project and can run conditionally based on any aspect of the user's record, such as survey responses or email domain.
Webhooks and external automation are available to customers with Enterprise or Unlimited licensing, or those with the Enhanced Integrations package. Webhooks work similarly to emails but communicate data from system to system rather than to a person.
How Do I Create Macros?
User macros can be created or modified at the community or project level by accessing the Community/Project users tool, then Resources.
How Do I Create a Feedback Macro?
Feedback macros let you define actions for feedback tickets, such as updating status, scoring users, or modifying access. Since each feedback type has its own form, workflow, and access settings, feedback macros are created and edited within the chosen feedback type.
1. From within your project, click the Management menu.
2. Select Project configuration.
3. Click Feedback types.
4. Hover over a feedback type and click the Modify (pencil) icon.
5. Click Resources.
6. Click Create a macro.
To display the macro on the left-hand menu while viewing feedback, enable Show as feedback action and select the teams who should be able to run it.
I've Created a Macro. How Can I Run It Manually?
Save the macro with Show as project user / feedback action enabled. This makes the macro available in the following places:
1. In the user or feedback advanced view, in the Action drop-down.
2. In the user or feedback results page, in the Action drop-down (allows individual selections).
3. On the user summary page.
4. When viewing a feedback ticket.

How Can I Trigger a Macro When Submitting a User Profile or Survey?
User profiles and surveys both support macro triggers via their Advanced Options. Use the Static macro type to run a macro whenever any user submits the form.
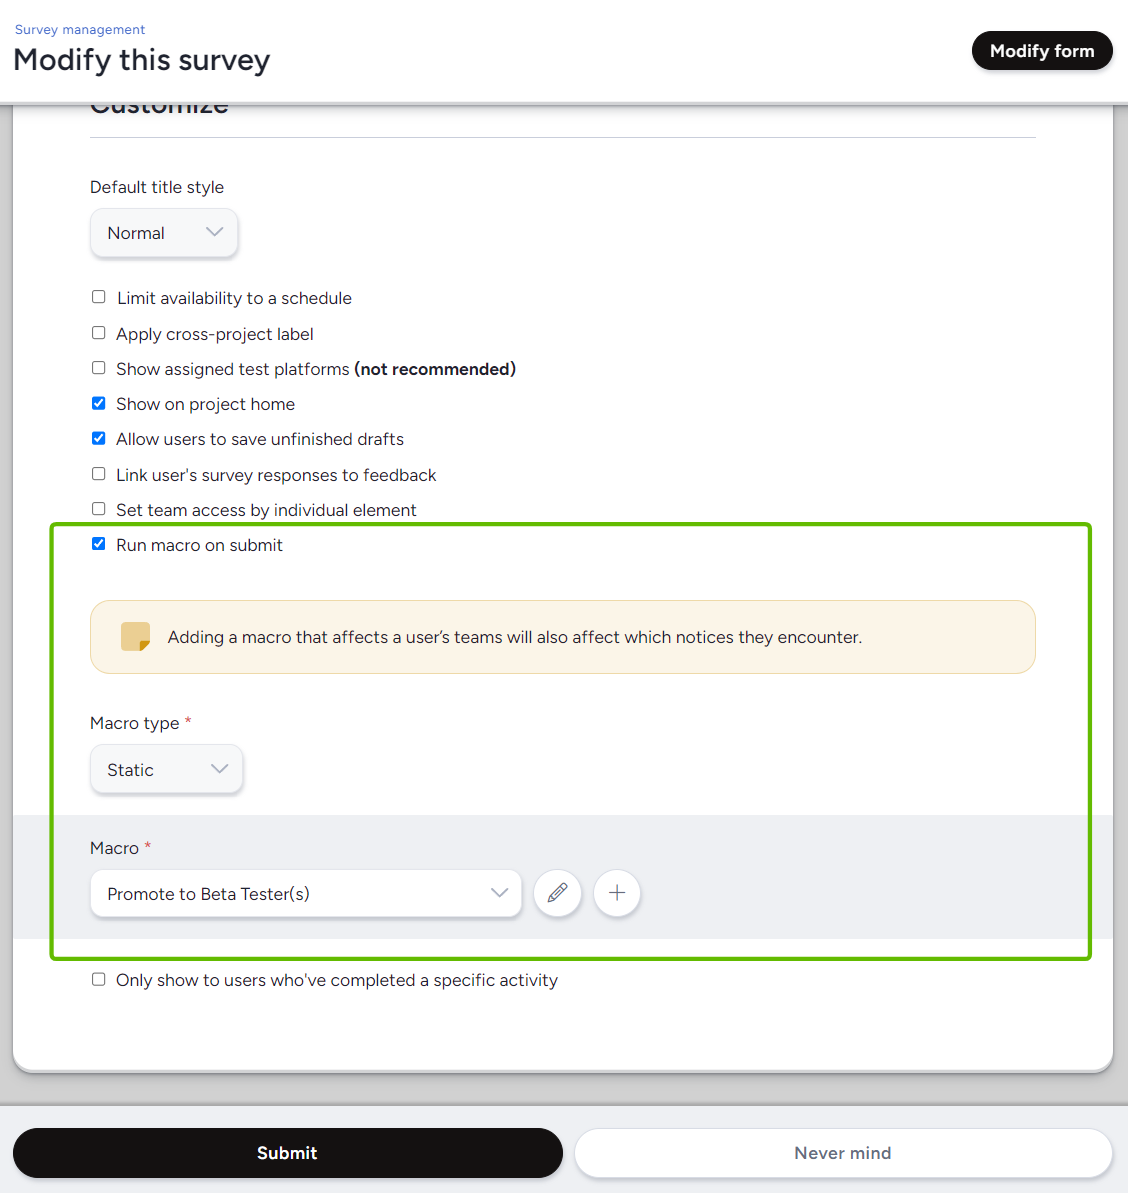
To trigger a macro when a community or project survey is submitted:
1. Click Community logo > Community management > Surveys, or Management > Surveys.
2. Hover over the survey and click the Modify (pencil) icon.
3. Expand Advanced options.
4. Check Run macro on submit.
5. Choose Conditional or Static from the Macro type drop-down. Conditional runs the macro only when filter criteria are met. Static runs it for any user who completes the form.
6. Select the macro from the Macro drop-down. Use the + icon to create one if needed.
To trigger a macro when a user profile is submitted:
1. Click Community logo > Community management > User profiles.
2. Hover over the profile and click the Modify (pencil) icon.
3. Expand Advanced options.
4. Check Run macro on submit.
5. Choose Conditional or Static from the Macro type drop-down.
6. Select the macro from the Macro drop-down. Use the + icon to create one if needed.
Can I Schedule Macros to Run at a Later Time or Date?
Yes. After creating a user or feedback macro, you can attach it to a schedule. Schedules let you set a recurring filter and time frame for the macro to execute automatically. You can set a macro to run once, hourly, daily, weekly, or monthly.
Can I Set Macros to Trigger Based on an Event?
It depends on the macro type.
User macros are typically triggered manually or on a schedule. You can also use notices to trigger them on sign-in, or attach them to a survey or user profile submission.
Feedback macros support two event-based triggers: On submission fires only when feedback is first created. On modify fires only when an existing ticket is edited, typically by an admin.
How Can I Automatically Segment My Users into Teams via a Macro?
Use a notice macro or a user macro attached to a user profile or survey submission to adjust user teams. Users can be sorted into specific teams based on any data you've captured about them. Read more about automatically segmenting users.
How Can I Make Sure a Macro Only Runs Once per User (or Feedback)?
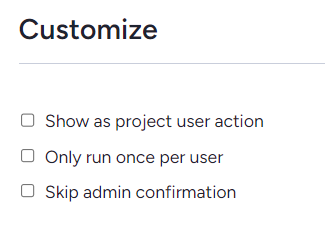
Enable the Only run once option on the macro. This prevents redundant executions, such as scoring a user multiple times for the same milestone.
To limit a user macro to one execution per user:
1. In the navigation bar, go to the Users menu at the project or community level.
2. Click User resources.
3. Open or create a macro.
4. In the Customize section, check Only run once per user.
To limit a feedback macro to one execution per ticket:
1. Click Management > Project configuration > Feedback types.
2. Hover over the feedback type and click the Modify (pencil) icon.
3. Click Resources.
4. Open or create a macro.
5. In the Additional Options section, check Only run once per feedback.
If you want a scheduled macro to run only once, select Once from the Rate drop-down when setting up the schedule.

How Can I Check Why My Macros Might Be Failing?
Check the macro log for the relevant macro. The log shows when the macro last executed and, for webhook macros, displays response codes to help you determine whether the webhook is firing correctly.
To access user macro logs:
1. Click Community management or Management.
2. Navigate to the Users or Project users section.
3. Click User resources in the upper right.
4. Hover over a macro and click View log.
To access feedback macro logs:
1. Click Management > Project configuration > Feedback types.
2. Hover over the relevant feedback type and select Modify.
3. Click Resources.
4. Hover over the macro and click View log.