Auto-sort your users based on their data
This article applies to Team and Legacy editions.
A Notice Macro is similar to a macro: It is a single instruction that expands automatically into a set of instructions to perform a particular task. In this use case, we're adjusting users' Teams.
Click here to find out what Macros can automate for you.
In this example, we'll walk you through the step-by-step process to automatically segment your users into different Project Teams based on their User Profile responses.
To create a Notice Macro:
While in a Project:
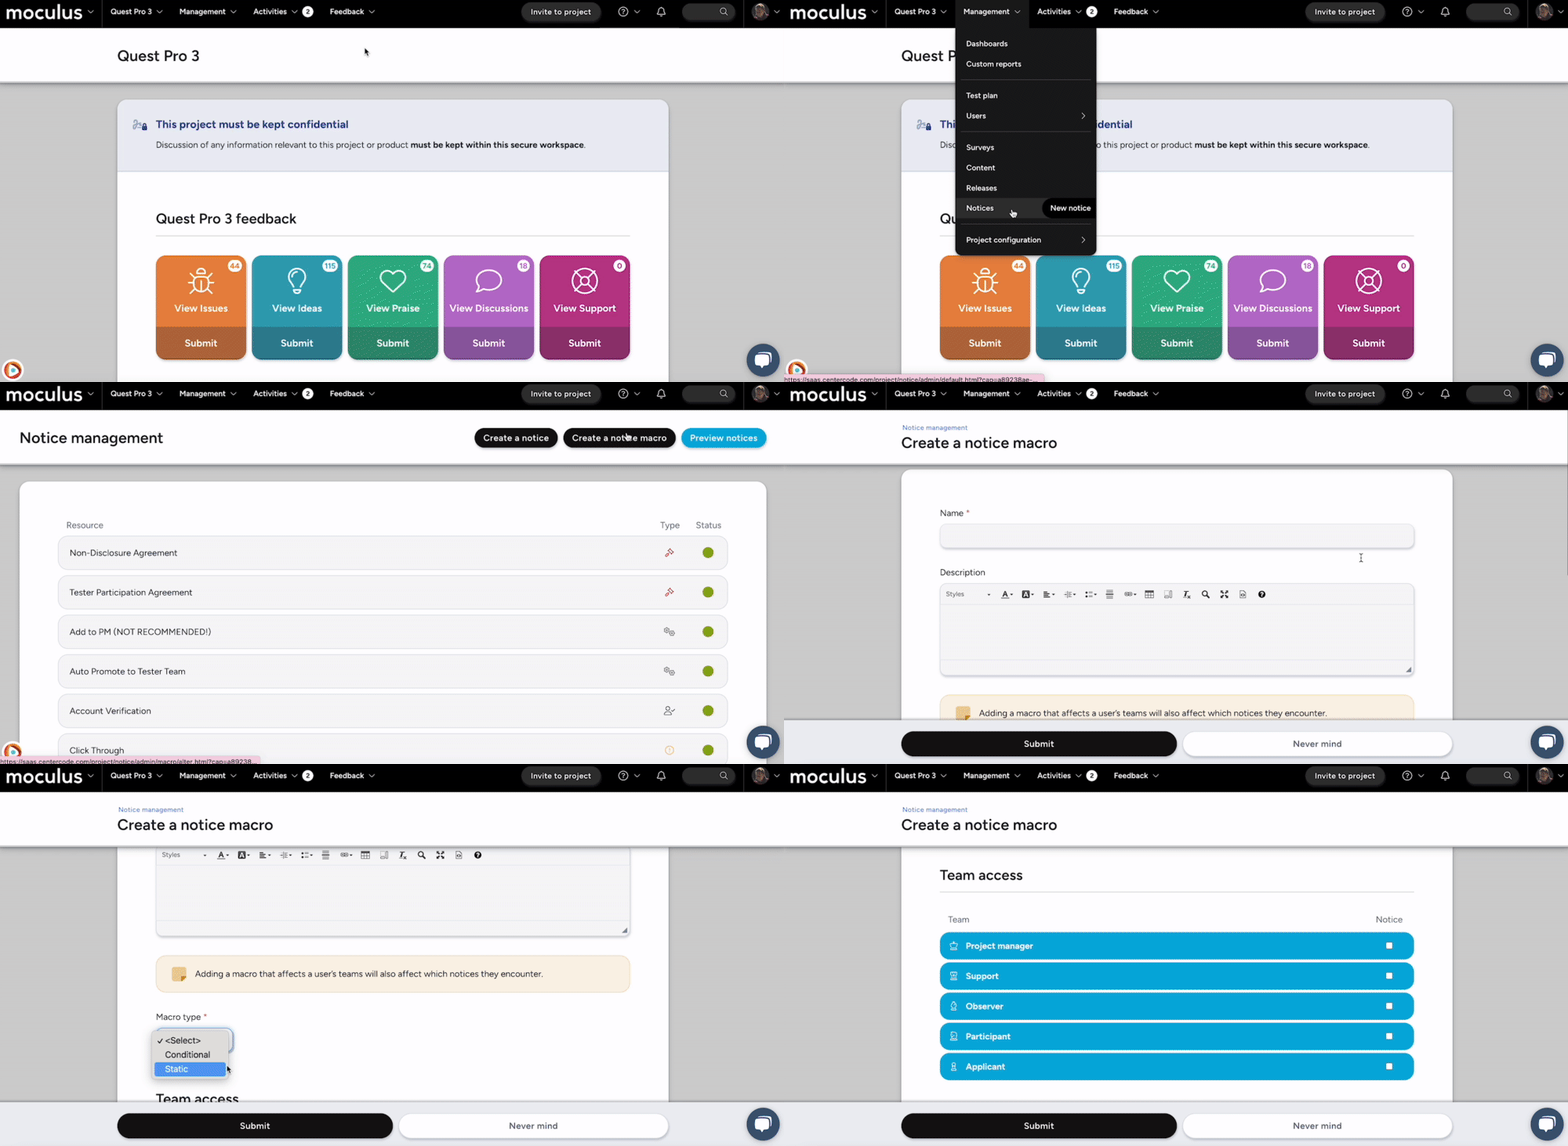
- Click the Management > Notices in the navigation bar.
- Click the Create a notice macro link in the upper right.
- Give your Notice Macro a name.
- Set the Macro type, either Conditional or Static. (In the case of auto-segmentation, we'll select Conditional.)
- Ensure your Team access is set. This designates the team(s) you want your Notice Macro and Filter conditions to process on. Essentially, you're setting what team(s) you want to be auto-segmented.
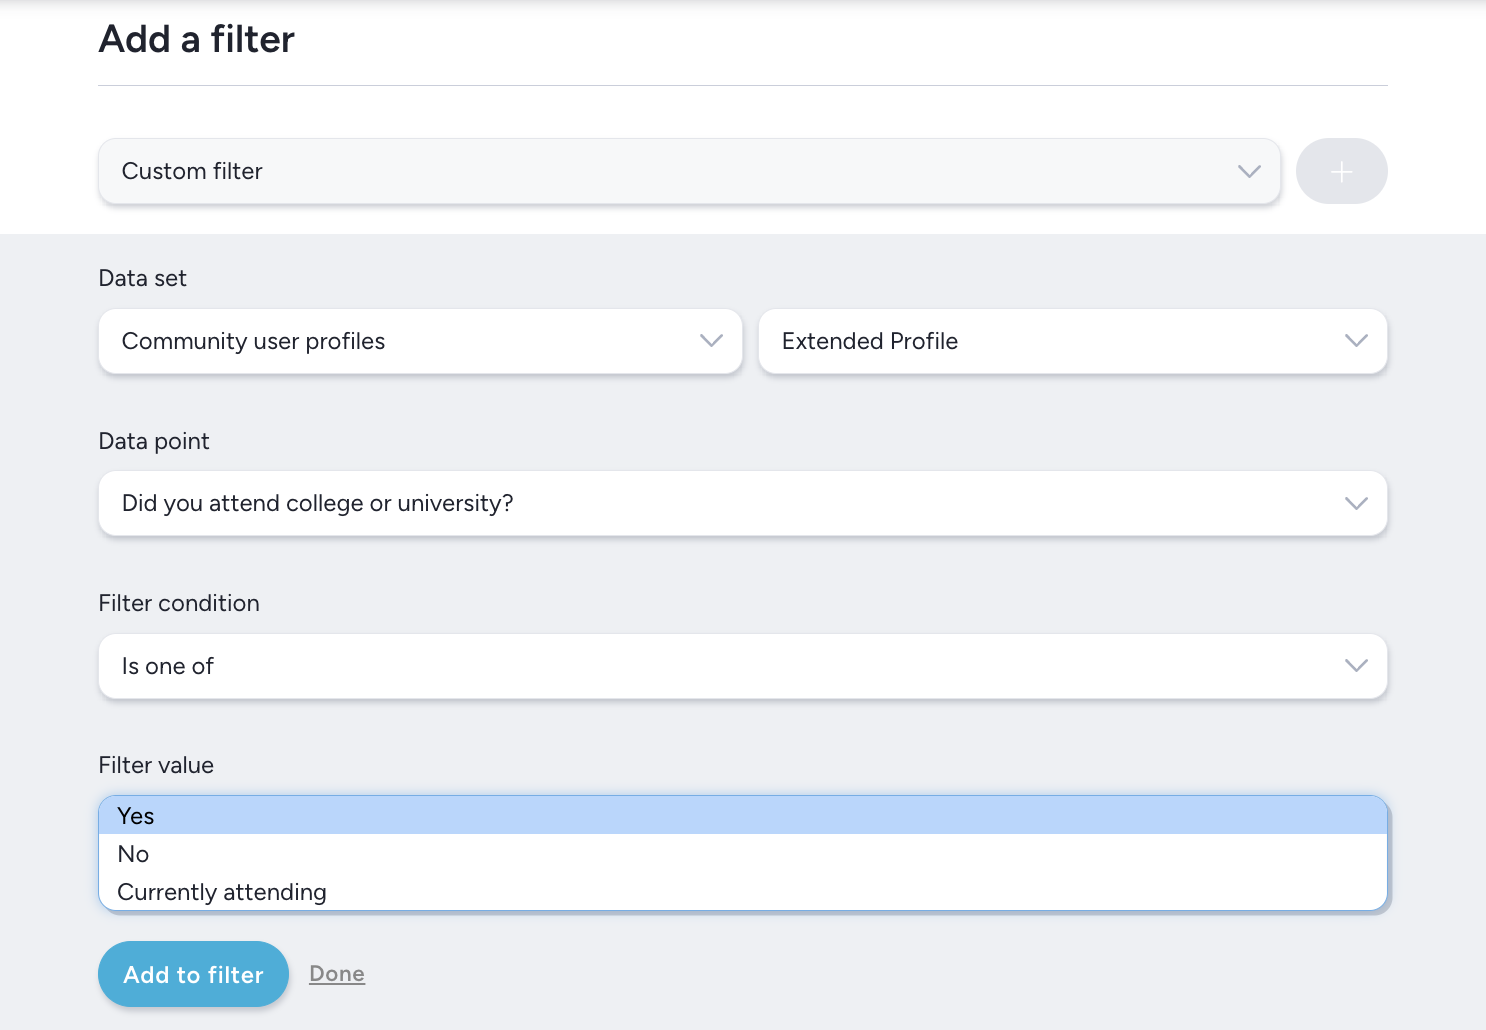
The Conditional macro type allows you to set filter criteria for targeted users in order for this Notice Macro to execute on. For example, any user that has answered they own an iOS device on their profiling forms will be put on the iOS Team.

You'll now create a True macro, which will execute your instructions based on users who match your above filter criteria. In this example, we'll place users on the iOS Team.
- If desired, you can also create a False macro, which is a set of instructions for those who do not meet your Notice macro filter criteria. In this example, we'll place users on the Android Team who don't have an iOS device (this isn't necessarily factual).
To create your True macro:
- Click the + sign next to the True macro drop-down menu.
- Set a name for this macro; something descriptive to indicate what it does is recommended.
- Select Adjust user teams.
- Click Add to teams and select the team(s) you'd like your macro to auto-segment to. In this example, the iOS Team.
- (Optional) If desired, select Remove from teams, then select the team(s) you want your users to be removed from. In this example, an Applicants-type team or Unsorted Applicants team.
- Click Submit below.
- Click Submit at the bottom of the following page to save your Notice macro.
Notes:
- Static macro type allows you to execute your Macro based on your selected teams (rather than the Conditional filter), in your Team Access block. An example use case for this would be to notify your Project Managers whenever a new user is added to a Participant team.
- Notice Macros are part of the Notice chain. Notice Macros will perform their action in the order that the Notice Macros are placed. Please see your Notice Management tool to re-order your Notices. For example, you'll want a Block Notice to occur after a Qualification Survey. That way, your survey will be available to be taken by your users, but they'll then be blocked from progressing further in order for their responses to be exported and analyzed. Having the Block occur before the survey would result in those users not having access to your survey.

