Simple Guide to Data Packages
Make custom datasets available for seamless consumption by third-party systems
This article applies to Pro, Team, and Legacy editions.
Data packages are reports that make custom datasets available for seamless consumption by third-party systems. These custom sets, containing any arrangement of data held within your Centercode instance, are built into the reporting interface and act as mini-databases for your external system to pull.
Note: While Centercode’s integration features are intended to be approachable by a Customer Validation Professional, you might need to enlist help from an internal technical resource and refer to our vocabulary and troubleshooting documentation.
Common use cases for Data Packages
- Programmatically pull current Centercode-captured data into dedicated business intelligence systems like Tableau, Domo, MS Power BI, Excel, etc.
- Leverage Centercode data within company-standard analytics tools
- Compare project activity metrics over time within dedicated data visualization and analysis tools
Prerequisite criteria
- Enhanced integrations enabled
- Community-level API key (click here)
- Community or project manager access

Creating Your Data Package within Centercode
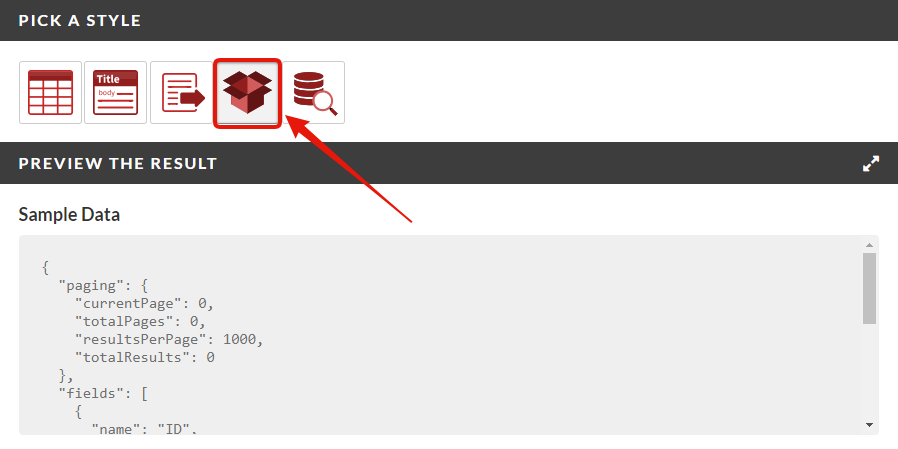
Data packages are located within reporting and are available in the Pick a Style section after your data is selected. With data packages, you’re essentially building a custom dataset or mini-database via reporting.
From Community or Project Reporting:
- Click Create a report element
- Select your desired Data source from Feedback Elements or User Elements (Macro Report / Complete Report options do not support Data Packages)
- Select your data, adding any relevant fields via the Add to view button
- (optional) Add a Filter to narrow the results to specific criteria
- Select the Data packages report style
- (optional) Set a simple Key to identify this report (e.g. survey data export)
- (optional) Add Notes, and/or Usage instructions
- Select a Return format (JSON or CSV)
- Select the appropriate Community API key
- Copy / Save the API endpoint URL to be used by your external system
- Save this report element to an existing or new report to make the data package available via integrations
You’ve just created your data package!
Notes
- Your Key can be a short, descriptive entry to separate this integration from other functions that use the same community API key for easier use
- The Notes and Usage Instructions fields allow you to provide any guidance to those who need to make use of the data packages created.
- API reports like data packages and record lookups are only available for use after they’ve been saved. They’ll appear in a special “API Reports” section in your reports interface.
- Once your data package has been created, the system has designated it as an API Report. You'll be unable to change the report to or from reporting styles.
- Complete reports / macro reports do not support the data package style.
- Modifying existing reports will not have the data package style.
-
Deactivating or archiving a project disables all automation reporting including the data package outputs/API reports.
- Any API endpoints are disabled in a deactivated/archived project as we disable macros and report processing/automation.