Learn what actions you can take on your users and how to perform them
This article applies to All editions.
Learn what actions you can take on your users and how to perform them
What is the User management tool?
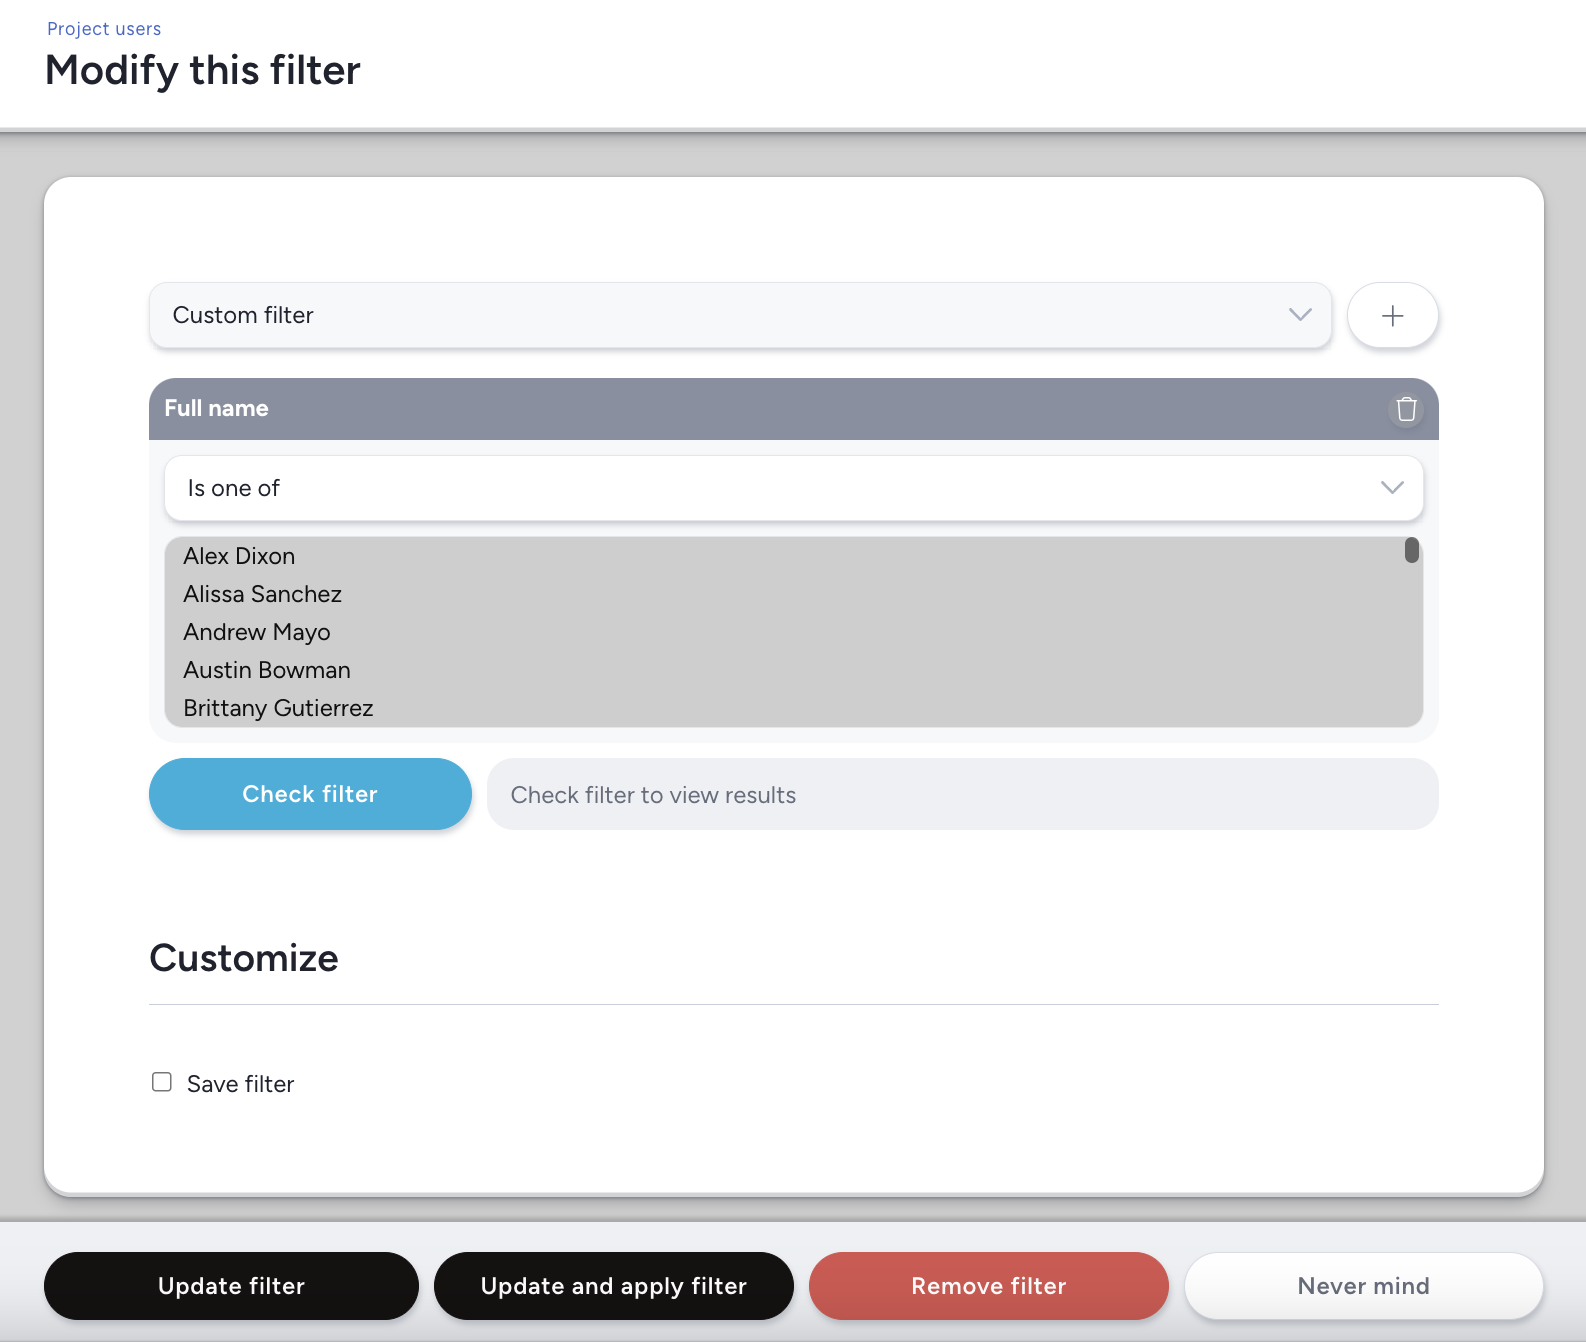
User Management is a powerful and necessary tool when running your Customer Validation Program that exists identically at both the Community level and Project level of your implementation. This tool gives you the ability to create a specific filter to narrow down a desired subset of users, create a view to see particular criteria/data of your desired subset, and then take action on those selected users.
Knowing how to create a Filter + View is essential for effectively utilizing User Management. For a quick refresh on Filters + Views and how to build them click here.
This tool can be accessed via the following methods:
Community User management:
Community menu > Community management > Users
Project User management:
Management > Users > Project users
What actions can I take with User Management?
User Management has the following actions available to it. Once you generate a list of Users (via Filter), you can apply these actions to the results or a selected subset. More details on each can be found below:
- Show user list is the default option that presents your Filter and View query, where the View dictates the number of results you see and its ordering.
- Email users allow your Filter to target the users you're going to email
- Add users to team allows your Filter to target the users who will have their Team updated
- Remove users from project allows your Filter to target users who will be removed from your Project (they will not be removed from the Community - meaning that they retain their account, but lose Project access)
- Add notes to users allows your Filter to target users to receive a comment on the account
- Create filter from results allows your Filter to take a snapshot of results where another filter can be layered over it; this is typically used if you have a particularly complex filter criteria
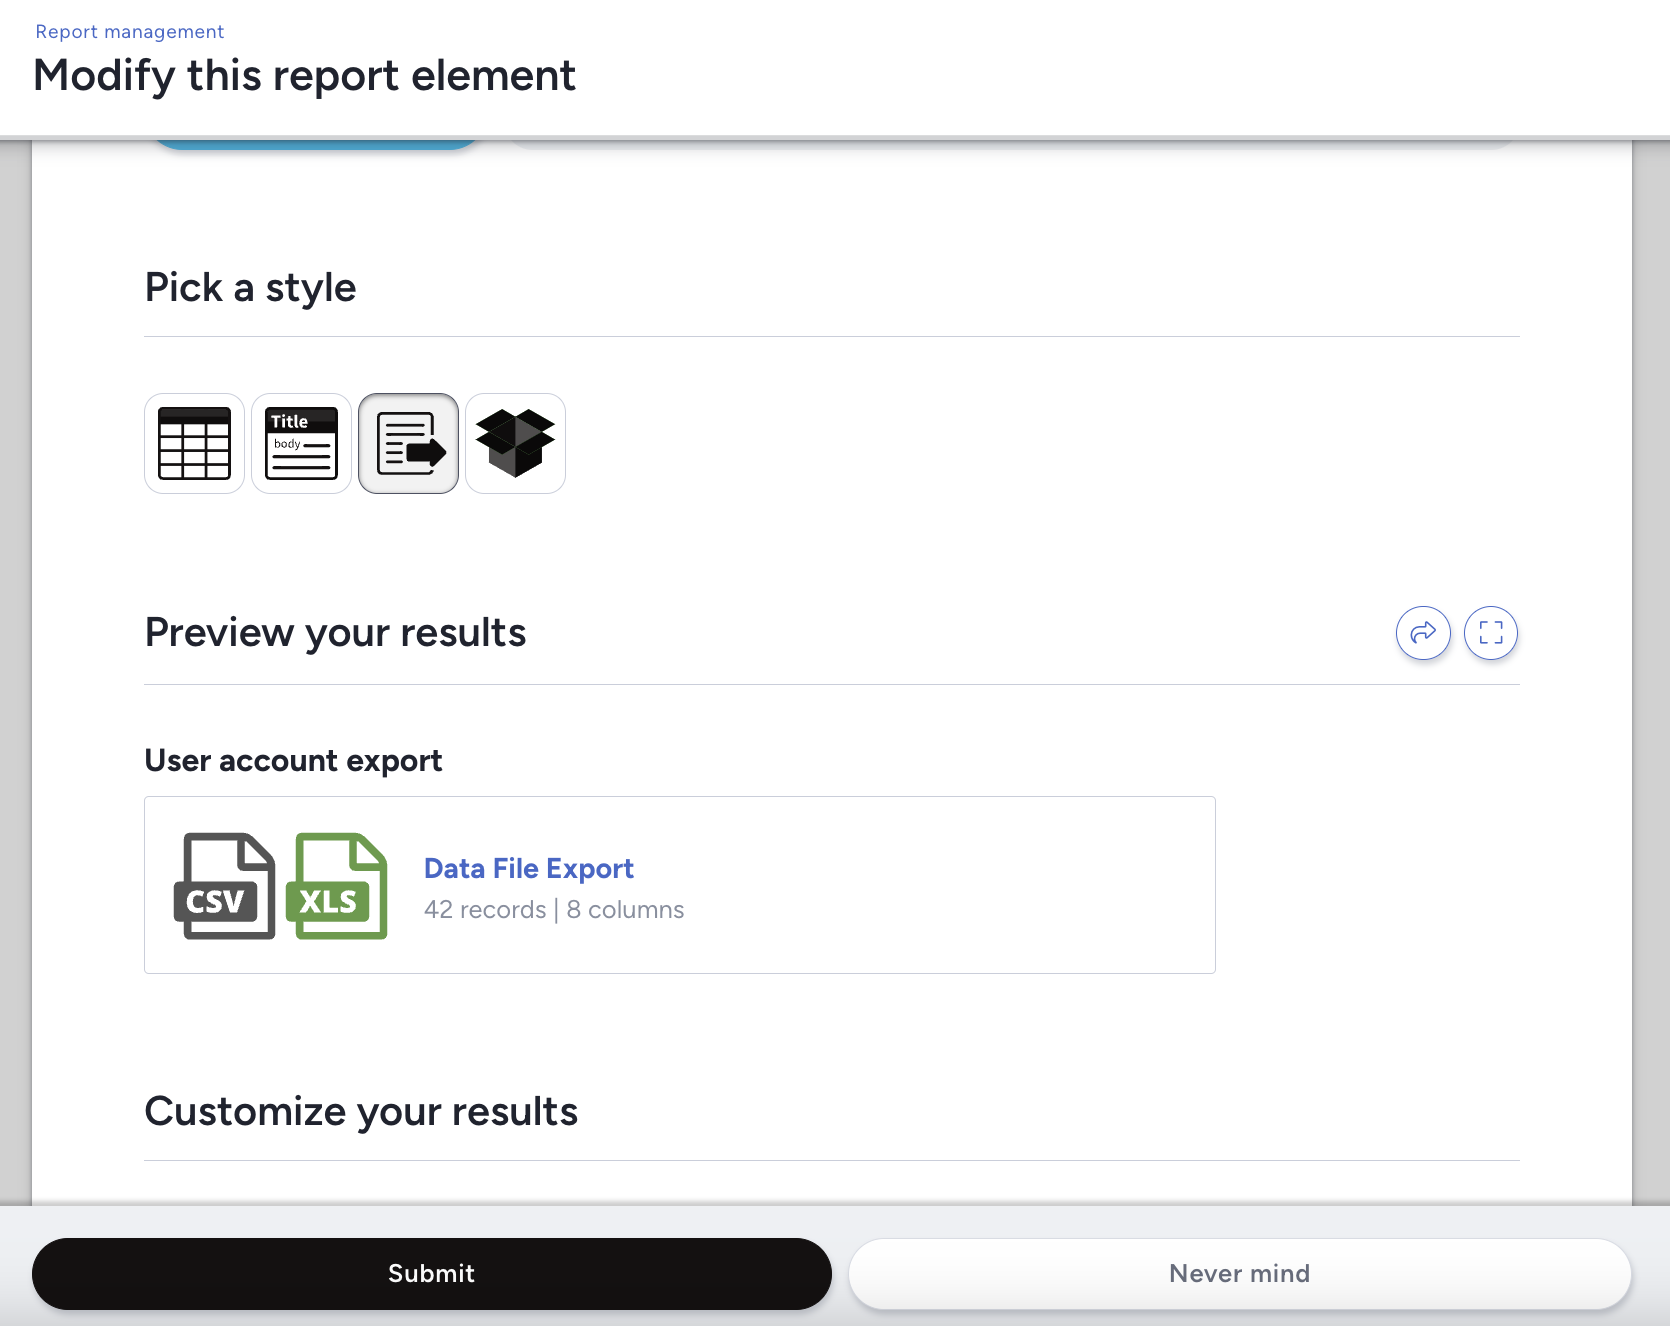
- Export data allows your Filter and View to populate a Report Element
- Trigger custom macro - Macros that you've created may show as a selectable Action when toggled to be used in User Management (Note: Limited by Centercode edition)
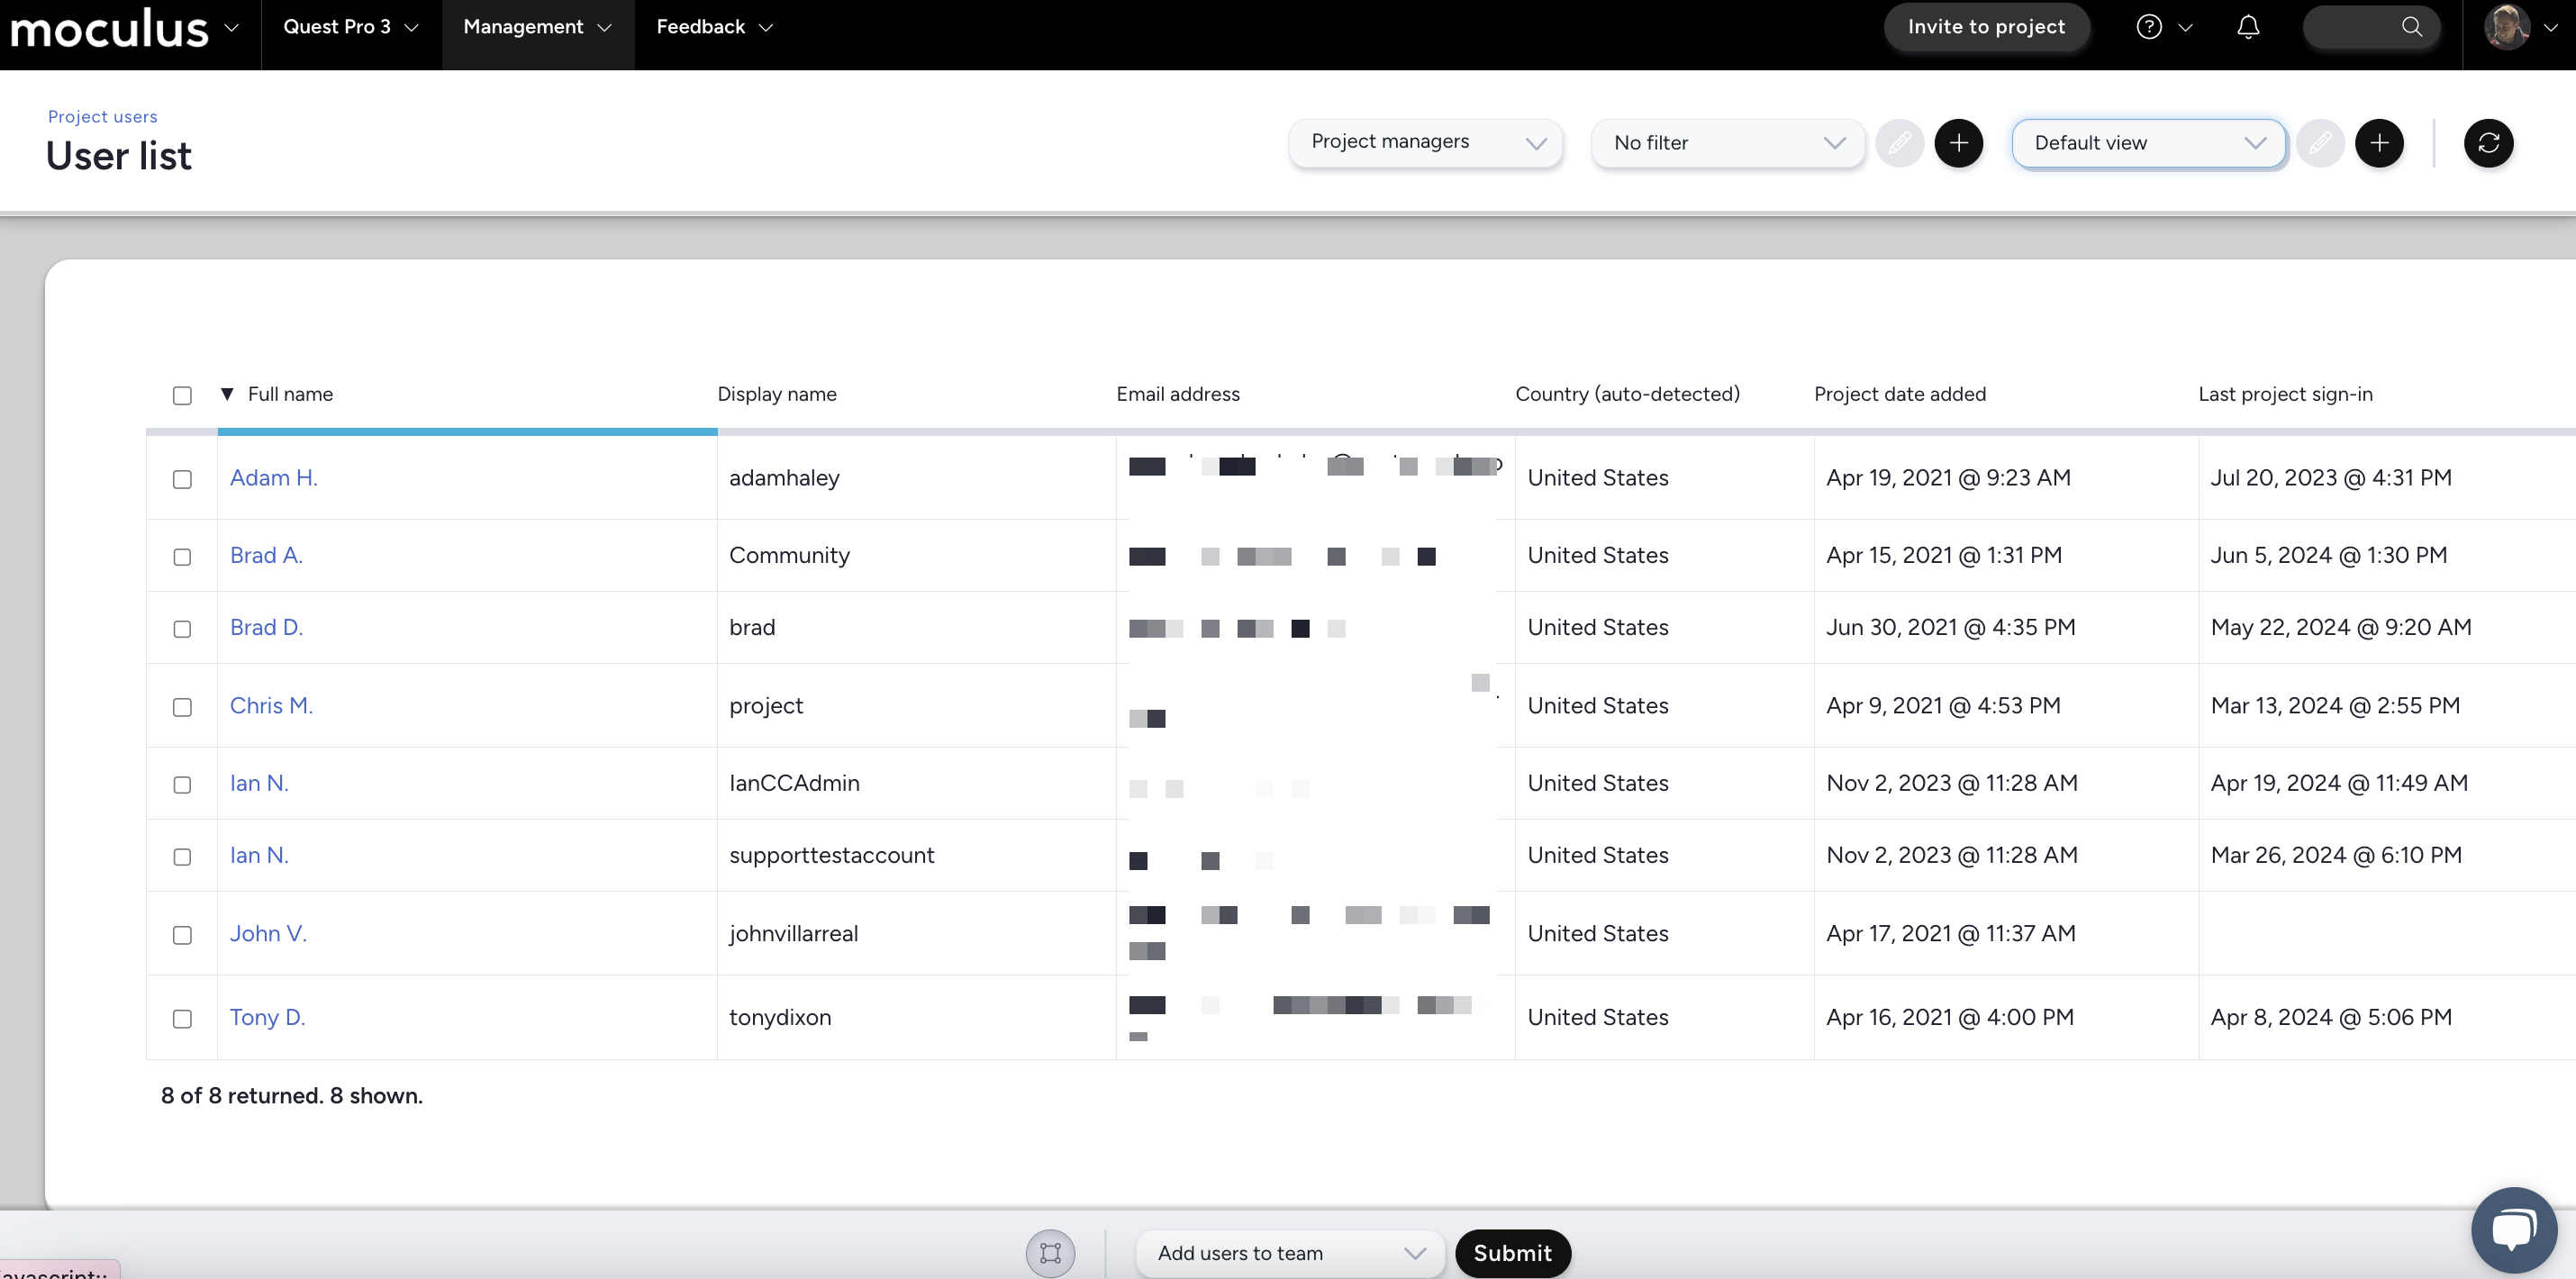
Show User List
Show user list allows you to view a list of users that meets your selected Filter and View criteria. The information you have selected when creating your View will appear in spreadsheet form within the portal itself. When viewing this list of users and their information, you can select individual users to take further action on by checking the box next to their identifier.
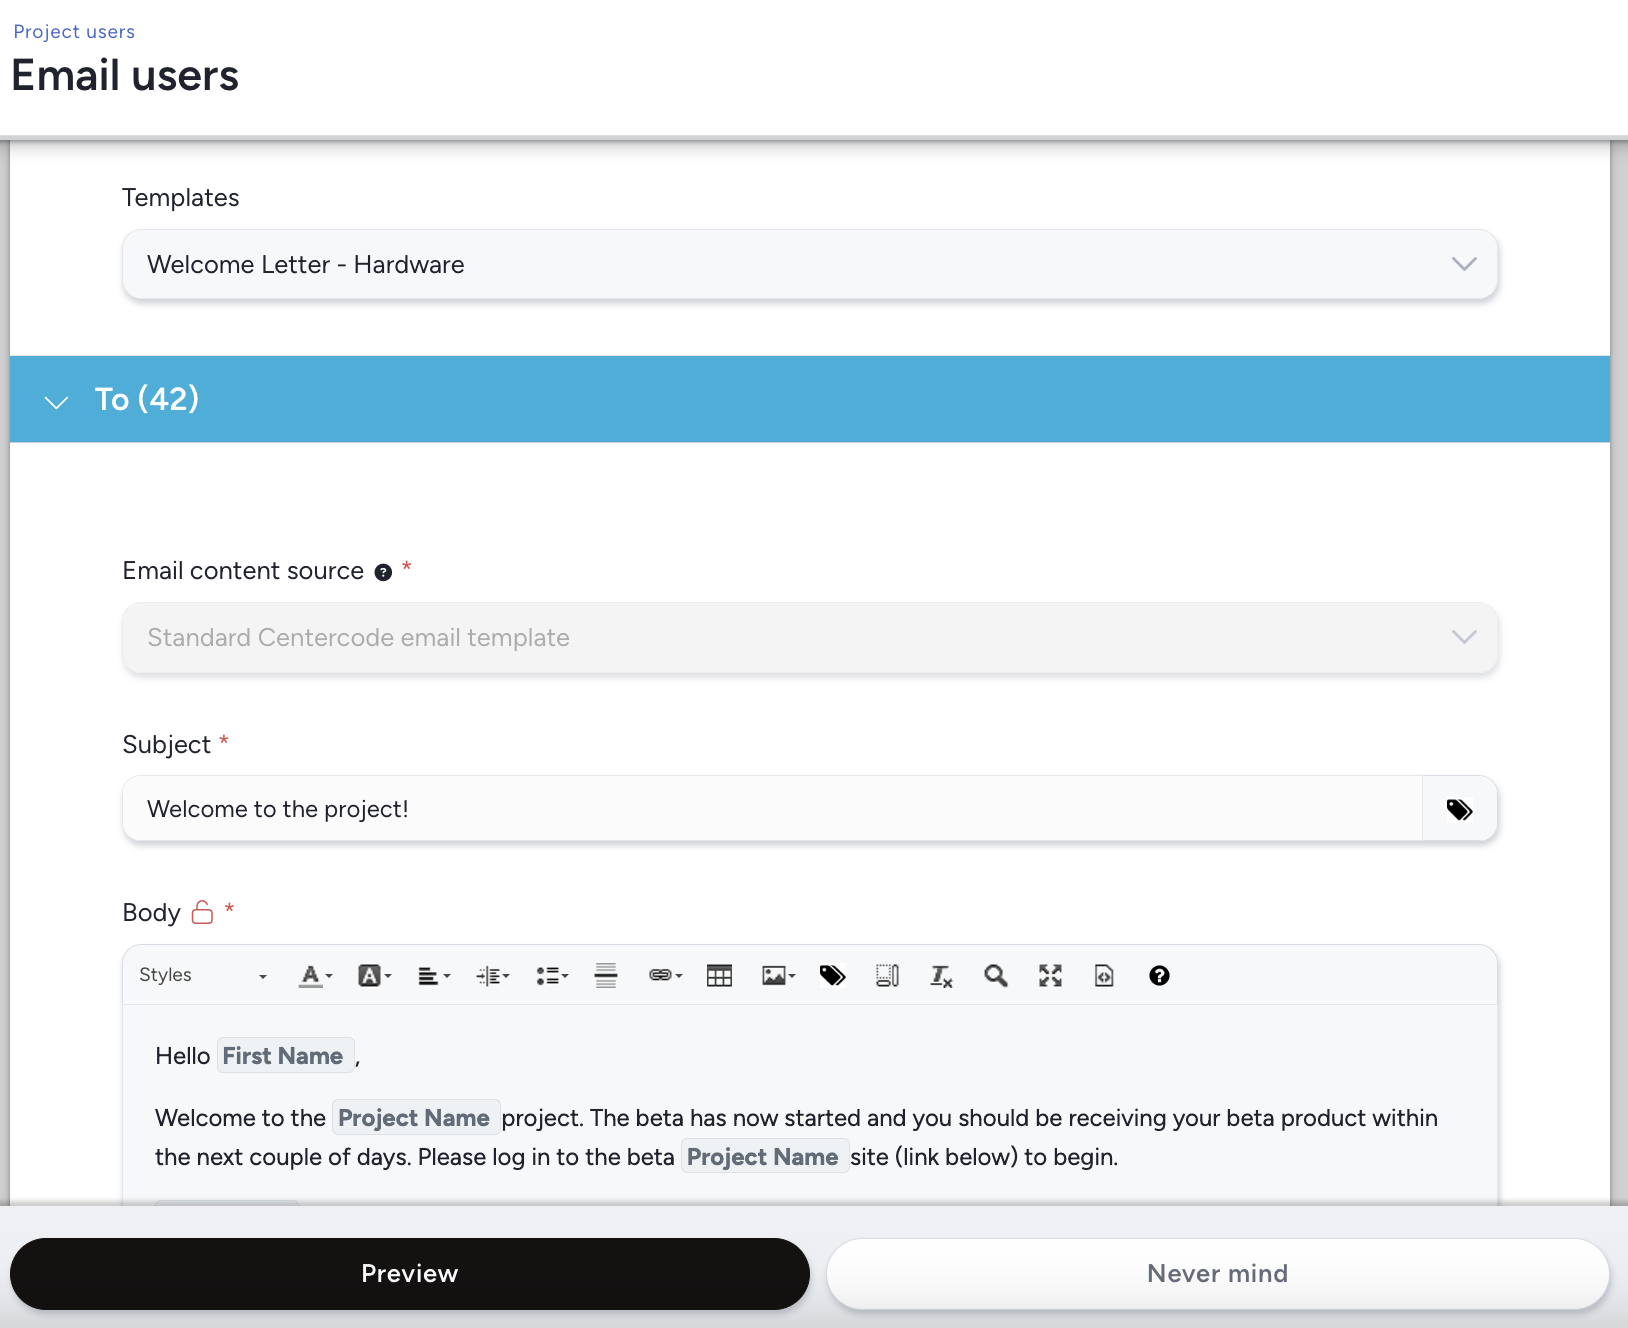
Email Users
Selecting the Email users action will allow you to email any users that meet your selected Filter and View criteria. You'll be able to select any pre-existing email template from your User Action email bucket or compose an email on the fly.
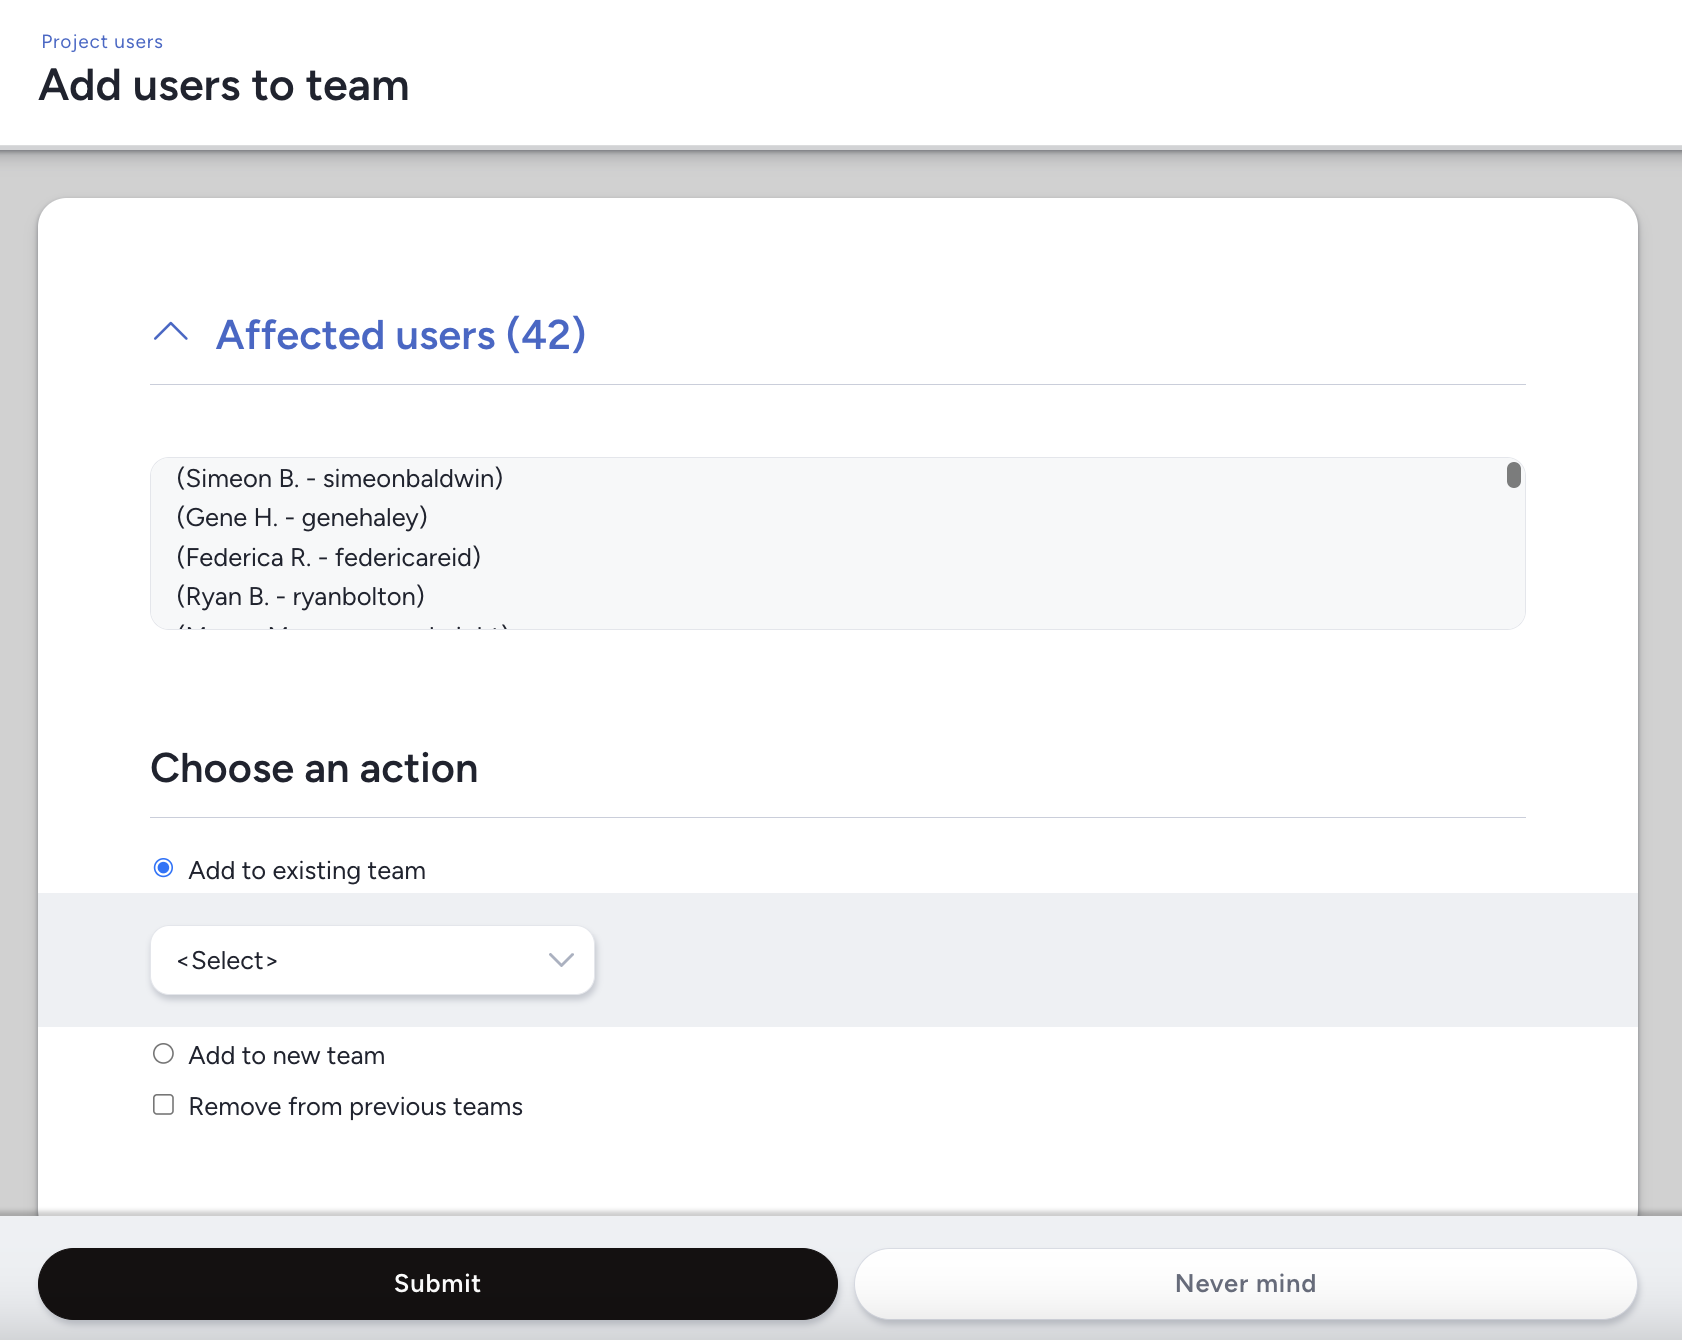
Add Users To Team
Add users to team gives you the ability to add any users that meet your selected Filter and View criteria to a pre-existing team, to a brand new team that you can create on the fly, and allows you to remove your selected users from all previous teams if desired.
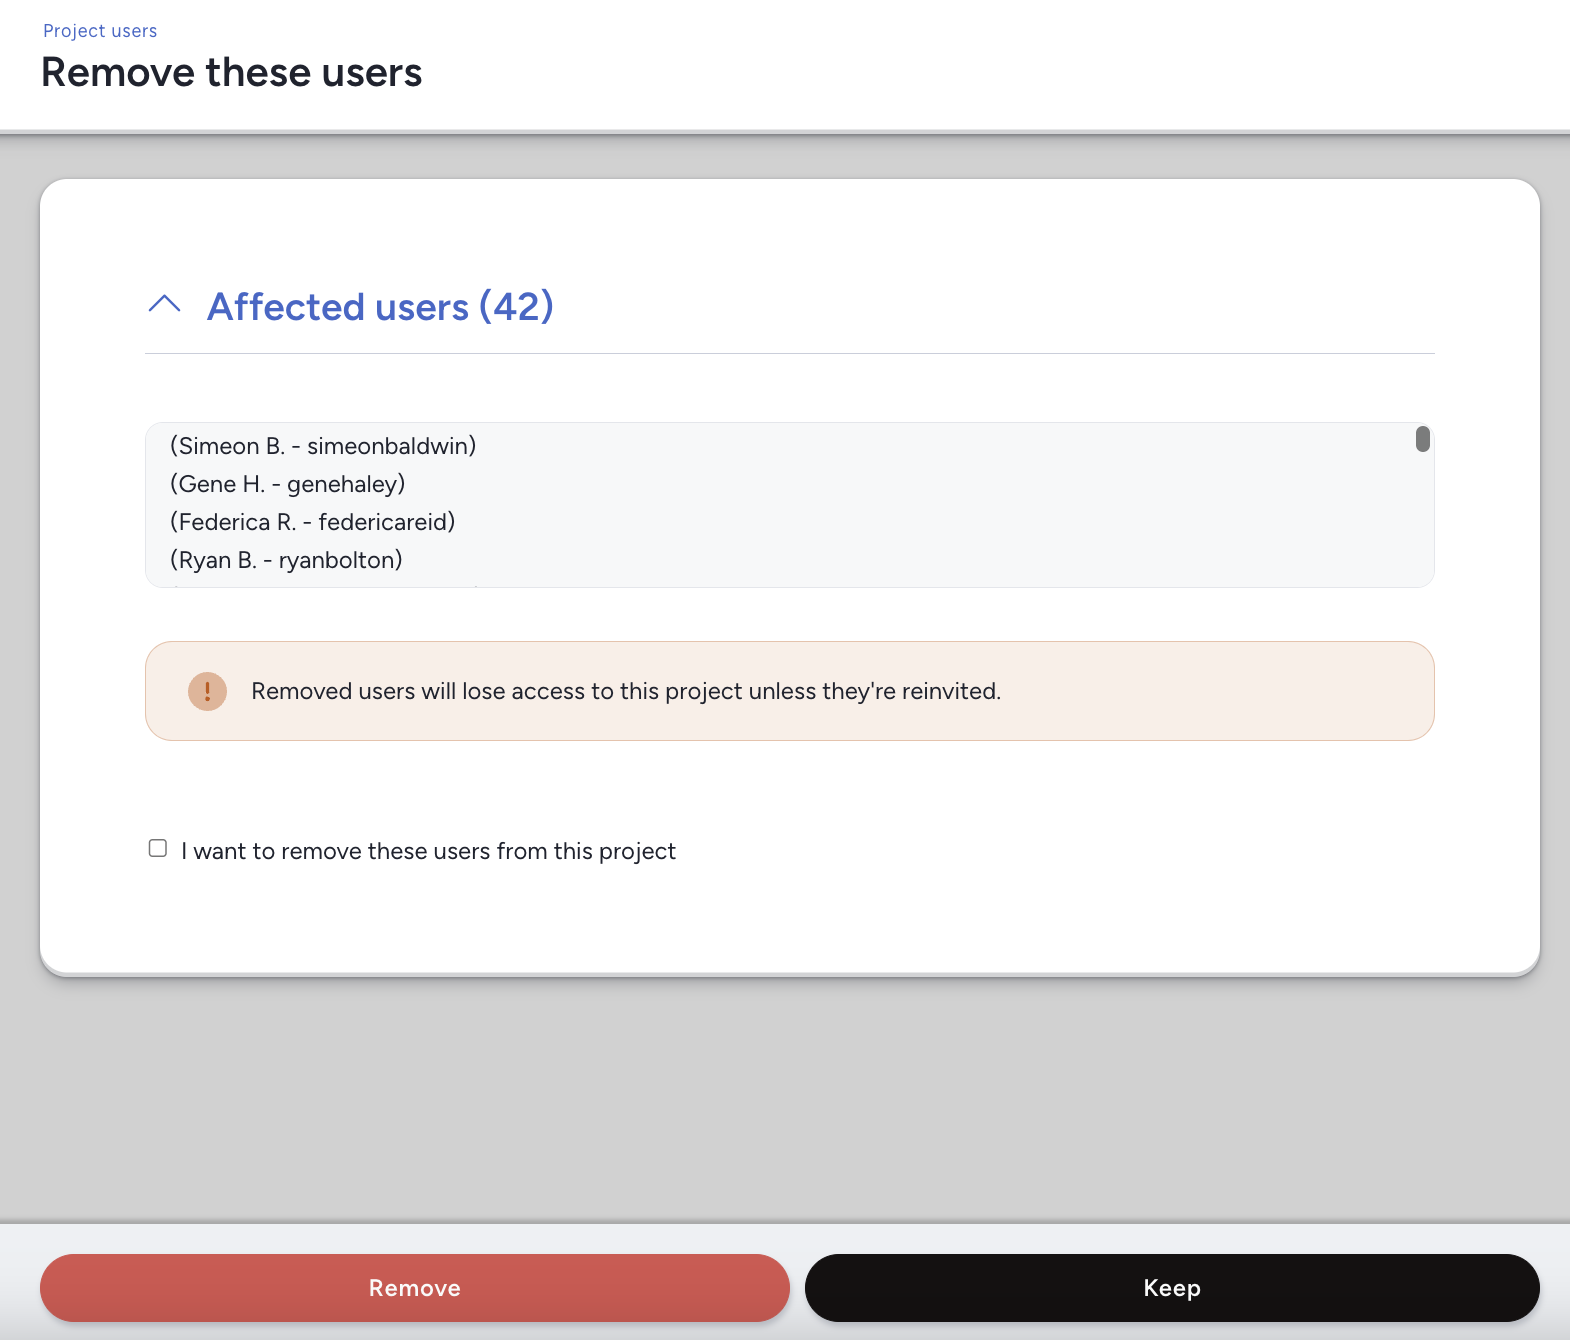
Remove Users From Community/Project
Depending on which level of the portal you're on, the Remove users action will allow you to remove users that match your Filter + View criteria from either the Community or your project.
Important Note: removing a user from your Community will erase their account from your implementation and thus all projects they have been a part of.
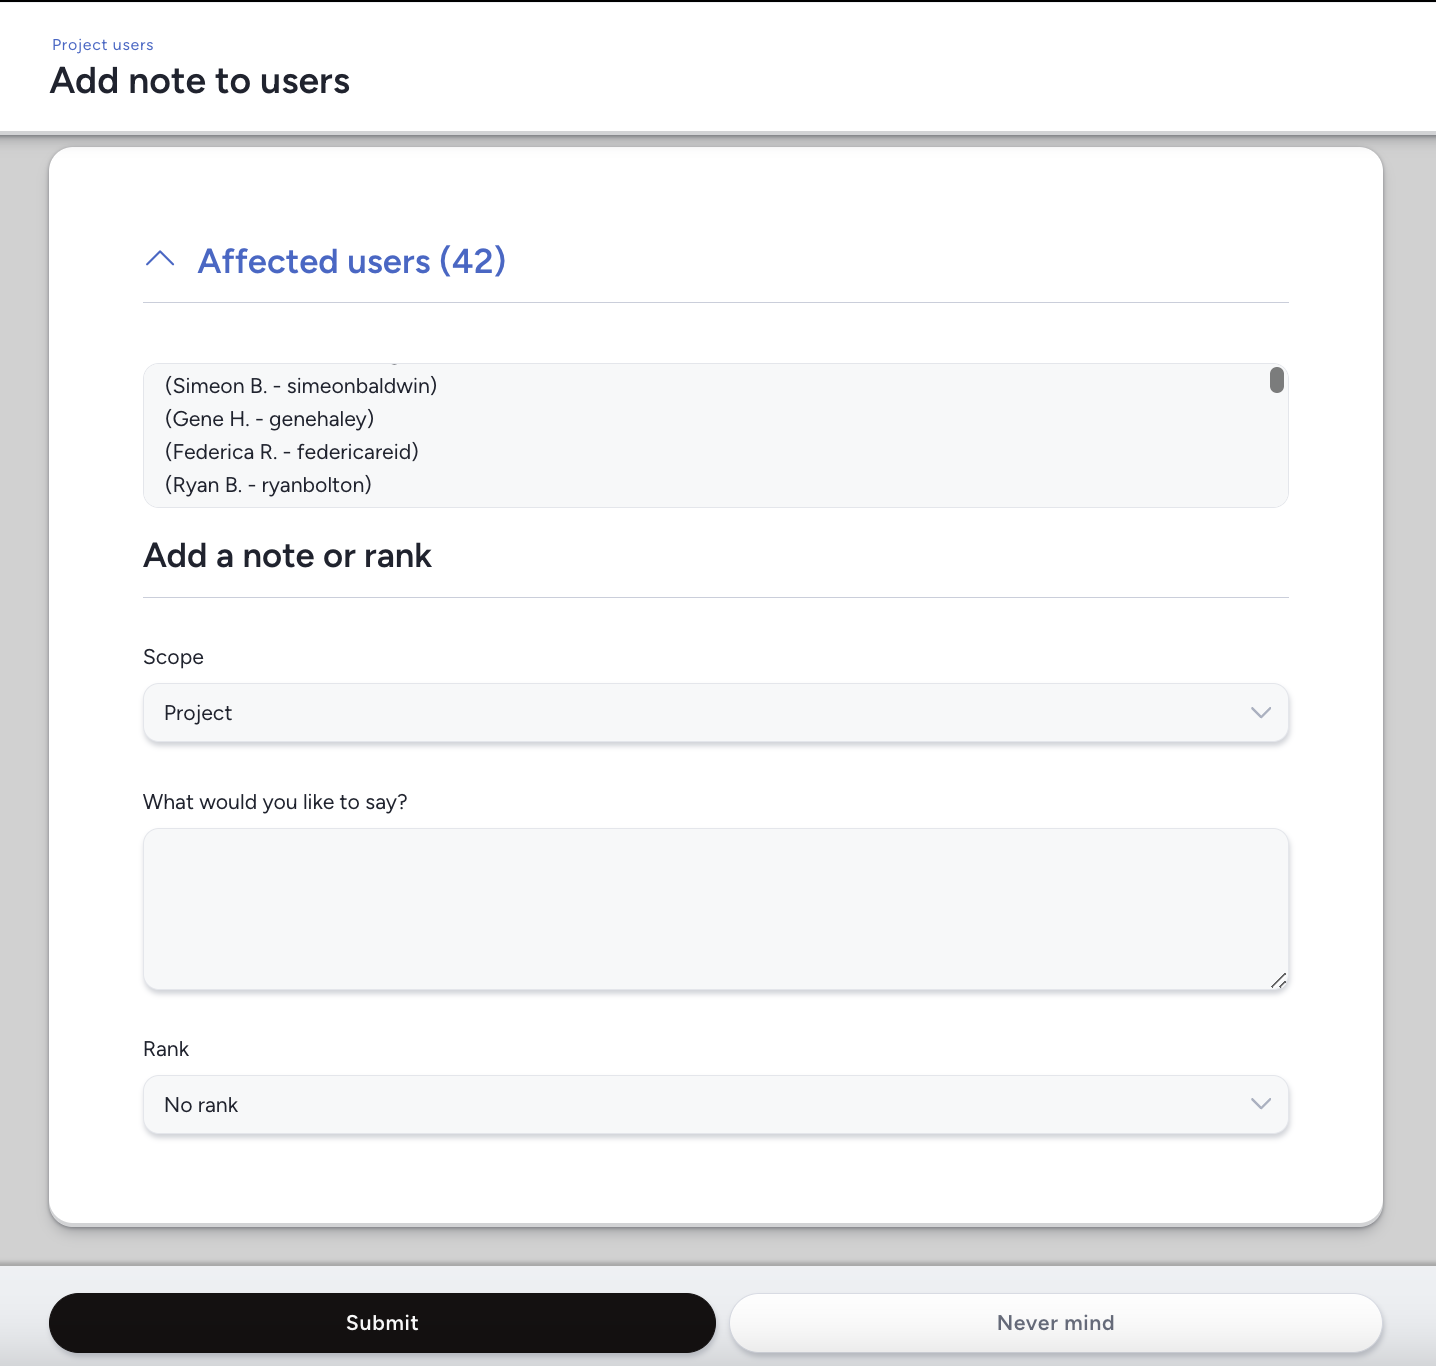
Add Note to Users
The Add note to users option will let you add a comment or a user score to any user's profile that matches your Filter + View criteria. This comment and optional user score can be added to either their profile within the current project you're taking this action in or within their Community profile.
Create Filter From Results
The Create filter from results option gives you the ability to create a new Filter that you can apply to the results you've gathered from your initial filter thus allowing for compound filtering.
Export Data
Export data allows you to export the data that results from your selected Filter + View criteria. Utilizing this action will take you to the Centercode Reporting engine and automatically creates a spreadsheet of your results so you can easily export them as either a CSV or XLS file.
What about Macros?
Note: User macros are only available if your license allows them.
When creating a User Macro under User Resources, you have the option to set that macro to "Show in User Management Actions". By doing so, the Team(s) of your choice can run your macro via the Action drop-down. Furthermore, you'll have the option to "Suppress Confirmation" of that macro (not recommended!) when utilizing it via the Action drop-down and to set that macro to only run once per user account.
Important Notes:
- As mentioned there is a User Management tool at the Community level and a User Management tool in each individual Project.
- Community User Management and Project User Management can only return filtered results for users within their scope. For example, you can't trigger emails for Project B's users from within Project A.
- We strongly recommend viewing your list before taking any direct actions against your filtered results so you can see the results first.
- A standard view will show you 100 results per page, however, this can be changed when creating or modifying your View to show up to 1000 results per page.
- If you need to take action on more than 1000 users at a time, you can do so by selecting your choice from the Action drop-down on the User Management page and clicking "Perform Action" once you've set a filter. Utilizing the "Show Users" action and selecting everyone on the resulting page first is not required.