A simple way to invite users and admins / project managers.
This article applies to All editions.
Invite Users
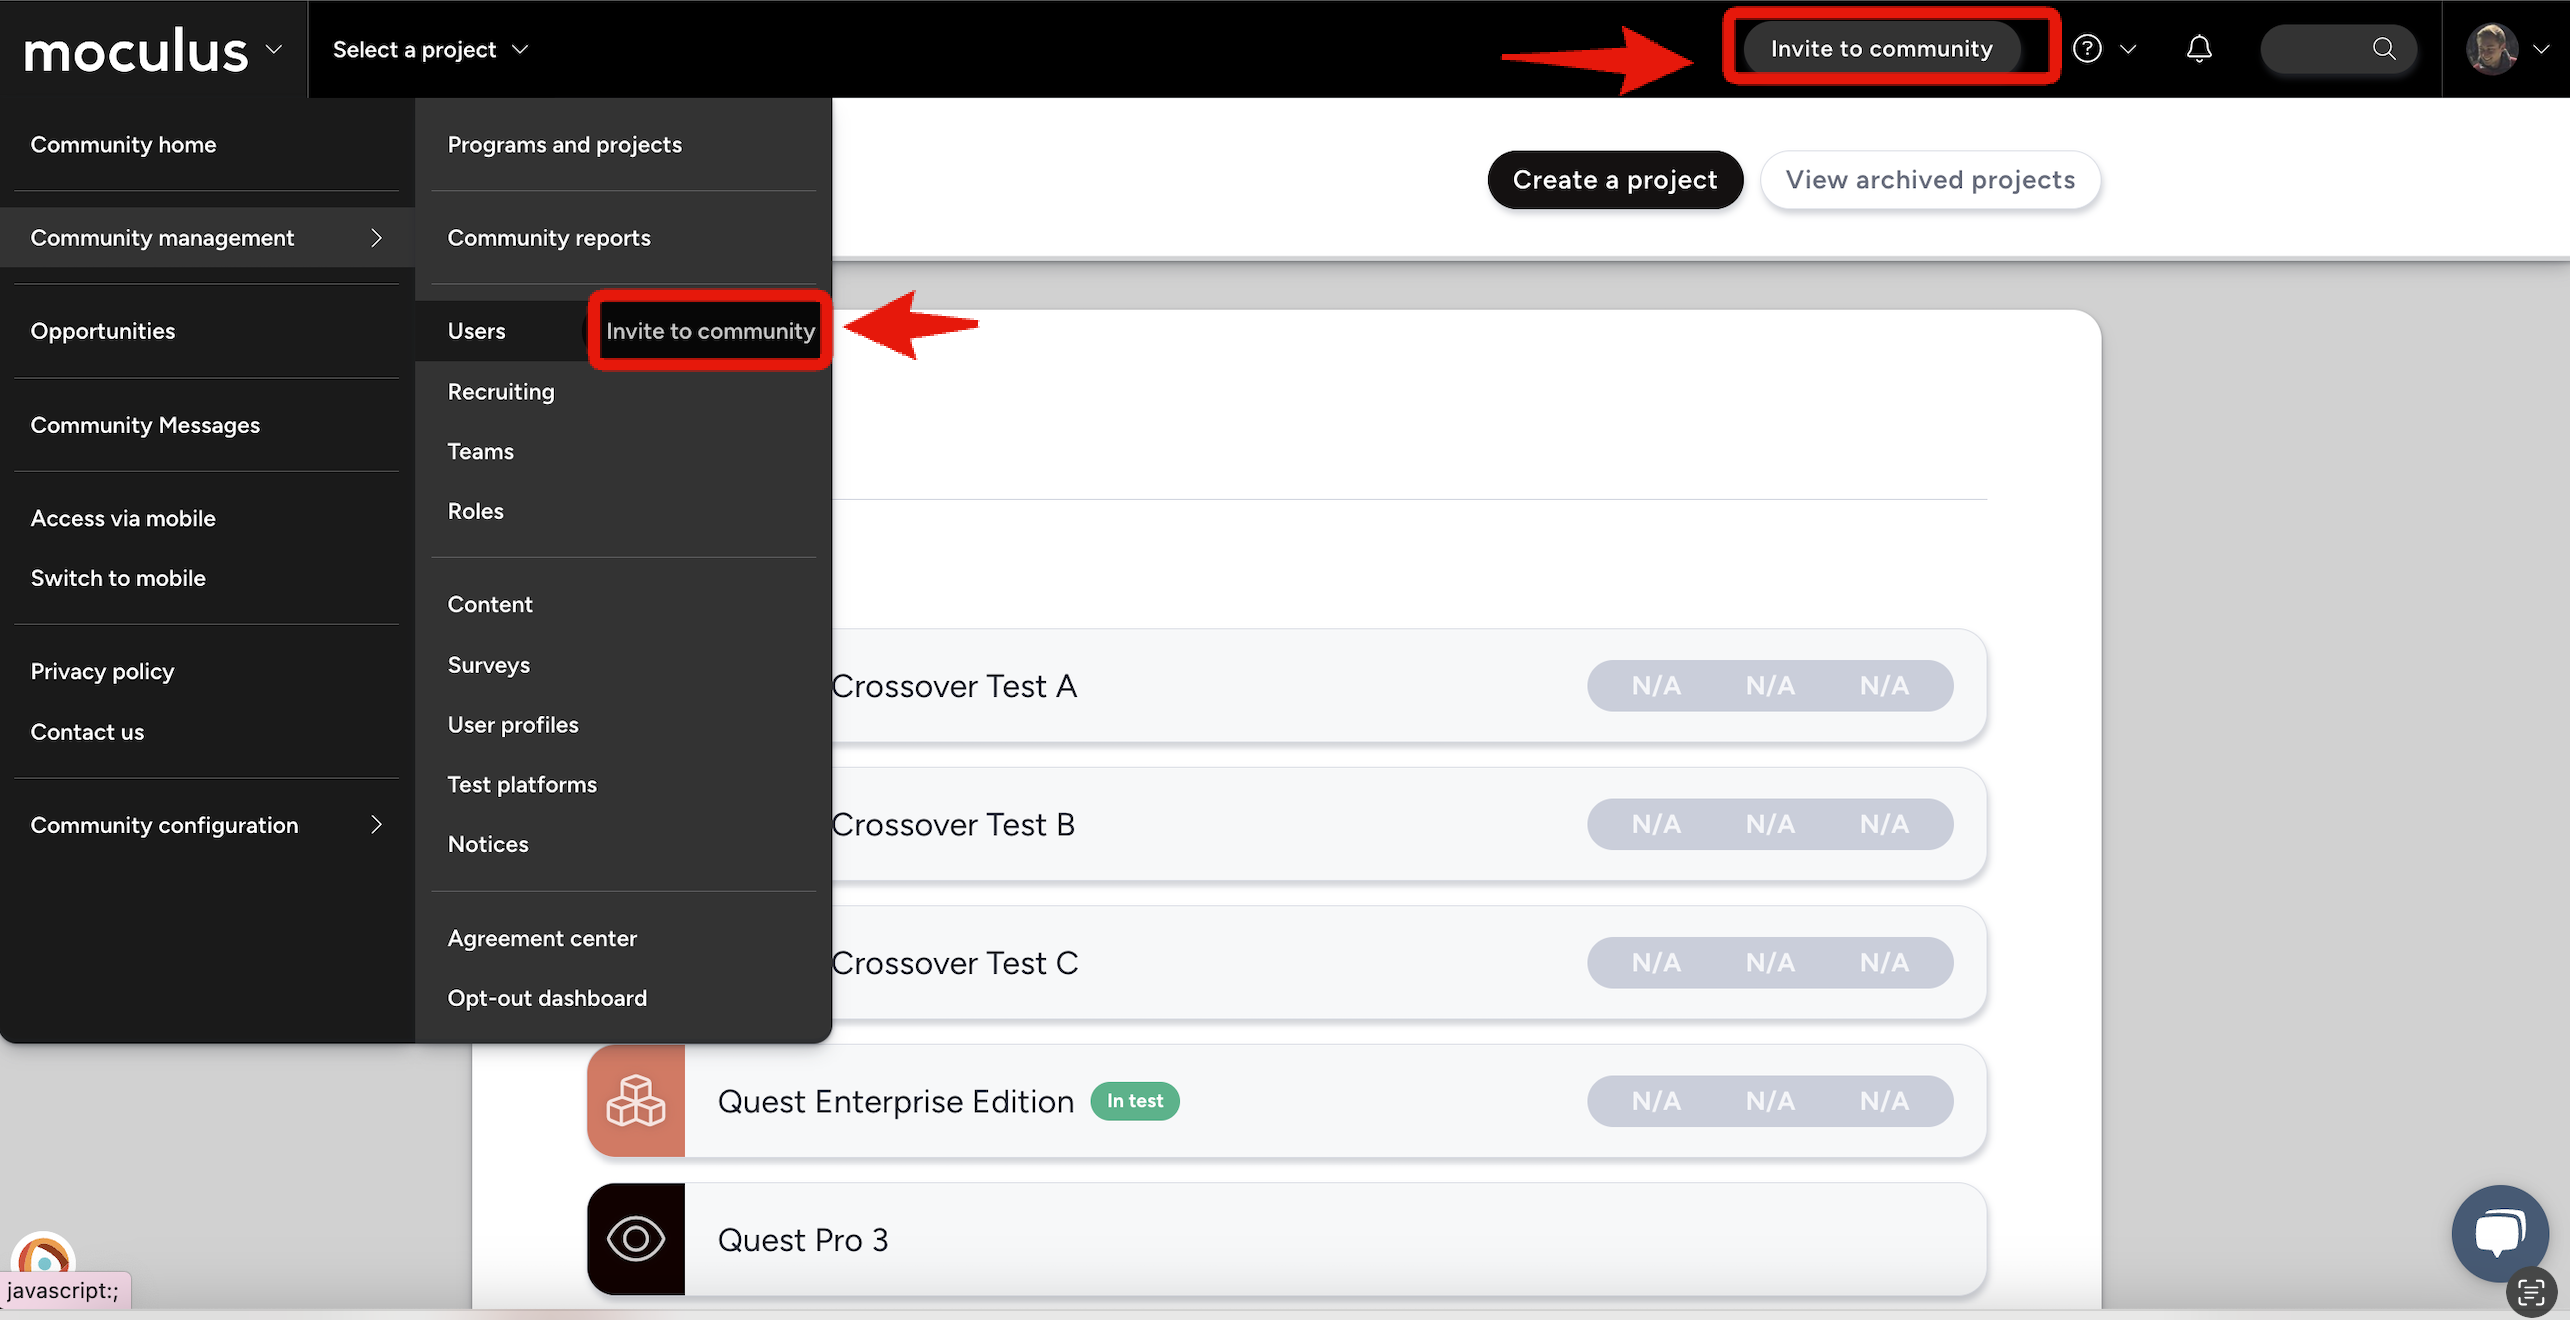
The Invite Users feature exists to swiftly bring users into your portal on the fly. You’re able to access Invite Users anywhere within your Community and Project at the top left of your page, within the Users section of your Community or Project.
Invite Users to Community:
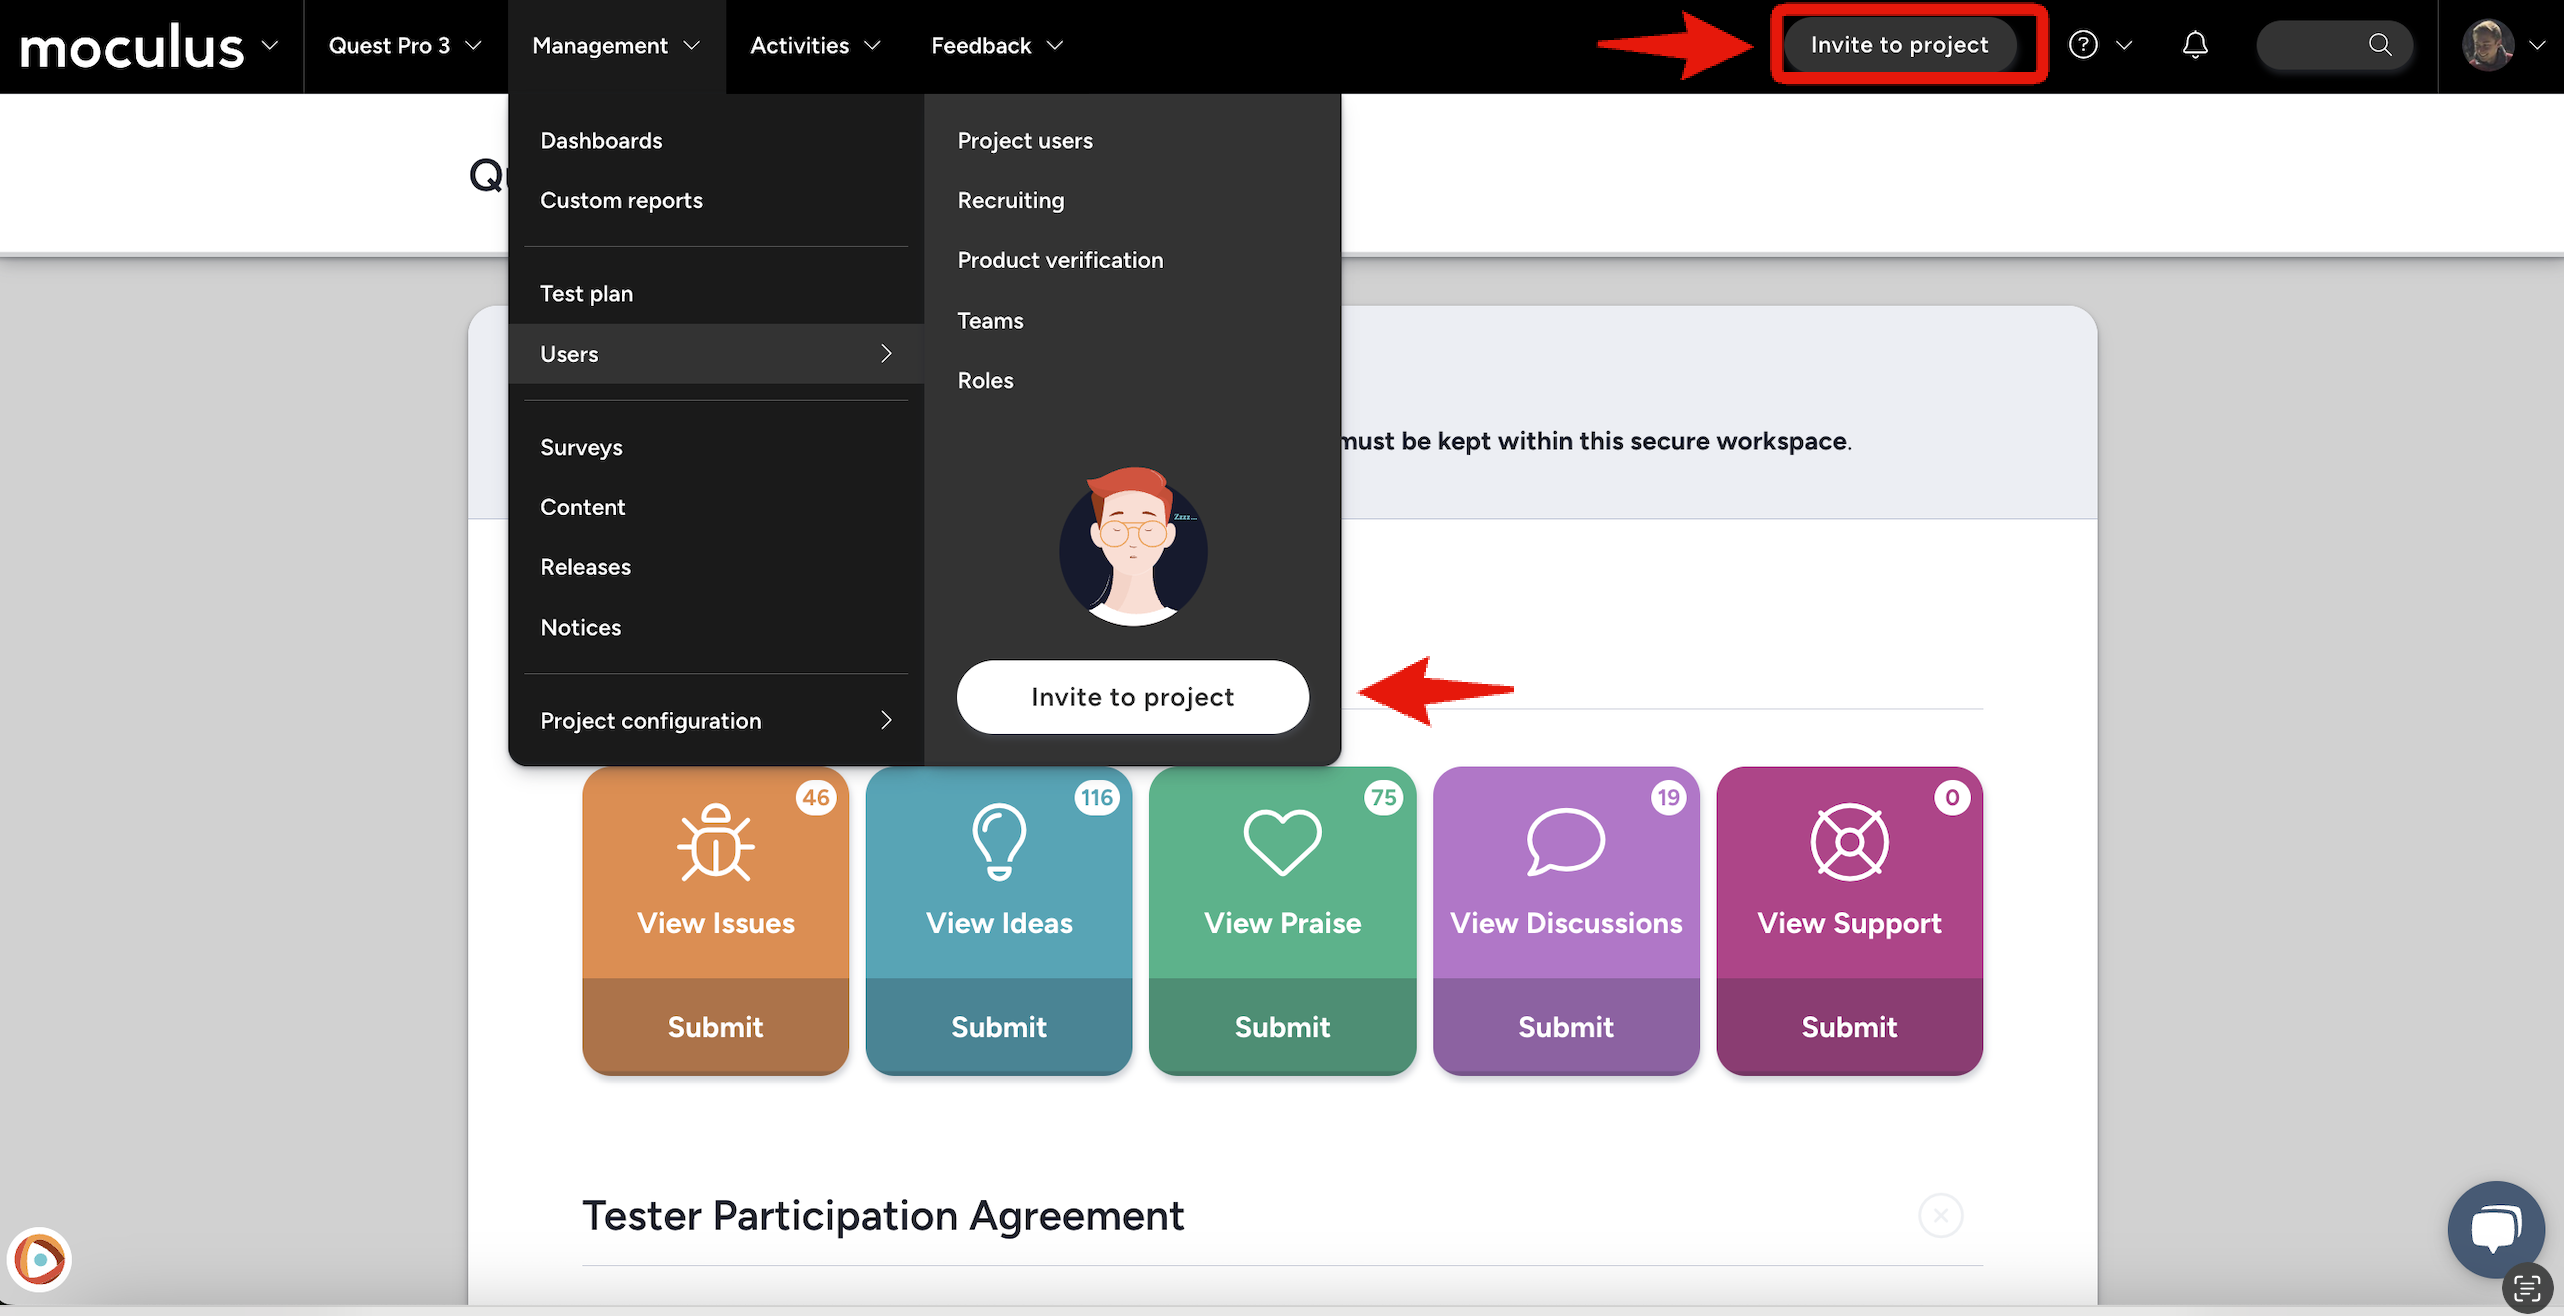
Invite Users to Project:
When using Invite Users, you’re able to add users By Recruitment or By Teams by sending out an immediate email invitation, putting users in a Recruitment Pool to be invited at a later time, or even fully converting existing Community users into your Project.
When to use Invite Users
Recruiting is extremely effective at managing recruitment efforts and inviting users to join your portal in groups, allowing you to track which invite campaigns were most successful, it may not be the ideal tool for inviting just a few individuals into your portal. This is where Invite Users comes in! As mentioned above, Invite Users allows you to invite users into your Community or Project on the fly.
Need to add a few internal members without all the bells and whistles of a Recruitment? No problem!
Forgot to include a few tester candidates or need just a couple more invitees, and you do want them to have the full Recruiting experience? Quick invite can handle this as well. Invite Users is also the most straightforward way to add Project Managers and Internal Members to directly to your Project.
What can Invite Users do?
As Opportunities bring an array of deep features, Invite Users simplifies the process while still leveraging powerful Recruiting features. As we continue to iterate on Invite Users’s feature set and UI, the following capabilities are considered the most advantageous and efficient.
- Lookup by name - Do you need to add someone to your Project but can’t remember their exact email address? Identify existing Community users by their name, partial email address, or username. The search will show the closest match(es) for you to select.
- Add to pool only - If you have a few users you’d like to invite into your portal but want to send them a truly customized email, you can check the “Suppress Invitation Email” check box to add them to a Recruitment Pool. From the Recruitment Pool, you’ll be able to send a customized email whenever you’re ready.
- Convert existing users to project automatically - If you have some existing community users (especially internal support accounts) that need to be added to your Project ASAP, utilize “Convert Existing Users to Project Automatically” to bring users into your Project sans email.
- Cookie your preferences by project - For the Invite Users experience to be truly quick, you can check the “Save Settings” option to store your configuration via cookies for each individual Project.
- Dynamic strings - Customize your Invite Users email with new dynamic "name" strings for your Project (:projectname:), Community (:communityname:), and Company (:companyname:).
Customizing your Invite Users landing page
Users invited via Invite Users can be shown a specific landing page, similar to the landing pages used for regular Opportunities. To customize your Invite Users landing page:
- Navigate to the Community or Project level Recruiting management page
- Hover over the Candidates added manually via teams source
- Click the modify pencil
You can now enter the information you would like displayed to users you invite via Invite Users before they enter your community/project.
Invite Users example
You just started up a Project and you need to get your Beta Support team of 5 members into your portal so they can assist with triaging feedback as soon as possible. Generally, these internal members are aware of your Project and are not going to need to interact with all the content that comes with a full Recruitment. Add your Beta Support team quickly to your Project using Invite Users by Teams.
Let’s address the scenario described above via Invite Users:
- While in the appropriate project navigate to the Invite users button within the Management > Users dropdown in your navigation bar.
- Enter the email addresses of the users you’d like to invite or select Lookup by Name to lookup their pre-existing Community account.
- Click on the via Teams option and choose the appropriate destination team(s).
- Select a New Community Invitation option from the Users will be onboarded into the community via drop-down.
- Beta Support members should likely be Internal accounts, so look for an Internal or Employee Sign-Up option from the list.
- (Optional) Click Customize to adjust the message included in your invitation email.
- (Optional) Add to Pool only to add users to an Opportunity Pool to be emailed later. Use this option if you want to send a customized email at a later time.
- (Optional) Click Convert existing users to project automatically if you’d like to fully convert these users to your Project with an invitation.
- Click Send invitation
“What if I forgot to add a Beta Tester to my Project when recruiting, and I need them to see my Recruitment?”
Invite Users can handle that just as easily and your user will still get the full experience of your Recruitment. Utilize the same steps as above but click on “By Recruitment” in step #3. For simplicity, if you only have one Recruitment, it will default to that one. If you have multiple Recruitments, you’ll be presented with a menu to select your choice.
Conclusion
You’ll find that Invite Users is the best way to rapidly invite users to your Community or Project, ideally used when you need to invite just a few users to your portal, such as your internal team, fellow managers, or overlooked testers. The ability to quickly invite users via your Opportunities or via a specific Team covers all your invitation needs and works to save you time.
If you run into any issues, please let us know! We’d be happy to guide you through when and how best to use Invite Users and address any other questions you may have through chat or help@centercode.com.
Notes:
- The layer of the portal that you’re on when clicking on the Invite Users button (i.e. Community or Project) will be the layer of the portal the user will be invited to.
- In order to utilize the Convert Existing Users to Project Automatically option to fully convert users into a Project without sending an invitation email users must already be an existing member in your Community.
- If you only have one Community Invitation Type with the “Make available as project invitation” option checked, the Users will be Recruited into Community via drop-down will not be displayed and the only available Community Invitation Type will be used.