This article applies to Pro, Team, and Legacy editions.
Note that while Centercode’s integration features are intended to be approachable by a Centercode Program Manager, you might need to enlist help from an internal technical resource and refer to our vocabulary and troubleshooting documentation.
Aha! is a robust tool commonly used to collect feedback from product users. This article will discuss common integration use cases for connecting Aha! with your Centercode site.
- Receive feedback in Centercode from Aha!
- Send feedback data from Centercode to Aha!
- Receive user data in Centercode from Aha!
Receive feedback in Centercode from Aha!
Using this integration, you’ll be able to take feedback captured in Aha! and send it to Centercode for the purposes of tracking, duplication, triage, or analytics. Through this integration, Aha! will be able to create new feedback submissions in Centercode on behalf of the original submitter or a default account. Once created, the feedback will behave just as if it had been submitted by a Centercode user in the first place.
Externalize Workspace Data in Aha!
For this integration, you’ll want to leverage Aha!’s activity webhook to externalize workspace data by sending a POST request to a Centercode API endpoint.
Get Centercode Ready to Receive Feedback
To get Centercode ready to receive feedback from Aha!, you’ll need to configure an external source for the feedback type in which the feedback will be stored. If you’d like to have feedback go into more than one feedback type, you can create external sources for each of them. Each external source will provide its own API endpoint. Aha! can then send feedback to the endpoint associated with the intended feedback type within Centercode.
Troubleshooting
Errors sending data
Depending on the element type receiving data in Centercode, there may be specific values that must be sent from Aha! For example, you may have a choices element on your feedback form that's configured as a Severity drop-down with Critical, Major, Minor, and Trivial selections. If you try to send P0, P1, P2, and P3 from Aha! to Centercode, it will result in an error, since those are not viable selections in that drop-down. To resolve this, ensure the expected values in Centercode match the data transferred from Aha! by either changing the expected choices in Centercode or modifying the values sent from Aha!
Handling arrays
Currently, it is not possible to pull in more than one value from an array. To work around this, you can create multiple element parameters on the Centercode side, one for each part of the array you’d like to capture. For example, if you had multiple attachments coming from Aha!, you could set it up like this:Send feedback data from Centercode to Aha!
It is also possible to configure Centercode to send feedback data to Aha! if, for example, it is your engineering team’s preferred bug tracking software. By configuring the integration in this manner, you’ll be able to use Centercode to collect, triage, and prioritize your feedback. Then, when you’ve got a clean, actionable piece of feedback, you can push it over to Aha!.
Get Aha! ready to receive data
To configure this integration, you’ll use Aha!’s REST API to configure an endpoint capable of receiving data from an external system.
Externalize feedback data in Centercode
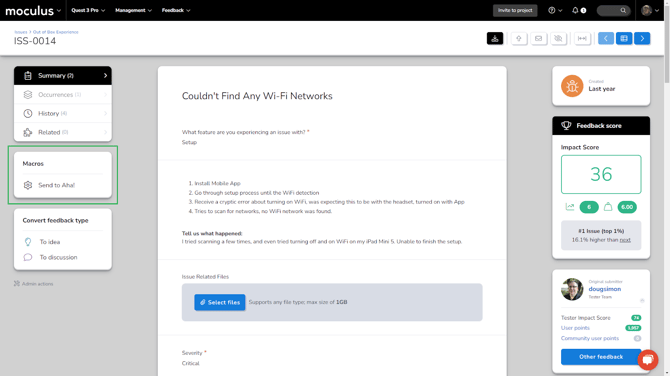
In order to send feedback from Centercode to Aha!, you’ll need to create a webhook macro. Once configured, you’ll be able to manually run the macro against any feedback you’re viewing. Note: You can also configure Centercode to trigger the webhook macro automatically once certain conditions are met. For example, you might trigger the macro when feedback is placed in the “Will Fix” status.
Troubleshooting
Possible Aha! error status codes:
- 403 - The authentication information is incorrect.
- 400 - There is an error in the construction of the request. The body of the response will contain more details of the problem.
- 404 - The requested record could not be found. This may also occur if the user does not have access to the requested record.
- 429 - The request exceeded the rate limit.
- 500 - Something went wrong on the server. This error should not occur. If it does please report the problem to support@aha.io.
- 504 - The request timed out as a result of requesting too much data. Try paging the request or limiting the number of fields.
Receive user data in Centercode from Aha!
It is also possible to capture account data from Aha! and append it to an existing user record in Centercode. This will enable you to use Aha! as the source of truth for user information/CRM data while still being able to view/filter that data in Centercode.
Externalize account data in Aha!
For this integration, you’ll want to leverage Aha!’s activity webhook to externalize account data by sending a POST request to a Centercode API endpoint.
Get Centercode ready to receive user data
To get Centercode ready to receive account data from Aha!, you’ll need to configure an external listener using the external data listener type. Once the integration is complete and data has been transferred from Aha! to Centercode, it can be viewed on the user summary page under the newly created data group label. This page can be accessed by searching for a user and clicking their name. This information is also available in the Centercode Data Engine and can be leveraged when creating filters and views.
Troubleshooting
Labels and parameters
External data listeners use a “key value pair” design but let you pick the label used when presenting the data on the user summary screen. The parameter must still match the parameter sent by your third-party system.
Sending POST requests
Please note that when sending a POST request to your Centercode API endpoint, the JSON body must be JSON encoded.