This article applies to Team and Legacy editions.
Note that while Centercode’s integration features are intended to be approachable by a Product or Beta Testing professional, this integration will likely require help from an internal technical or IT resource. Refer to our vocabulary and troubleshooting documentation.
The Google Cloud Console console is a powerful set of tools the full use of which is outside the scope of this guide. See Google’s Cloud Services guide, and OAuth setup guide, for further information.
This guide will attempt to guide you through only the steps necessary to create OAuth credentials to be used for accessing a Google-provided email address via POP.
Each organization’s own IT requirements should supersede any aspects of this example configuration that are found to be conflicting with those requirements.
- In a web browser, sign into the Gmail account you want to use with POP email.
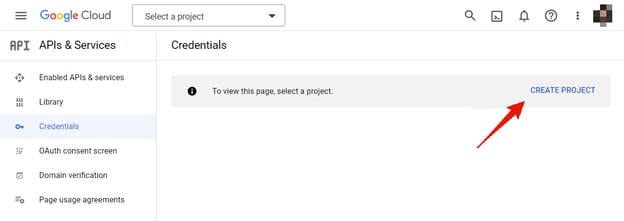
- Go to https://console.cloud.google.com/cloud-resource-manager and create a new project that will be used to associate with the POP email account you intend to use.
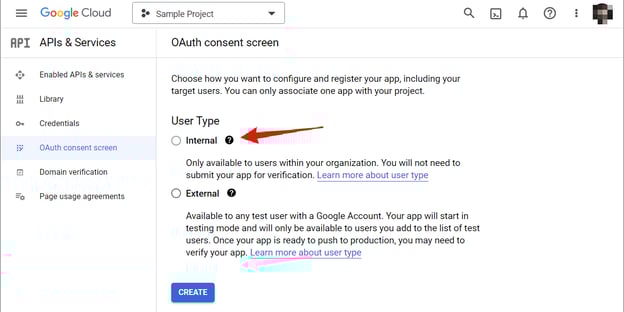
- Configure your consent screen. Selecting Internal user type should be appropriate here.
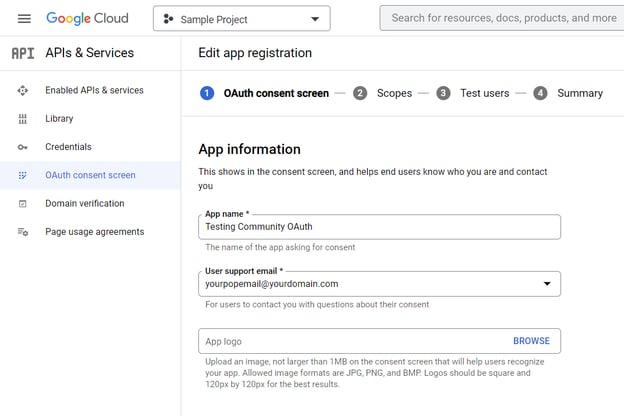
- Fill in the app information.
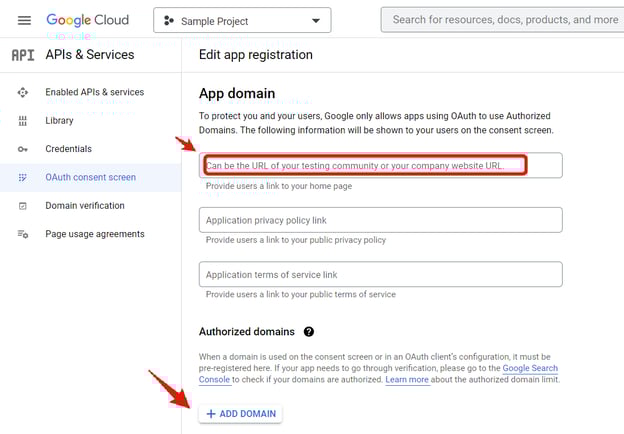
- Add the home page URL, and authorized domain.
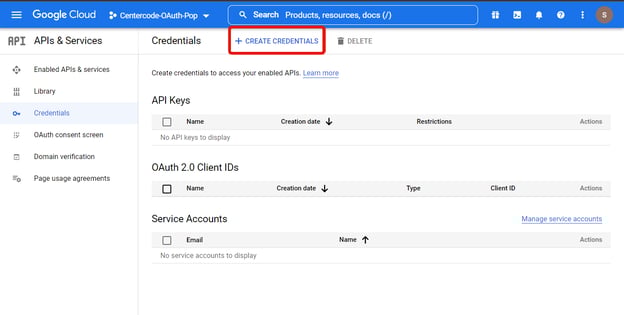
- Go to https://console.cloud.google.com/apis/credentials
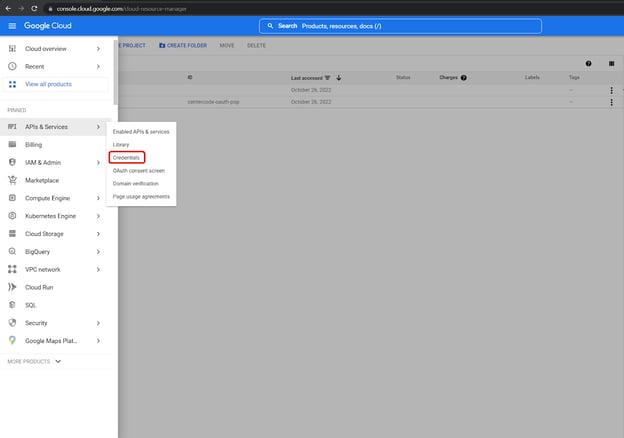
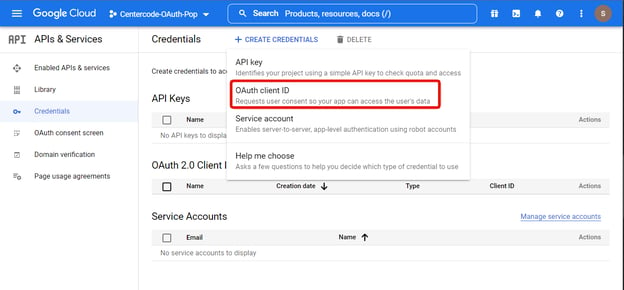
- Click on +Create Credentials
- Select OAuth Client ID
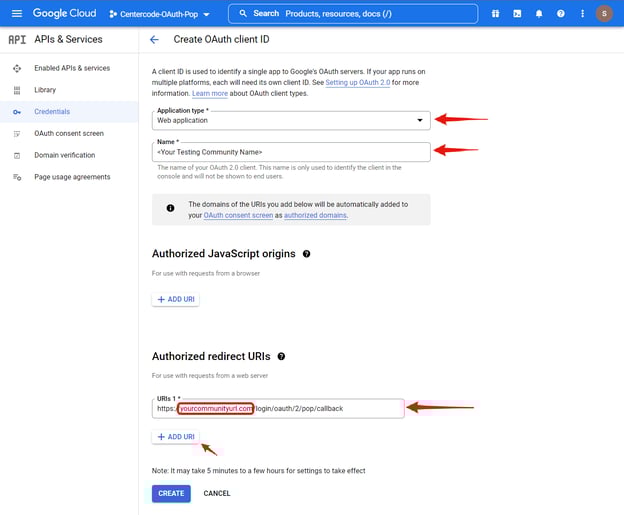
- Enter information: Select Web Application as the type > Enter your testing community name > Add the authorized redirect URI as: https://<Your Testing Community Domain>/login/oauth/2/pop/callback
- After creating, it will present you with Client ID and Secret. Save these, as these are important pieces of information Centercode will need to enable the POP functionality.
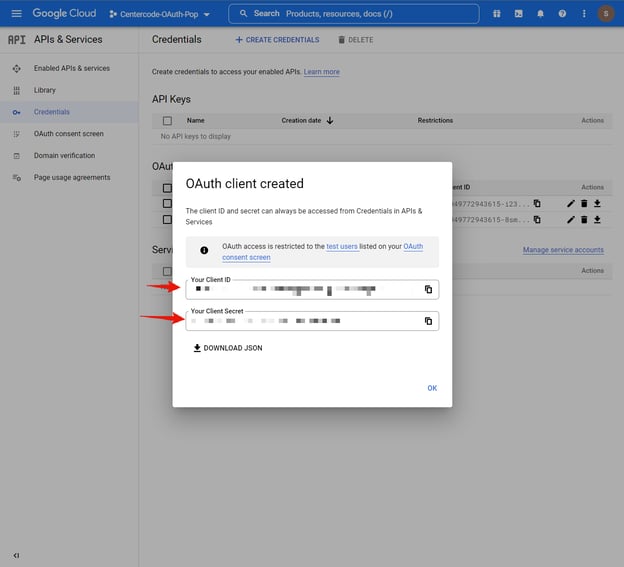
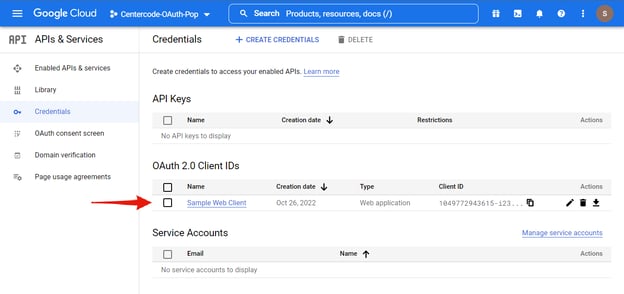
- You can always access the Client ID and Secret again from the Credentials page in the Cloud Console.
- Provide the Client ID and Client Secret to Centercode IT so that the POP Email account can be set up in the testing community.
- The other three pieces of information that are needed for a POP email setup with Google are commonly known to Centercode IT: Authorization Endpoint: https://accounts.google.com/o/oauth2/v2/auth > Token Endpoint: https://www.googleapis.com/oauth2/v4/token > Scope: https://mail.google.com/
You've just configured your OAuth Authentication credentials for POP email on Google!
You are now ready to send over the credential information Centercode needs in order to enable OAuth authentication for POP Email as outlined in our main article: Email-Reply Integration for Feedback (via POP)