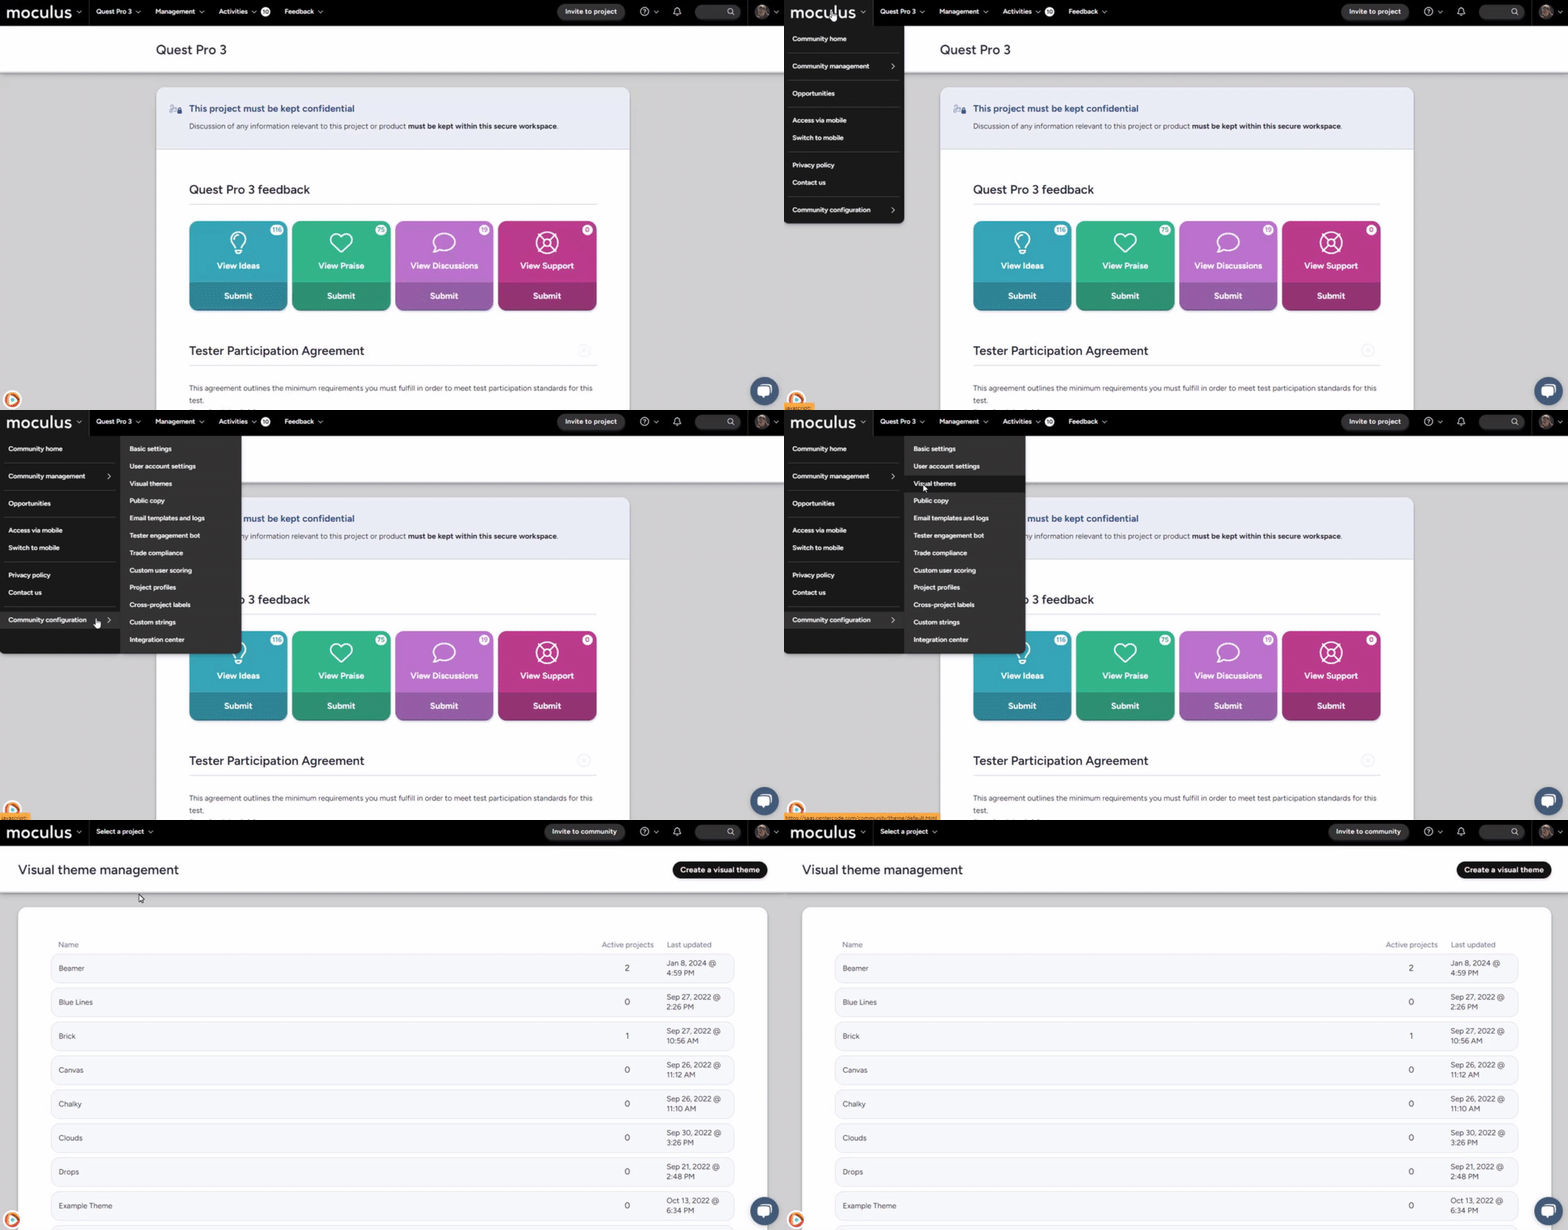
Customize the look and feel of your Centercode implementation with the Visual Theme tool.
This article applies to All editions.
Create theme:
From the Community Homepage:
- Navigate to Community Logo>Community Configuration>Visual Theme
- Click the Create a Visual Theme link in the top right.
- Enter desired Theme Name and Layout, as well as associated files and color choices.
- Click the Submit button at the bottom of the page when satisfied.
You have successfully created a Custom Theme. For a comprehensive look at how to build a custom visual theme, piece by piece, check out this detailed article.
Background images / video
When you navigate into the Visual Theme tool, you’ll notice a section header titled, “Images”. Contained in this section are six options with an “Attach File” button. What we’re looking for under this header are the options titled “Inner Background” and “Outer Background”. These options will allow you to attach an image or video file.
Attaching a file under the Inner Background option will apply a background to pages that are located inside your site, or in other words, anywhere seen after logging in. Attaching a file under the Outer Background option will apply a background to the login page or any other publicly accessible pages which do not require a login. You may notice some pixel sizes in a dark grey box under each option. These are suggested heights/widths that we’ve taken the time to test out. We recommend you use these for the best results!
Custom CSS
The purpose of this box is to give our customers the option to customize their sites beyond what is offered in the Visual Theme tool. However, please keep in mind that any custom CSS that is entered into your portal cannot be directly supported by Centercode, so please use it with careful consideration. To utilize this feature, simply copy/paste your custom CSS into the box and hit Submit.
Modify theme:
From the Community Homepage:
- Navigate to Community Logo>Community Configuration>Visual Themes in the navigation bar.
- Click the table cell of the desired Theme.
- Make any desired changes to the Theme.
- Click the Submit button at the bottom of the page to confirm.
You have successfully modified a Custom Theme.
Remove theme:
From the Community Homepage:
- Navigate to Community Logo>Community Configuration>Visual Themes in the navigation bar.
- Hover over the table cell of the desired Theme and click the X icon to the right.
- Click the Yes, Delete this item link to confirm the removal.
You have successfully removed a Custom Theme.
Requirements
- Manage Community Role
Notes:
- You are free to utilize the Custom CSS field to your liking. However, please remember that any custom CSS input into your portal is not directly supported by Centercode.
- You can select and set your Community visual theme from the Community management menu > Community configuration > Basic settings > Selecting the desired theme in the "Visual theme" field drop down > Submit.
- Utilizing the Report PDF Logo will display your logo on any reports you create throughout your portal. For best results, ensure your logo is visible against a white background.
- When uploading a Favicon, we recommend that you use a single .ico formatted file. You can utilize this (third-party) site to convert most file types into an .ico file.

