This article applies to Team and Legacy editions.
Access to resources within Centercode, whether surveys or software downloads, feedback, or forums, is controlled by the combination of Teams and Roles. In order to provide the right level of access, you may need to adjust user teams multiple times throughout a project. Given this fact, there are many different ways to adjust and control a user's team assignment, from the account's creation to triggered automation, to on-the-fly corrections. This article will cover the various methods of initiating and adjusting a user account's team assignment.
Using Recruiting
Recruiting is the first line of assigning users to teams. It's through these resources (Community and Project scope, respectively) that user accounts start their voyage into your Customer Validation program. As the first line of assignment, all subsequent Surveys, Notices, etc. hinge on where the user is placed. Check out our available self-help resources describing Recruiting here.
Using automation and User Management Actions (promoting applicants to participants)
As a common practice after an application process, where users are screened based on their Qualification Survey responses, managers often turn to automated team adjustments to fine-tune their end-user access to various resources. This is typically done in two ways: via User Management Actions or automated Notice Macros.
Note: Please refer to the Macros FAQ if you're unfamiliar with creating Macros. When creating your Macro, consider adding users to a Team and removing from the previous Team.
Via User Management
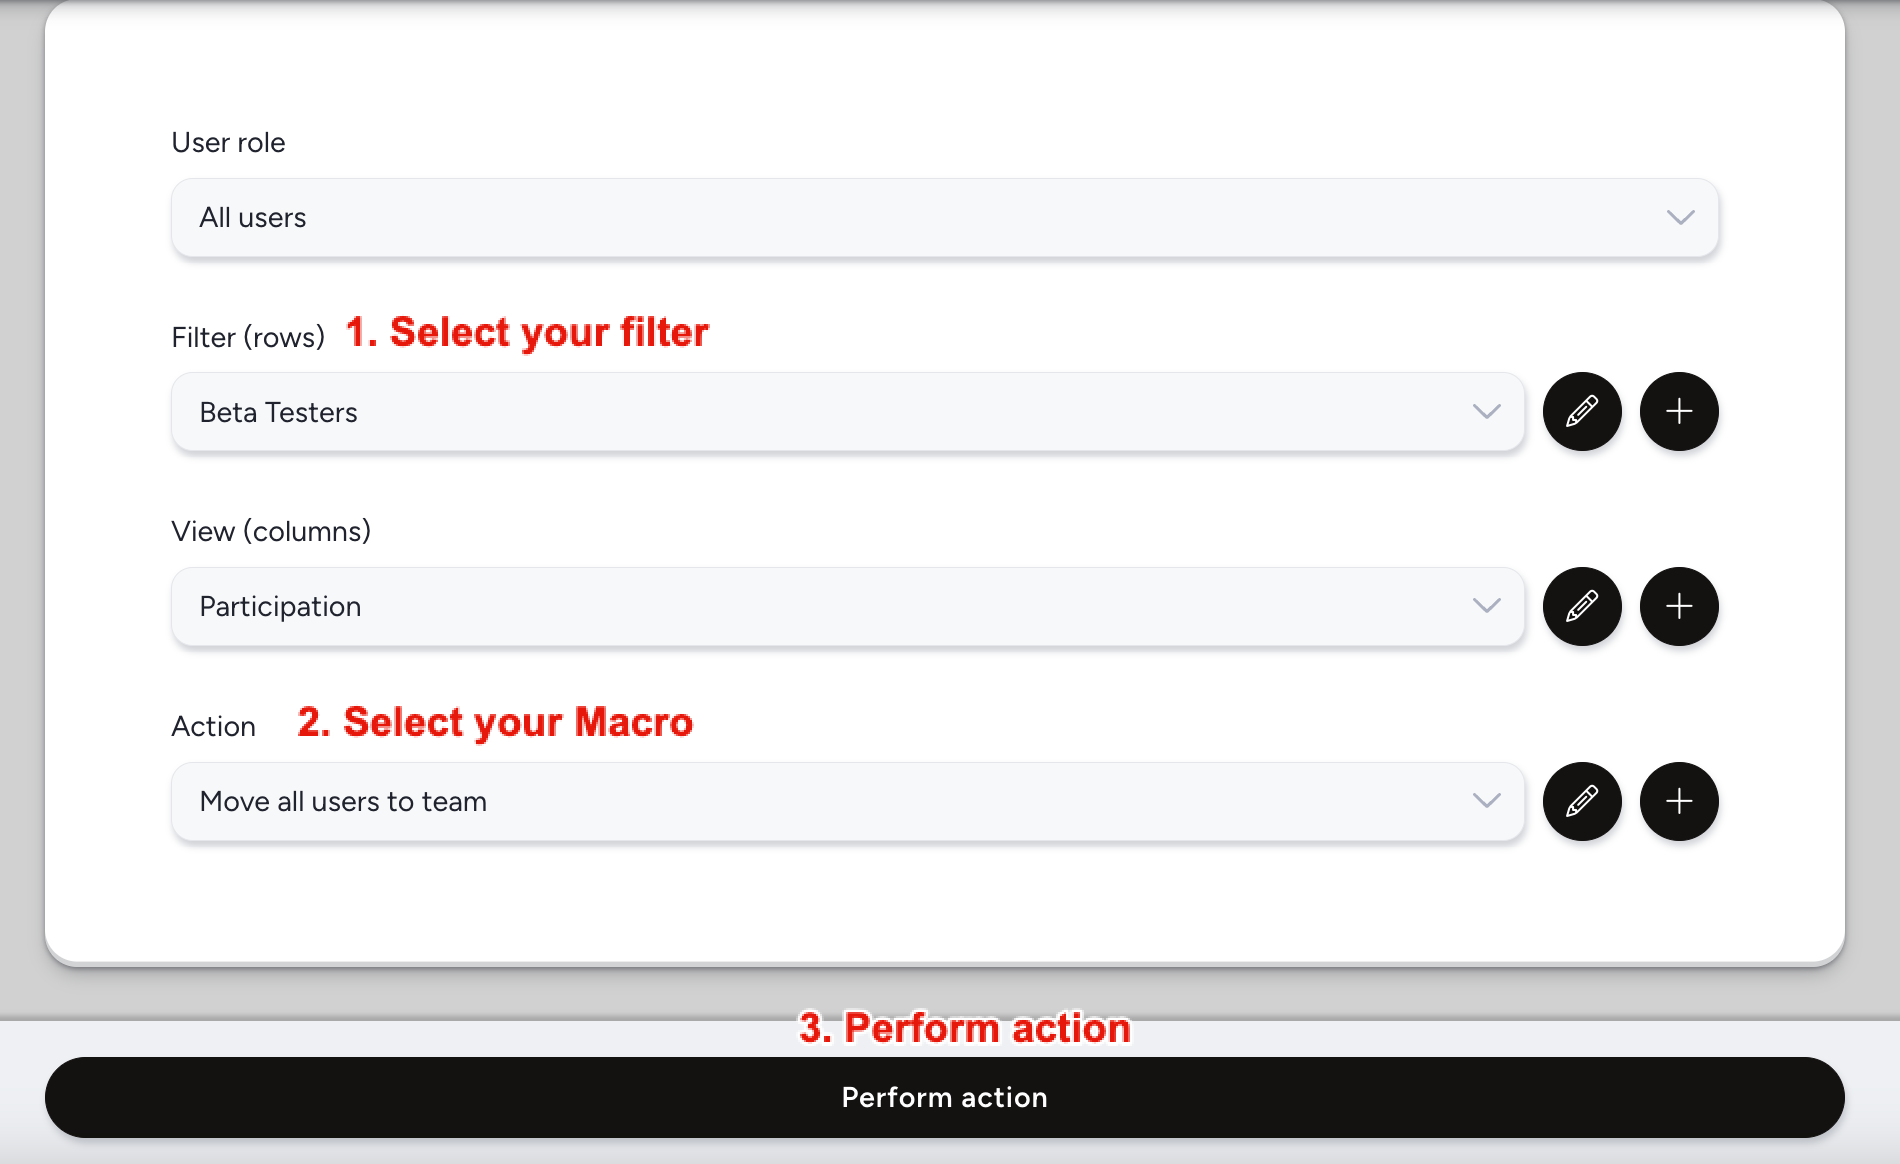
- Perform the usual User Management search using appropriate Filters and Views
Skip to Step 4 if you know the results of your Filter and want to apply the adjustment to all results - Perform action to show your list of results
- Select the users whose teams you want to adjust
- In the Action drop-down menu, select Add users to team and Submit
- To add to an existing team, select the team from the drop-down menu;
To create a new team on the fly, select the Add to new team option and enter the appropriate details;
To add the users to a team while simultaneously removing them from all their other teams, select the Remove users from previous teams check box - Click Submit to confirm
Via Automated Notice Macro
This process is a bit more complex and requires that you've configured a Macro that properly adjusts the users' teams. Please review our Notices FAQ.
Using the User Summary for ad-hoc Team adjustments
If you know precisely which users whose teams you need to adjust, accessing their User Summaries directly is the easiest and most straightforward method.
- Type some identifying information into the Knowledge Base Search Bar
This could include all or part of their name, email address, or Username - Wait for the QuickSearch to populate a short list of results
- Click the name of the user whose team you want to adjust
This will take you to their User Summary - Select the appropriate project/scope in the upper right dropdown menu
- Select the Modify access/Modify project access in the left-hand menu
- Check on or off the user's teams as appropriate
Note that you will need to expand the Team Types to avoid adding the user to all teams of that type - Click Update community/project access (depending on scope) to confirm
Using the Team Management tool
It is also possible to add one or more users to an existing team if you already have a spreadsheet of email addresses.
From the Project homepage:
- Click Management > Users > Teams
- Mouse over the team you want to add users to and click the Import button
- Add email addresses to the Add users field, 1 per line
- You can optionally select additional teams in the Team section to add the user to more than one team at a time
- Click the Submit button to confirm
From the Community homepage:
- Click Community management > Teams
- Mouse over the team you want to add users to and click the Import button
- Add email addresses to the Add users field, 1 per line
- You can optionally select additional teams in the Team section to add the user to more than one team at a time
- Click the Submit button to confirm
Notes
- In order to properly select the individual teams for assignment, you'll need to expand the User roles by clicking on the link text. (Ex: The Applicants team type houses the New Applicants, Rejected Applicants, and Accepted Applicants teams - all teams of the Applicants Team Type.)