Append custom data to users in Centercode via the External Listeners tool
This article applies to Team and Legacy editions.
Note that while Centercode’s integration features are intended to be approachable by a Customer Validation Professional, you might need to enlist help from an internal technical resource and refer to our vocabulary and troubleshooting documentation .
Through Enhanced Integrations, Centercode offers integration functionality to allow your own application to append custom data to users within Centercode. The Centercode platform allows you to generate an API endpoint to accept incoming Webhooks containing custom JSON data to further extend Centercode’s Data Engine.
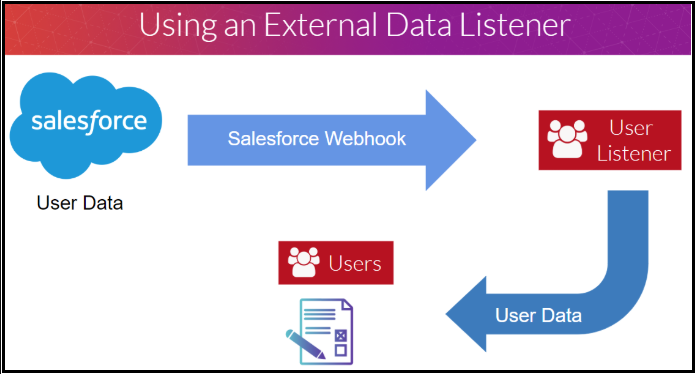
The principles included in this guide apply to any API-capable endpoint that can send data to a Centercode API endpoint in JSON format. In this example, we’ll be capturing and appending custom data sourced from a third-party app to existing Centercode users using External Listeners.
In this guide, you will:
- Create (or identify) an API Key in Centercode
- Create a User External Listener in Centercode
- Send data to the External Listener Endpoint from your application
- Review External Data received in Centercode
In order to configure both sides of this integration, you will need:
- Access to an existing API Key or Community Manager access to create a new one
- Project Manager access in the project of your choice (or your project template)
Preparing Centercode to Listen for Your External System
1. Creating an API Key
From the Centercode side, the first step in any API integration is to ensure that you have an API Key available within your Centercode Community. API Keys are used to track and control how API endpoints are accessed and can be leveraged by multiple simultaneous API integrations. If one is already created and available for use, you may continue past this step.
If necessary, create a Community API Key by following the steps outlined here.
2. Creating an External Listener
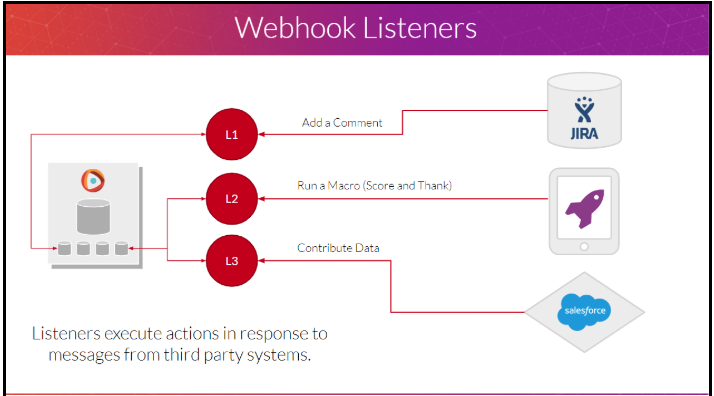
An External Listener is effectively an API endpoint created within your Centercode implementation that your third party system reaches out to. This provides a path for a system to interact with your Centercode implementation for a predetermined purpose. In this case, to append data to existing Centercode users.
From your Project Homepage:
- Click Management > Users > Project users
- Click User automation
- Click Create an external listener
- Create an (internally-facing) name
- Add a simple key to help identify this External Listener (ex: “appdata”)
- Add a Filter, if desired
- Under Listener Type dropdown, select External data
- Name your Data group label or select one existing
- Copy / Save the provided API Endpoint URL (needed in Section 3 below)
- Click Submit
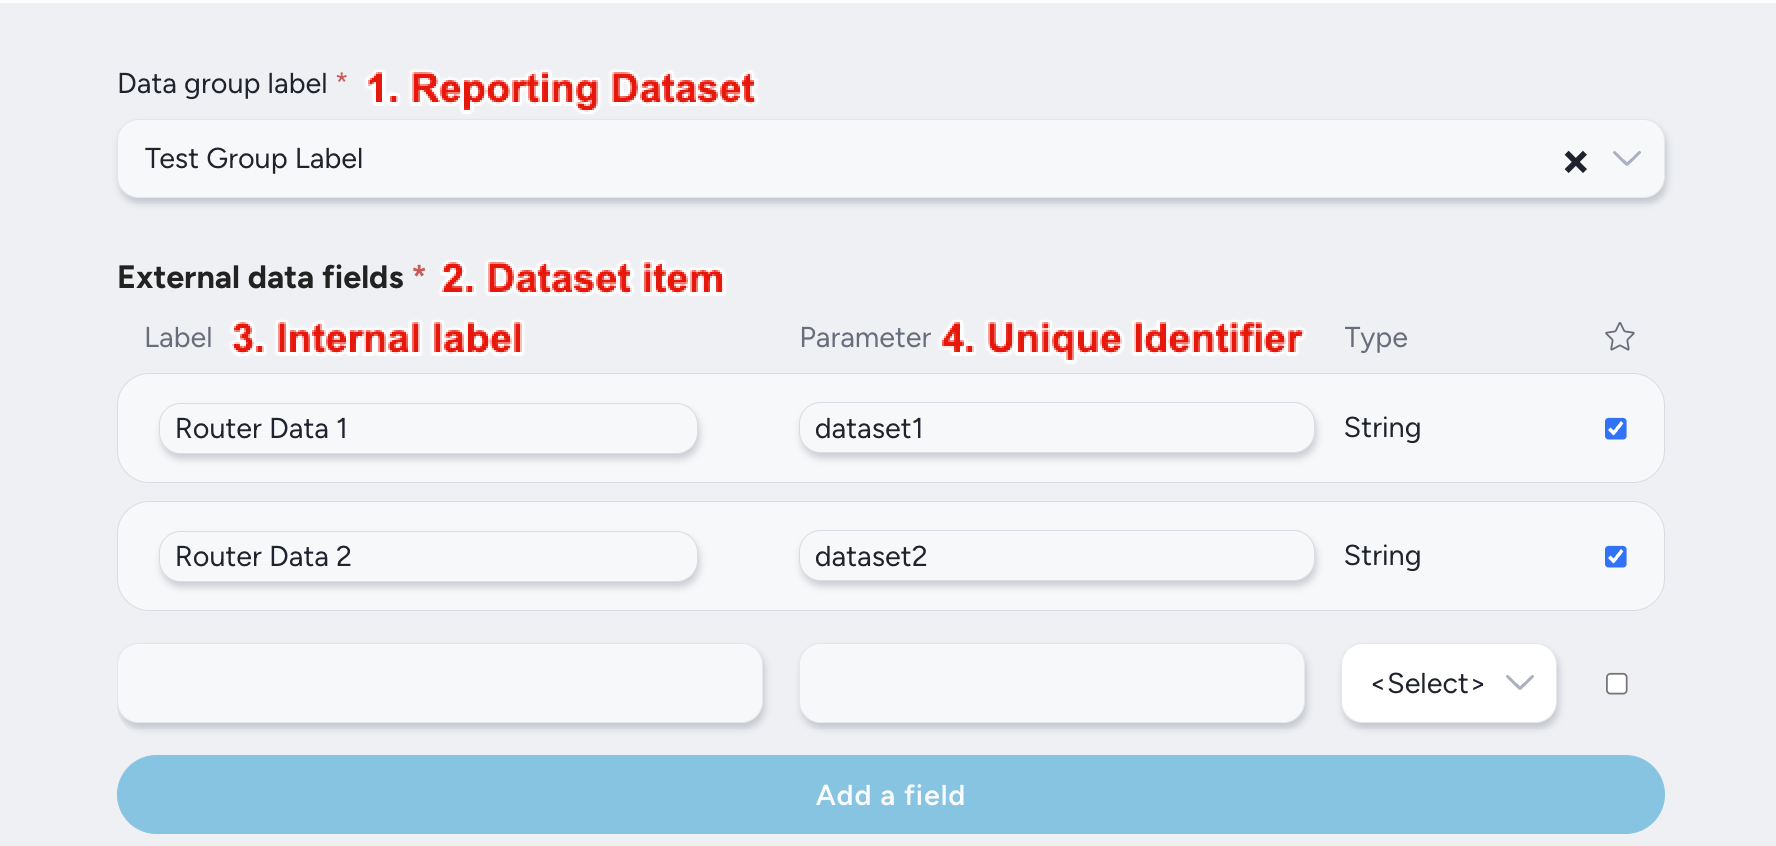

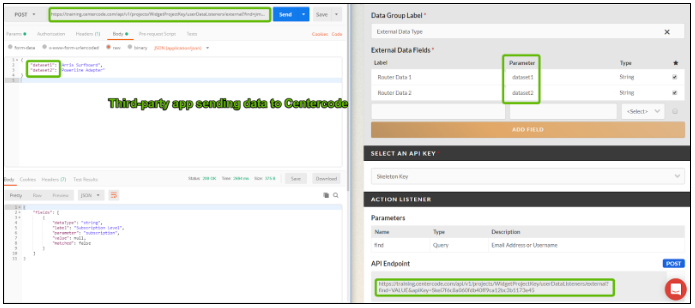
- Data group label is your Dataset
- External data fields are your Dataset items
- Label is your internal label
- Paramaters are the unique identifiers that link to data
- IMPORTANT: Replace VALUE with user email or username
- Send JSON data to the API Endpoint
Listener Notes
Data Group Label refers to how you’ll identify and categorize data captured from your external system. These groups are functionally identical to User Account, Participation, or Surveys data groups. External Data Fields are shown in Reporting and User or Feedback Management as the Label, and are mapped from your external system’s webhook request via the Parameter field.
Selecting the correct data Type allows you to report on and visualize the stored data as the correct type.
- Boolean refers to values returned as true and false
- Date and Time refers to dates and times returned
- Integer refers to numbers to be returned
- String refers to textual data returned
External Data Listeners follow the same “key value pair” design but let you pick the Label. The Parameter must still match the parameter sent by your third-party system.
3. Sending Data to Your External Listener
Now that you’ve created an API endpoint URL to capture data, you’re able to use your third-party system to send data to be captured by Centercode. Have the URL from Step 9 above ready. Please note that when sending a Post request to your Centercode API endpoint, the JSON body must be JSON encoded.
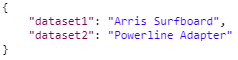
Here’s an example of Postman sending data to Centercode’s External Listener. Notice that the data sent to the API Endpoint generated and data is mapped to Paramater’s set within Centercode.
4. Reviewing your External Data
The External Data returned from your third-party system extends the reach of your Centercode Data Engine. These results can be leveraged in Reporting, User or Feedback Management, and the user’s summary or feedback ticket.
Creating your Filter
To review your results, you can simply create a custom Filter and View within User Management, or build a report. Building a Filter hones the scope of data you want to see. You’re setting criteria you want your data to match. If you'd like to see all results, No Filter may work for you.
- Click Users or your Feedback Type in the Management section of the navigation bar
- Click the + button to the right of the Filter drop-down
- Select the desired Data set, Item, Default qualifier, and optionally a Default value
- Click Add to filter
- Repeat steps 3 and 4 until all desired Filter criteria have been added
- Click the Create filter at the bottom
Creating your View
Once your Filter is complete, it’s time to build a View. Typically, the View is the information you’d like to see regarding your filtered results. In this example, we’re selecting your External Data.
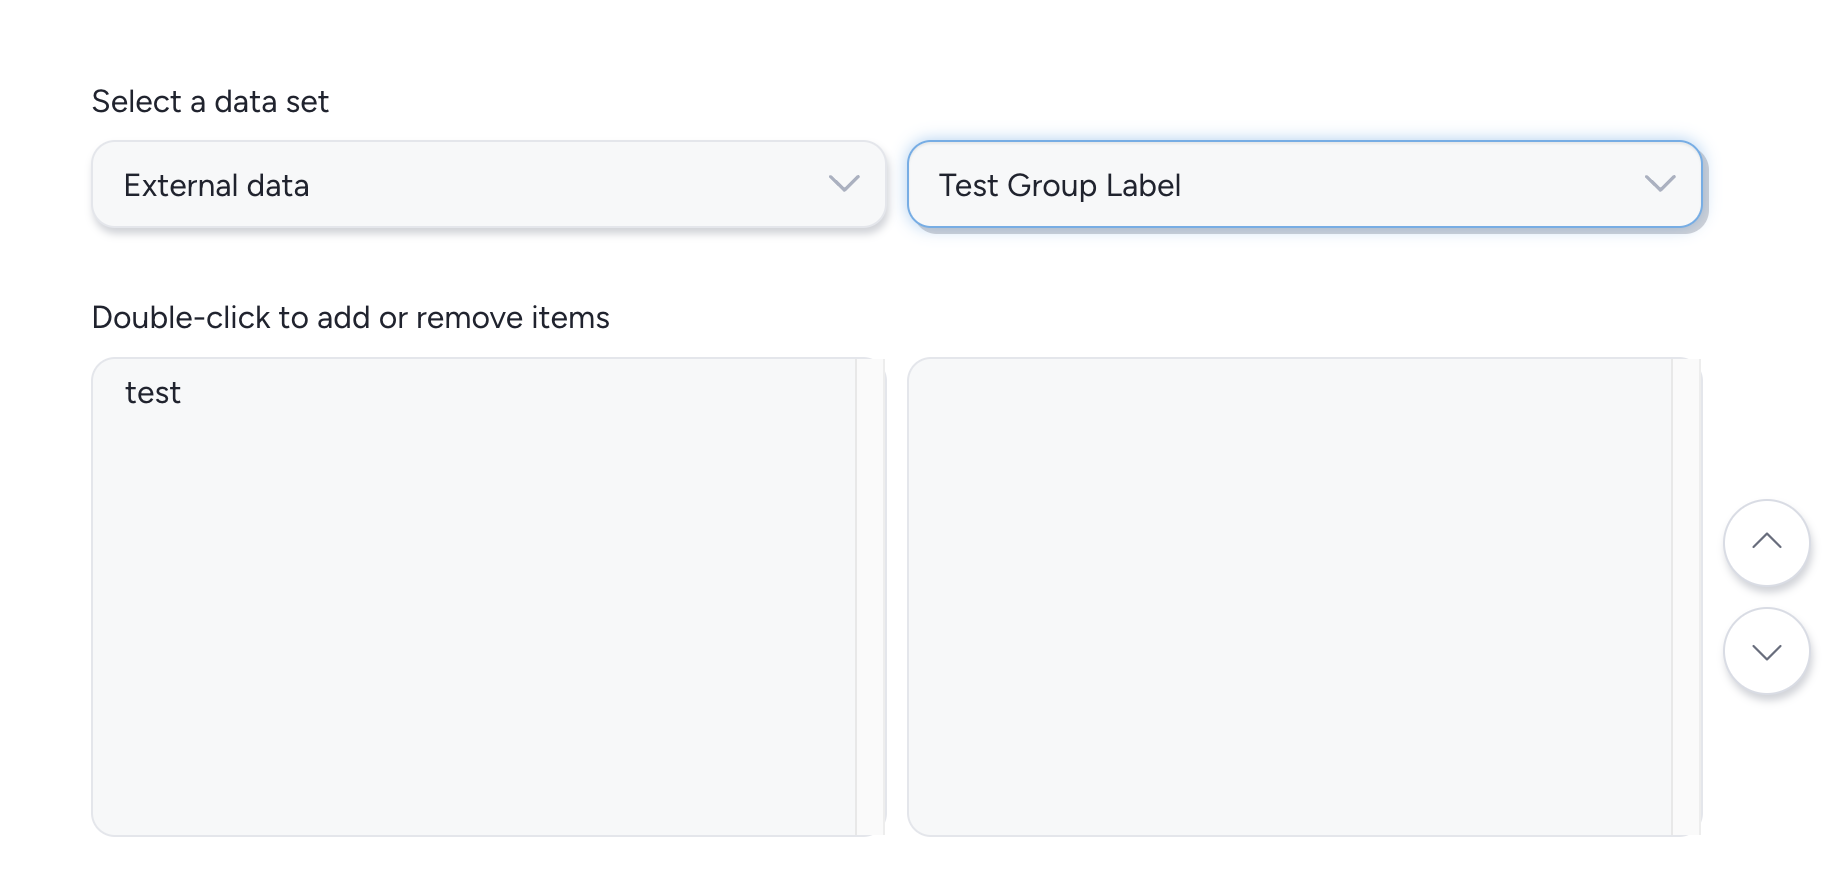
- Click the + button to the right of the View drop-down
- Select the Data set and highlight the item in the left text field
- Double-click the item to move it to your View.
- Repeat steps 2 and 3 until all desired View items have been added to the View
- Click Create view and execute to see your results
Creating a Report
All Report creation is done on a single page and shows your data in real-time. Reporting can analyze your data, report distributions, and generate exports.
- Click Management > Custom reports (For Community Report, click Community Tools first)
- Click Create a report
- Select datasource: Single elements contain user or project information.
- Select your data - This is where you’re selecting your External Data
- Add filter, if desired
- Pick a Style - Visual presentation of your report element. Available styles determined by data items selected.
- Name report element and choose destination.
- Click Submit to proceed to the next page.
- Name your Element
- Click Submit to save and generate your Report.
Once you’ve created your report(s), your preferred method of consumption and dissemination will lead you down any of three paths. First, you can view your report directly within the Reporting interface. Second, exporting the report to PDF, CSV, or XLSX allow you to take the data off-line or into a more manipulable format. Finally, you may prefer to send that report and all its contents to your stakeholders for review through a regularly scheduled distribution.
Exporting Report Data
Your data doesn’t have to live solely within your Centercode implementation. Exporting your saved reports allows you to take your data off-line which you may put into a format able to be manipulated. Exporting complete reports or individual elements are available in a number of valuable formats: PDF, CSV, or Excel’s XLSX. These allow you to consume the information within however you see fit.
Distributing Reports
Distributing a Report sends you a complete package of formats that includes both reporting formats (PDF & XLSX), as well as an HTML email. You can choose to send a one-off distribution to the email address(es) of your choice or set up an automatic, scheduled distribution to entire Project Teams or a list of individuals.
Please note that when sending a Post request to your Centercode API endpoint, the JSON body must be JSON encoded.