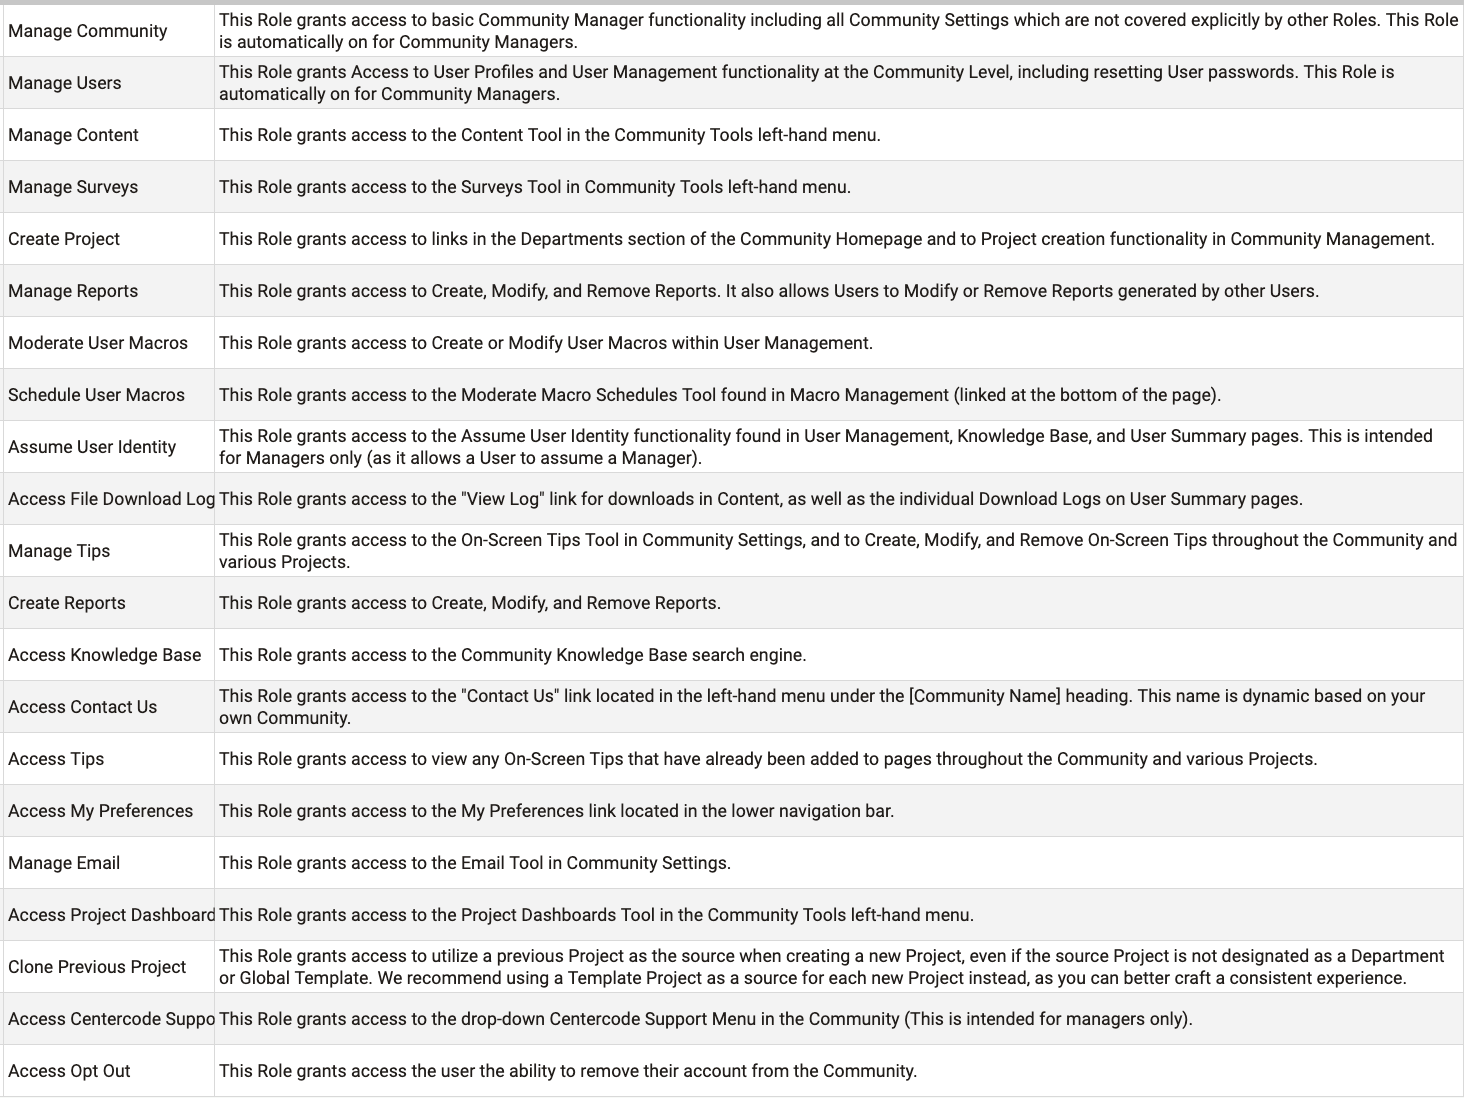
Community Roles designate what resources a particular User role can or cannot access.
This article applies to Team and Legacy editions.
Community-level Roles allow Community Managers to designate access rights to Teams. Where Project Roles apply only to that particular Project scope, Roles granted at the Community span the entire Community scope.
The following is a list of Roles at the Community level and their functions:
From the Community Homepage:
- Click your Community logo link on the left of the upper navigation bar.
- Click Community management > Roles
- Select the desired User role from the drop-down field at the top of the page.
- Check or un-check Roles as desired.
- Click the Submit button at the bottom of the page to confirm.
You have successfully modified Community Roles.
Requirements
- Manage Community role
Notes
- You can work with multiple User roles at once and wait to click on the Submit button until all Team Types are configured as desired.