Test Platforms are initial surveys given on the Community level that profile what type of devices users own and utilize as well as the various details pertaining to them.
This article applies to Team, and Legacy editions.
Test Platforms are typically used to collect details from your Users about a particular device or product that they own and use (such as a personal computer or mobile phone). Test Platforms should not ask for details about multiple devices on the same form. Users will submit one Test Platform for each device they own. For example, when entering a Mobile Phone Test Platform they may enter it once to provide details about their Home Phone and a second time to describe their Work Phone.
Test Platforms can be used as part of Project participant selection, as well as becoming available as an attachment to other form types to associate them with that User's device or product (most typically a personal computer Test Platform would be attached to a Feedback bug form in a Project to inform the developers what type of system specs were being used when the bug occurred).
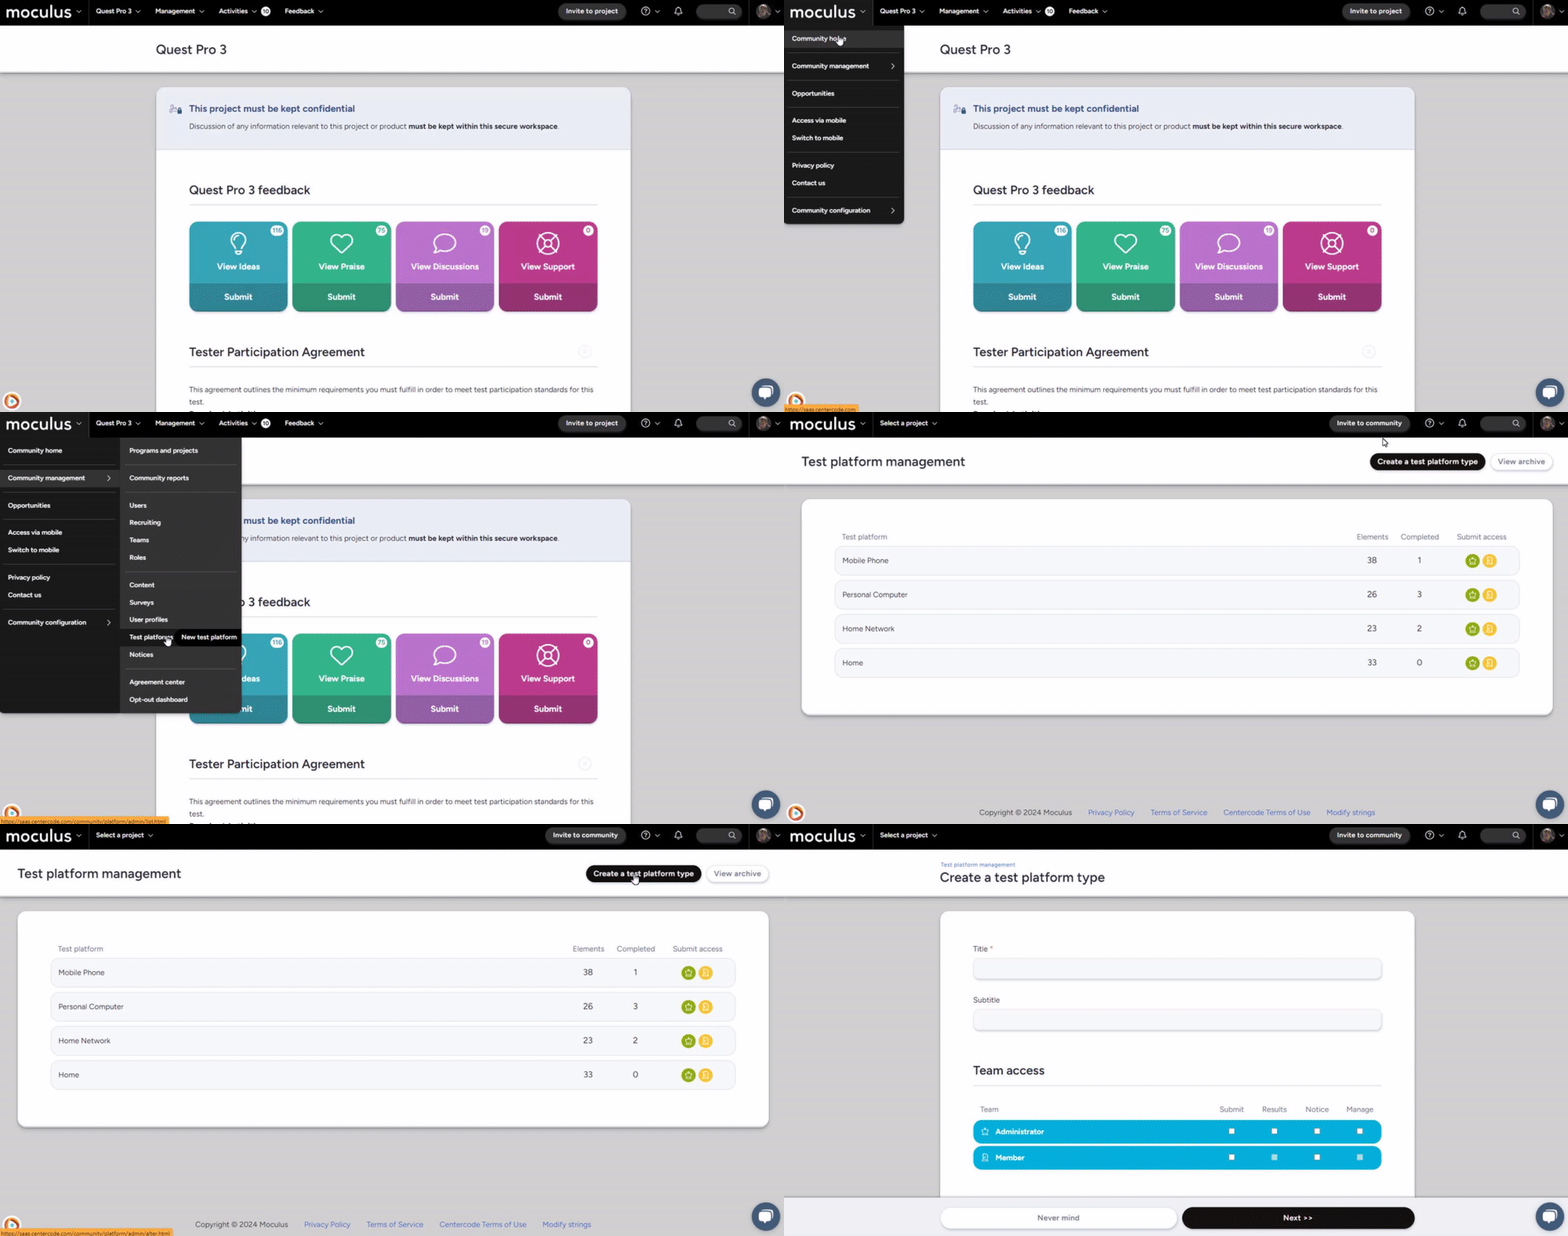
Create a Test Platform Type:

From the Community Homepage:
- Navigate to the Community Logo > Community Management > Test Platforms
- Click the Create a New Test Platform Type link at the bottom of the table.
- Complete the Basic Options, Team Access, and Advanced Options as desired.
- Click the Next button at the bottom of the page.
- Click the Create a Form Element link at the top of the form.
- Select the desired Element Type and then fill in the settings for that Element.
- Click the Submit button at the bottom of the form.
- Repeat steps 5 - 7 above until you have added all desired Elements.
- Click the Return button when satisfied to complete the process of adding Elements and return to the form.
- Click the Activate Platform button at the bottom of the page.
You have successfully created a Test Platform Type.
Modify a Test Platform Type:
From the Community Homepage:
- Navigate to the Community Logo > Community Management > Test Platforms
- Click the table cell of the desired Test Platform Type.
- Make desired changes to the Basic Options, Team Access, and Advanced Options as desired.
- Click the Submit button at the bottom of the page.
- Hover over the table cell of the desired Test Platform Type and click the Form icon.
- Click the Modify link beneath an Element you would like to change.
- Make desired changes, then click Update Element.
- Repeat steps 6 - 7 for each Element you would like to change.
You have successfully modified a Test Platform Type.
Remove a Test Platform Type:
From the Community Homepage:
- Navigate to the Community Logo > Community Management > Test Platforms
- Hover over the table cell of the desired Test Platform and click the Archive button to archive the profile.
- Click View Archive in the upper right.
- Hover over the table cell of the desired Test Platform Type and click the X icon to the right.
- Click the Yes, Delete this item link to confirm the removal of the Test Platform and all collected data.
You have successfully removed a Test Platform Type.
Steps 2 and 3 are only necessary if the Test Platform is active, an inactive Test Platform can be deleted directly from the Test Platform Management screen.
Requirements
- Manage Community Role
Notes
- Once created and active, End-Users that have access to submit the Test Platform will be able to add and manage their Test Platforms automatically using the form that you built above!
- Test Platforms should not ask for details about multiple devices on the same form. Users will submit one Test Platform for each device they own. For example, when entering a Mobile Phone Test Platform they may enter it once to provide details about their Home Phone and a second time to describe their Work Phone.
