![New_Centercode_Logo.png]](https://help.centercode.com/hs-fs/hubfs/New_Centercode_Logo.png?height=35&name=New_Centercode_Logo.png)
This article applies to All editions.
How do I create a new project?
Creating a new Project is quick and simple and allows you to set up a portal for users to beta test new software/hardware.
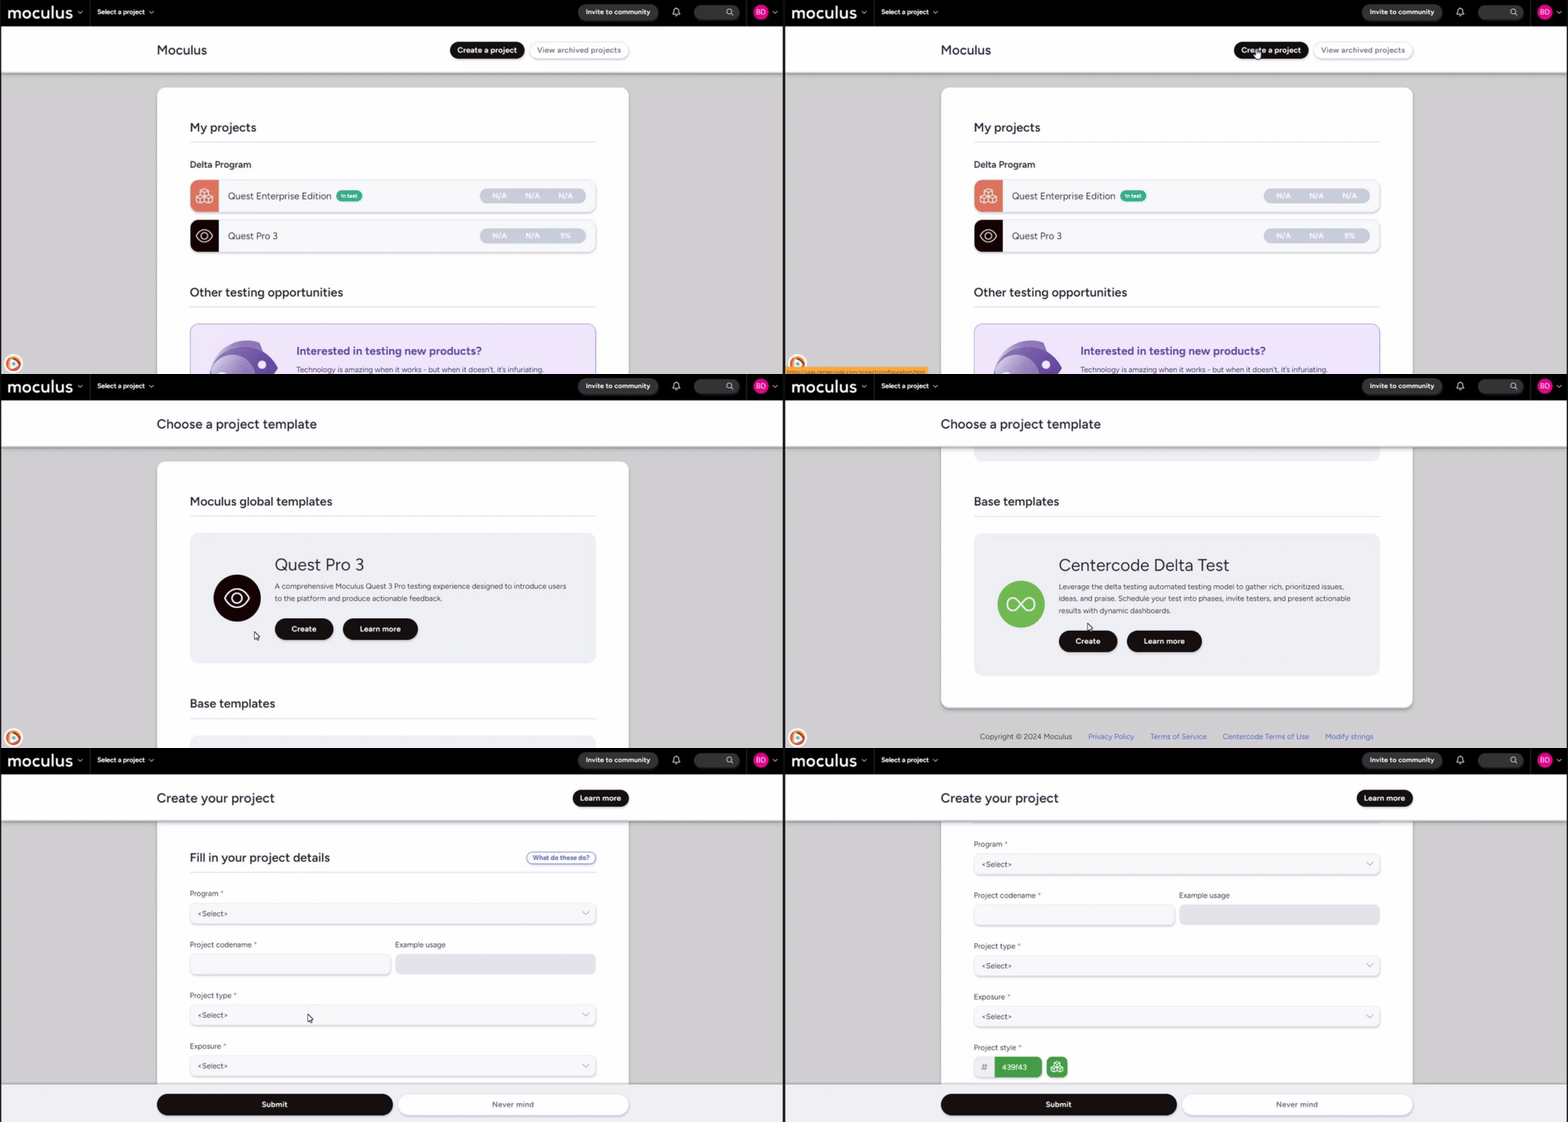
From the Community Home:
- Click Create a Project in the upper right corner of the homepage and choose Centercode Delta Test. (If you only have a single Project Template, you will skip the template select screen and proceed directly to the basic project settings.)
- You may have other Project Templates to choose from. For more information on cloning projects and project templates, review the Project Creation and Cloning FAQ.
- Set the desired Project Codename and complete the other Project configuration details.
- Click the Submit button at the bottom of the page to confirm.
What Is Not Cloned When Using a Project Template?
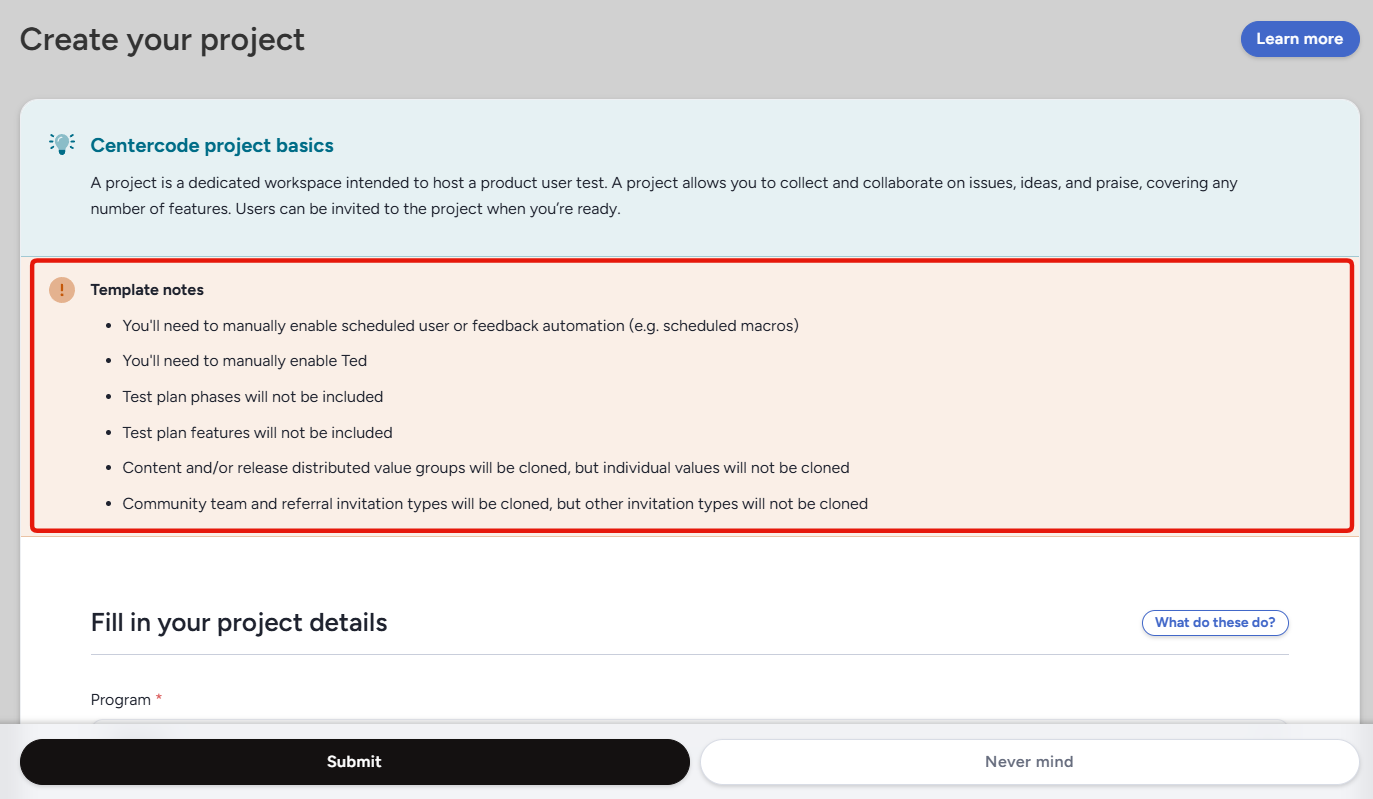
When cloning a program template or global template, the system will check for any items which cannot be cloned or activated. If such items exist, a warning message will appear in the basic settings during project creation.
The following aspects of a Project Template will not clone, and will need to be set up manually:
- Basic project settings
- An active macro schedule (user/feedback)
- If a survey has the “Require Completed Activity” option enabled.
- Any active phases (excludes phaseless/new user/regression)
- Any active features
- Feedback form elements conditional on a feature element
- Macros that affect a feature element
- Distributed values
- Opportunity sources besides referral, quick invite, and community team (team access)
Notes
- Check this article that details the various Project Settings for more information.
- If you only have a single Project Template, you will skip the template select screen and proceed directly to the basic project settings.
- Manager created areas will exist, but user generated data will not. This means that all user submitted content like feedback data/submitted surveys will NOT carry over.