Table of Contents
- How do I reset an account's password?
- A user is unable to reset their password
- Inactivity timeout windows
- Community age requirements
- How can I change a user's account information?
- How do I assume a user's identity?
- Why is my avatar image not updating after I upload a new image?
How Do I Reset an Account's Password?
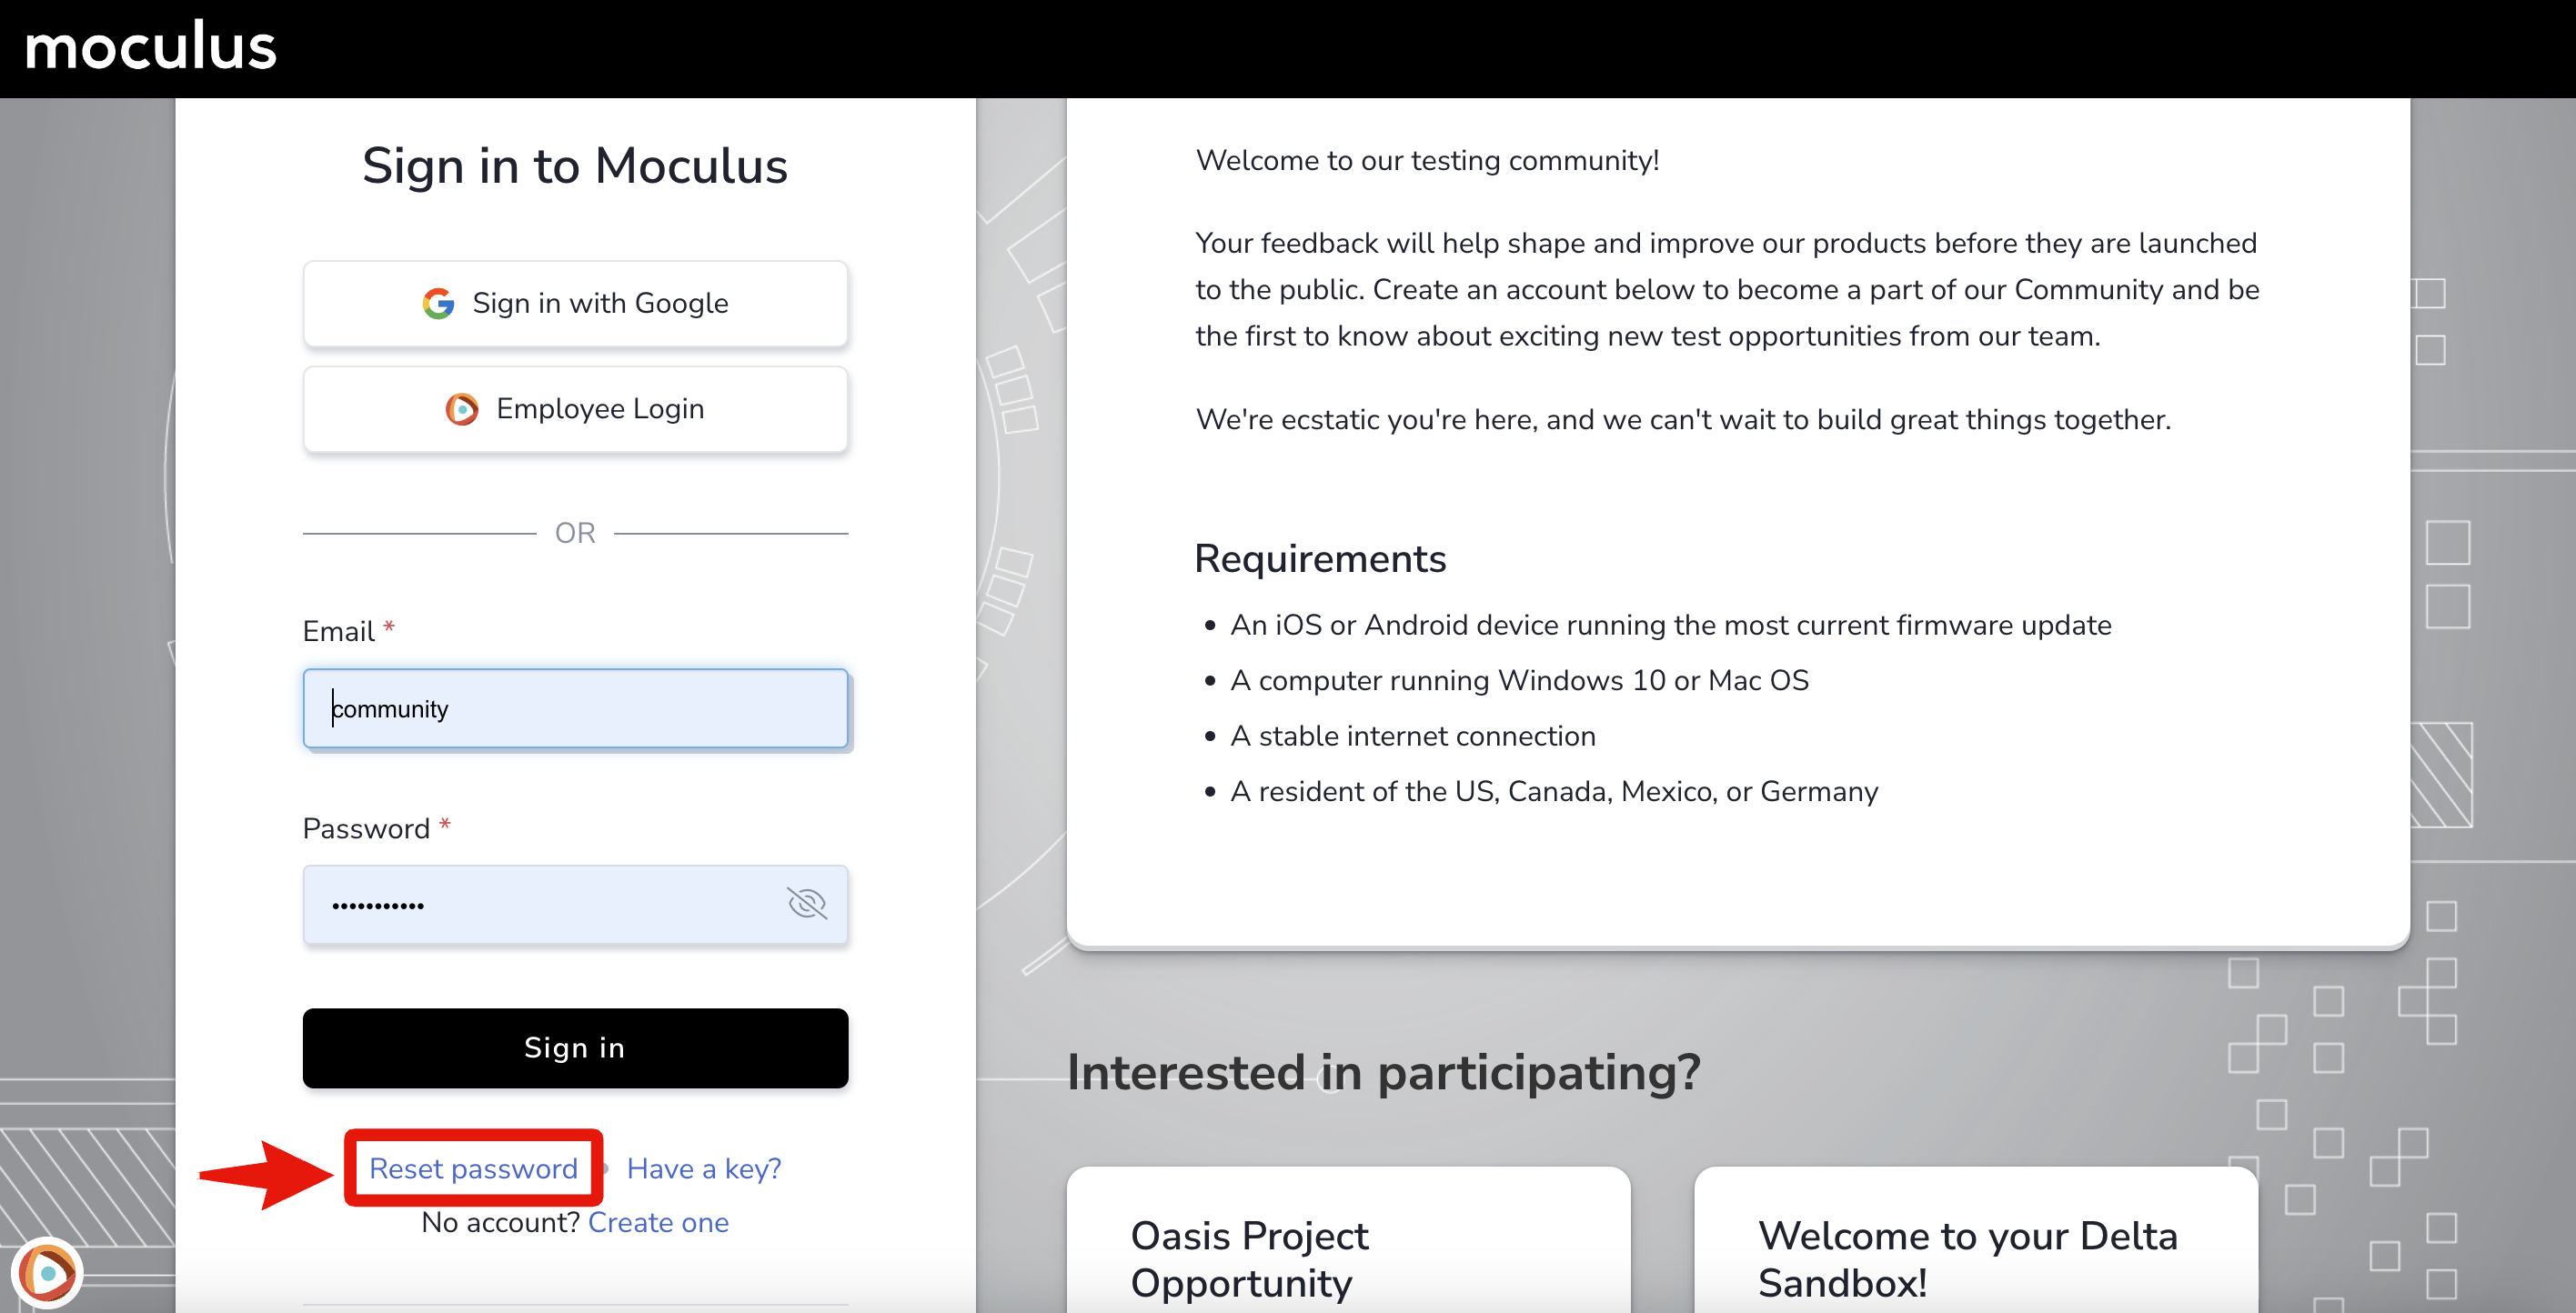
There are two ways to reset a password in Centercode.
Users can trigger a password reset from your Centercode implementation's homepage:
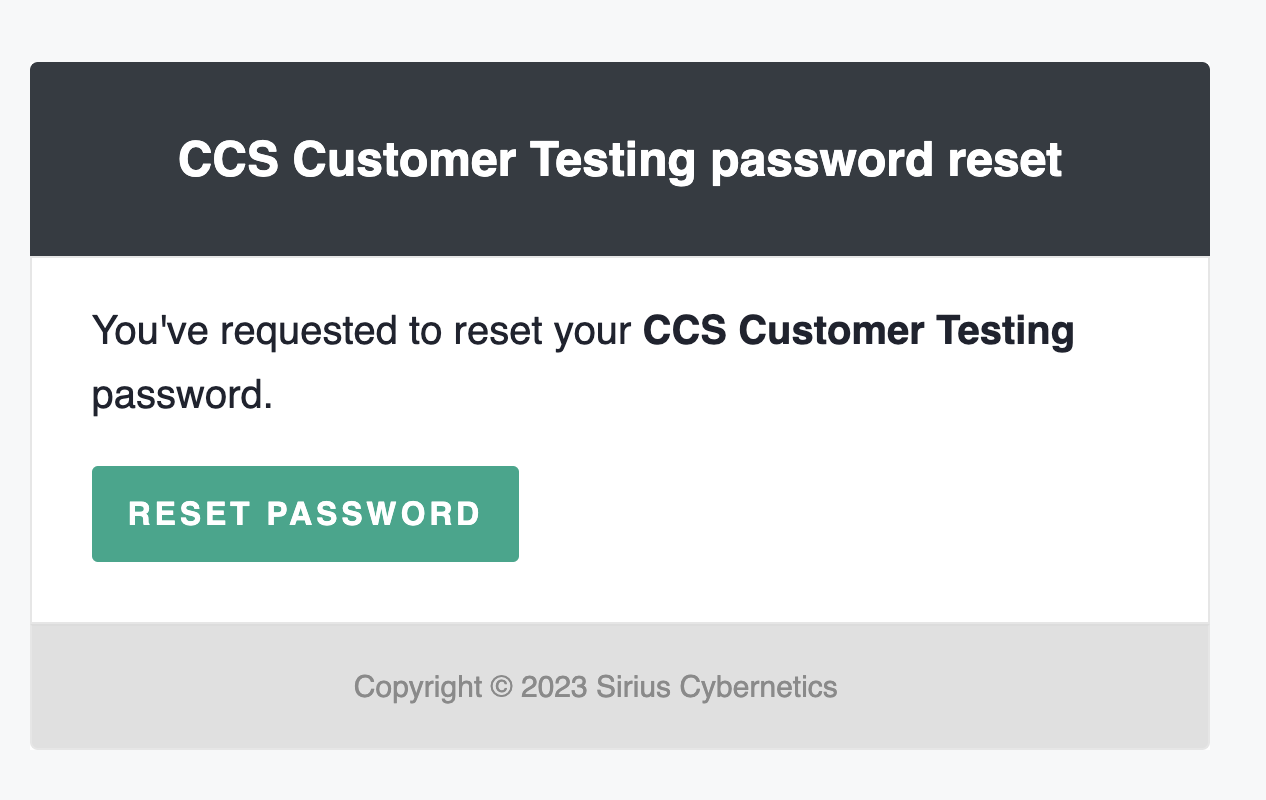
The resulting email will look like this:
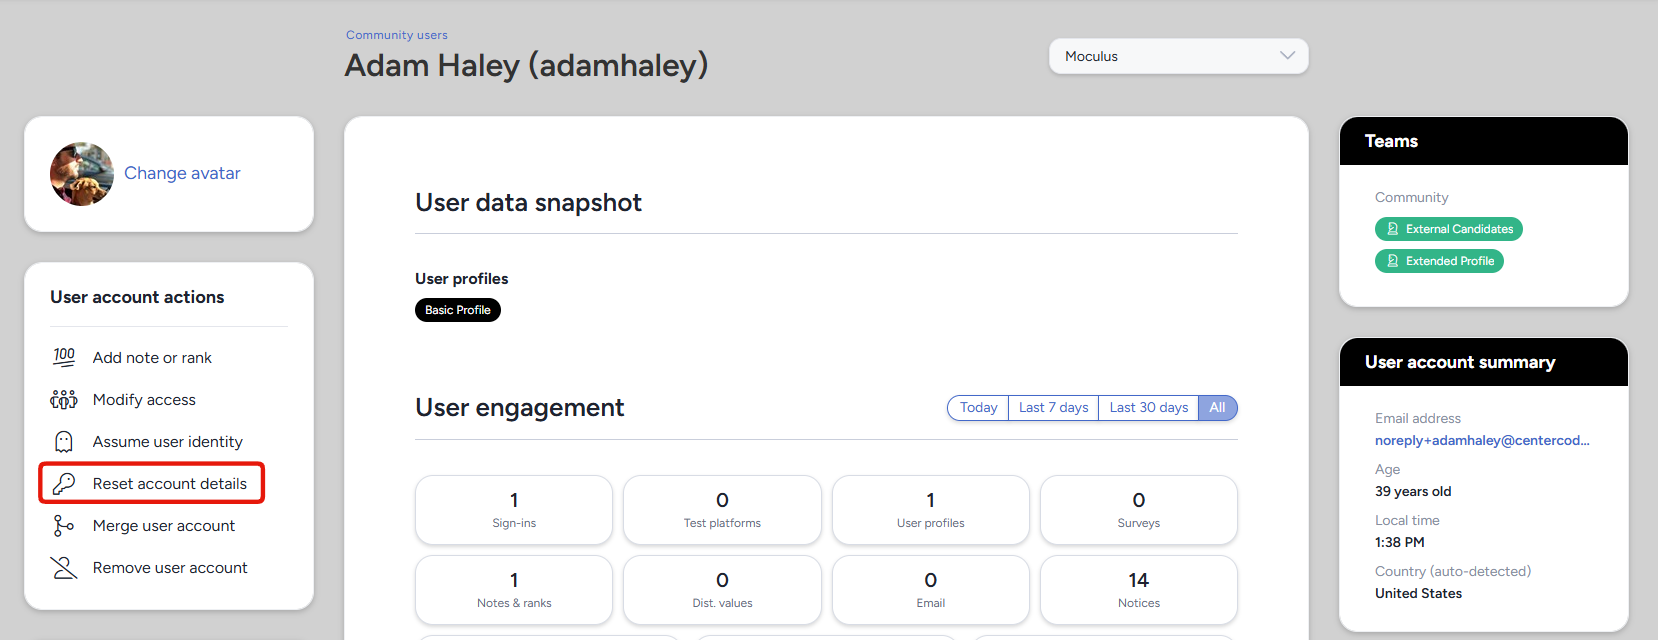
Administrators with the Manage users role can also trigger a password reset from the user summary page:
A User Is Unable to Reset Their Password
This error occurs for one of three reasons:
1. The password reset link has already been used. Reset links can only be clicked once. If a company email security system previews or scans the email, it may invalidate the link before the user can use it.
2. The password reset email expired. Links expire 24 hours after the request.
3. Multiple password reset emails were triggered. Each new request invalidates the previous one. Users should only access the most recent email.
Notes:
- The user must have an account with the requested email address to receive a reset email.
- For security purposes, the system always says an email is being sent, even if no account exists for that address.
Inactivity Timeout Windows
Centercode implementations start with a 30-minute inactivity timeout. When the timeout is reached, users receive a Session Warning popup prompting them to re-engage.
You can request an extension of up to 2 hours without affecting platform functionality such as user automation, notices, or session IDs. That is the maximum Centercode recommends. To request an extension, contact help@centercode.com with your contact information and implementation details.
Timeout windows are global and apply to your entire community. They can't be targeted to specific users.
Community Age Requirements
Centercode's Age Gate feature lets you set and enforce a minimum age for all current and future users in your community.
How do I set a minimum age?
1. Click the Community logo in the upper left corner.
2. Navigate to Community configuration > User account settings.
3. Scroll down to Date of birth settings.
4. Select Age restricted from the drop-down.
5. Enter the minimum age for your community.
6. Click Submit to confirm.
What will users who don't meet the minimum age see?
When creating a new account, users are prompted to enter and confirm their date of birth. If their age falls below the minimum, no account is created and they receive a message that the community isn't currently accepting new members.
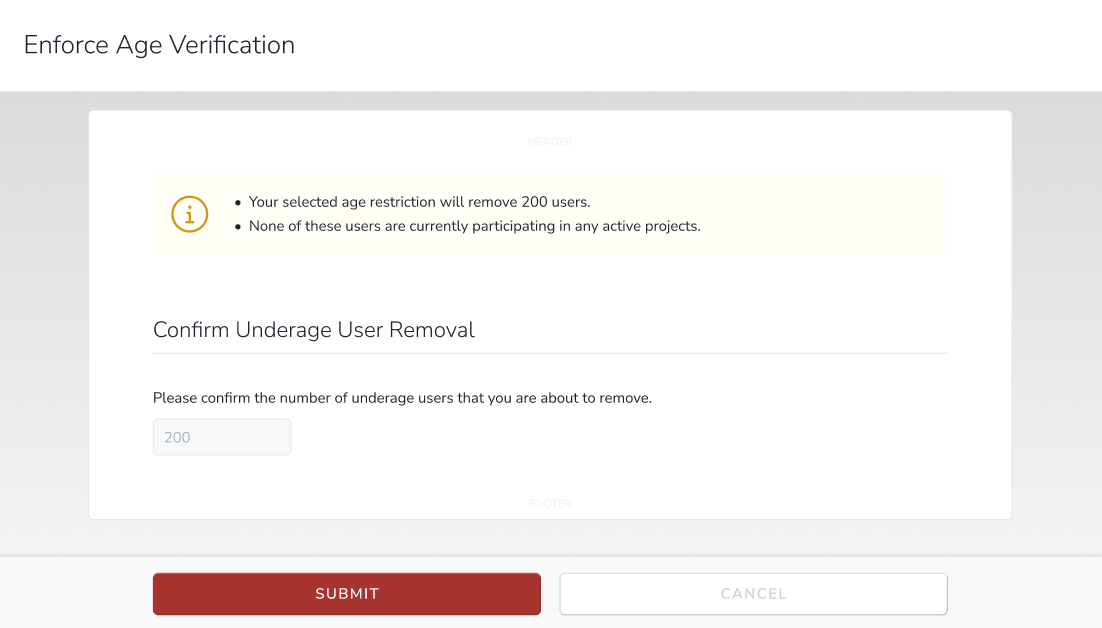
What happens to existing users when I set a minimum age?
The Age Gate tool automatically scans existing user date-of-birth data. Two scenarios can occur depending on whether underage users are active in projects.
Scenario 1: Underage users exist but none are active project participants. You'll see a confirmation screen with the count of users who will be removed. Age verification activates from that point forward.
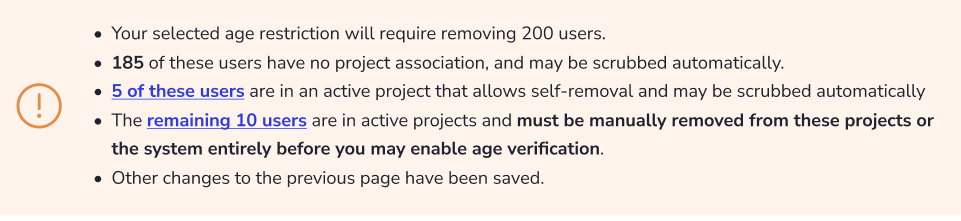
Scenario 2: Underage users are actively participating in a project. You'll see a breakdown of these users and any factors that prevent automatic removal. You'll need to manually remove users in projects that don't allow self-removal before age verification can be enabled.
What happens when an existing user enters an underage date of birth after age verification is enabled?
If the user isn't in any active projects, they'll receive a message that their account is being removed and the account will be deleted automatically.
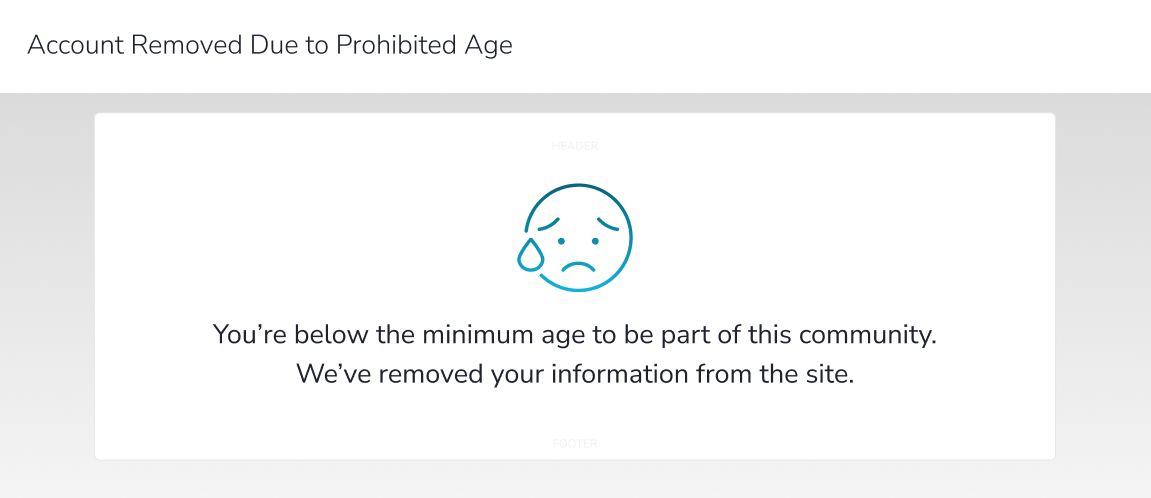
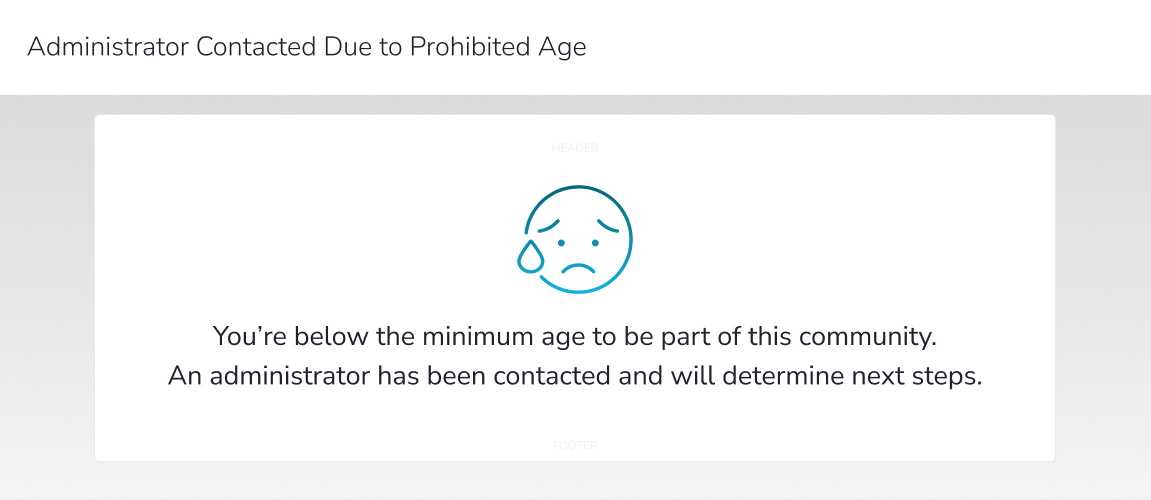
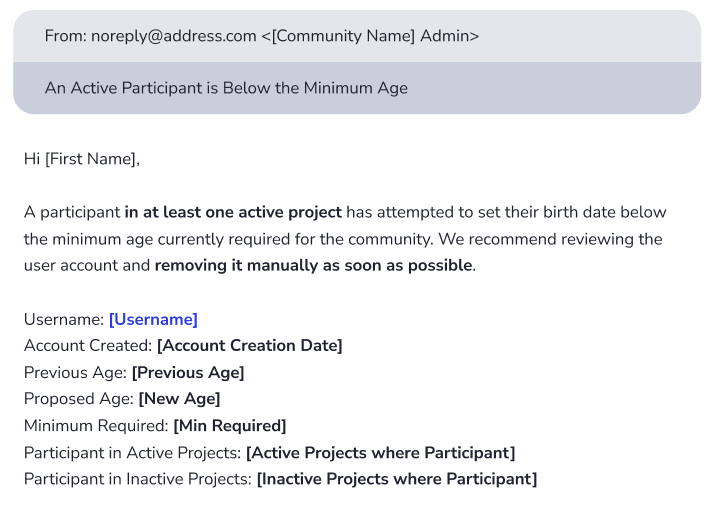
If the user is in at least one active project, they'll be told they're below the minimum age and that an administrator has been contacted. An email notification with the user's information is sent to your Community Support email address.
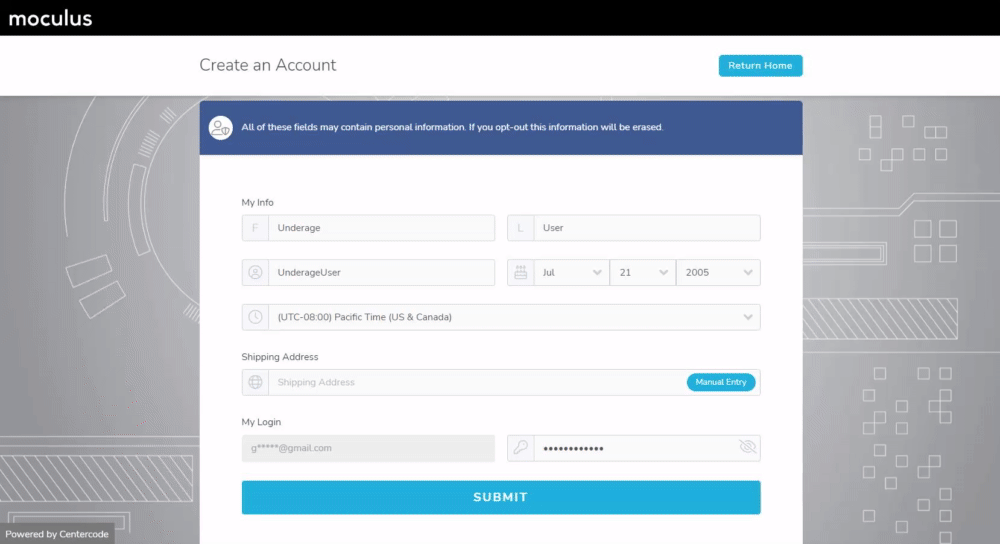
How Can I Change a User's Account Information?
If a user can't access their account to update their own information, a community admin can assume the user's account and make changes on their behalf via My account settings in the upper-right drop-down menu. See the next section for instructions on assuming a user's account.
How Do I Assume a User's Identity?
With the appropriate access, you can impersonate another user's identity in your Centercode implementation to troubleshoot obstacles or submit feedback and survey responses on their behalf.
From the community or project home:
1. Type the username into the knowledge base search bar in the upper-right corner.
2. A Quick Search page will open with matching results.
3. Hover over the desired user and click the Assume icon.
Requirements: The Assume user identity role at the appropriate scope (community or project).
Notes:
- Assuming is scope-specific. Assuming at the project level applies only to that project — leaving the project ends the assumption.
- Make sure the knowledge base search drop-down is set to Global or Users for your user list to display correctly.
- Assuming a user bypasses the notice chain and is not suitable for testing community or project-level notices.
Why Is My Avatar Image Not Updating After I Upload a New Image?
If a newly uploaded avatar isn't reflecting the change, you're most likely seeing a cached version of the image. A hard browser refresh forces the browser to pull the new version. Common shortcuts are Ctrl+F5 in Chrome and Command+Option+R in Safari, though the controls can vary by browser.