Customizing your Invite to Project landing page and how to add or remove the Create Account option from your login page.
This article applies to Team and Legacy editions.
To change your Default Community Opportunity (your Community's login page), navigate to your Community Onboarding tool and locate your default Source associated with a Dedicated URL Source, (IMPORTANT) then click into the associated Opportunity.
The Opportunity that the Dedicated URL Source is underneath controls the landing page text that users see when they log into your Community.
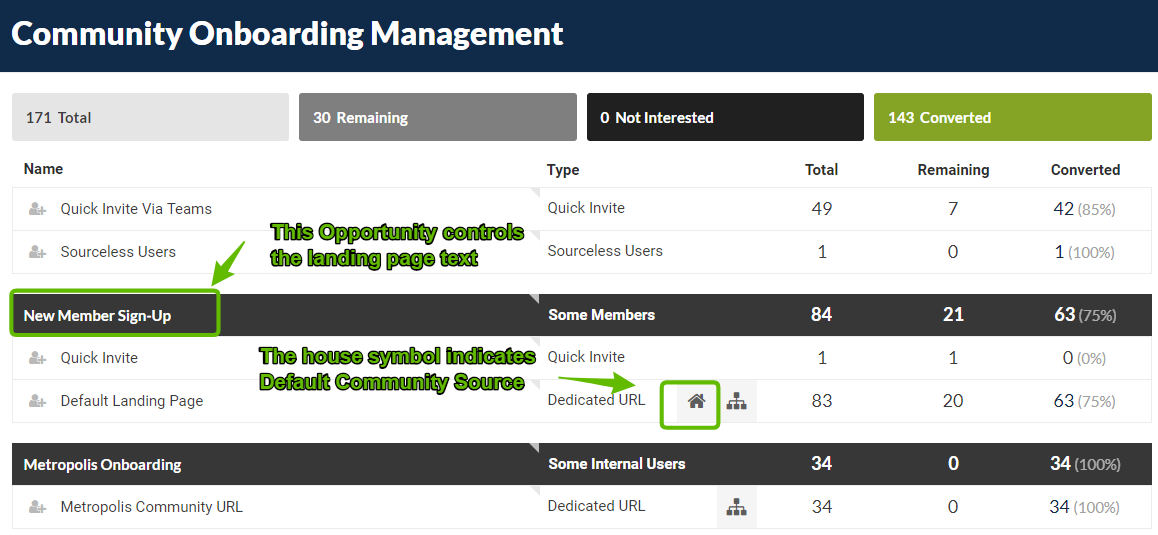
- If no house icon is shown, you do not have a default Community Source in use. Locate a desired Opportunity Click on any Dedicated URL Source and choose it as your Community default by checking the “Use as Default Community Source” box and hitting submit.
- To disable the ability for users to openly create accounts in your Community, deactivate your Default Community Source. Click into the row on which the house icon is located, then find “Use as Default Community Source”. Toggle that checkbox off.
Customizing your Invite Users Landing Page
Users invited via Invite Users are not technically under a specific Opportunity and have their own unique landing page to customize. Here is how to customize the landing page seen when using Invite Users:
- Navigate to the Community or Project level Recruiting Management page
- Hover over the Quick Invite Via Teams source
- Click the Modify Pencil
You can now enter the information you would like displayed to users you invite via Invite Users before they enter your community/project.