The survey management page is the primary method you'll use to interact with your community and project level surveys. From this screen you can view all unpublished and currently available surveys, create new surveys, and view vital information about existing surveys.
Click here for help building your surveys using the Centercode Form Engine
.
Accessing survey management
To access your community level surveys:
- Click the upper left Community logo
- Select Community management>Surveys
To access your project level surveys:
- Make sure you are viewing the appropriate project
- Select Management
- Click Surveys
Survey management functions and settings
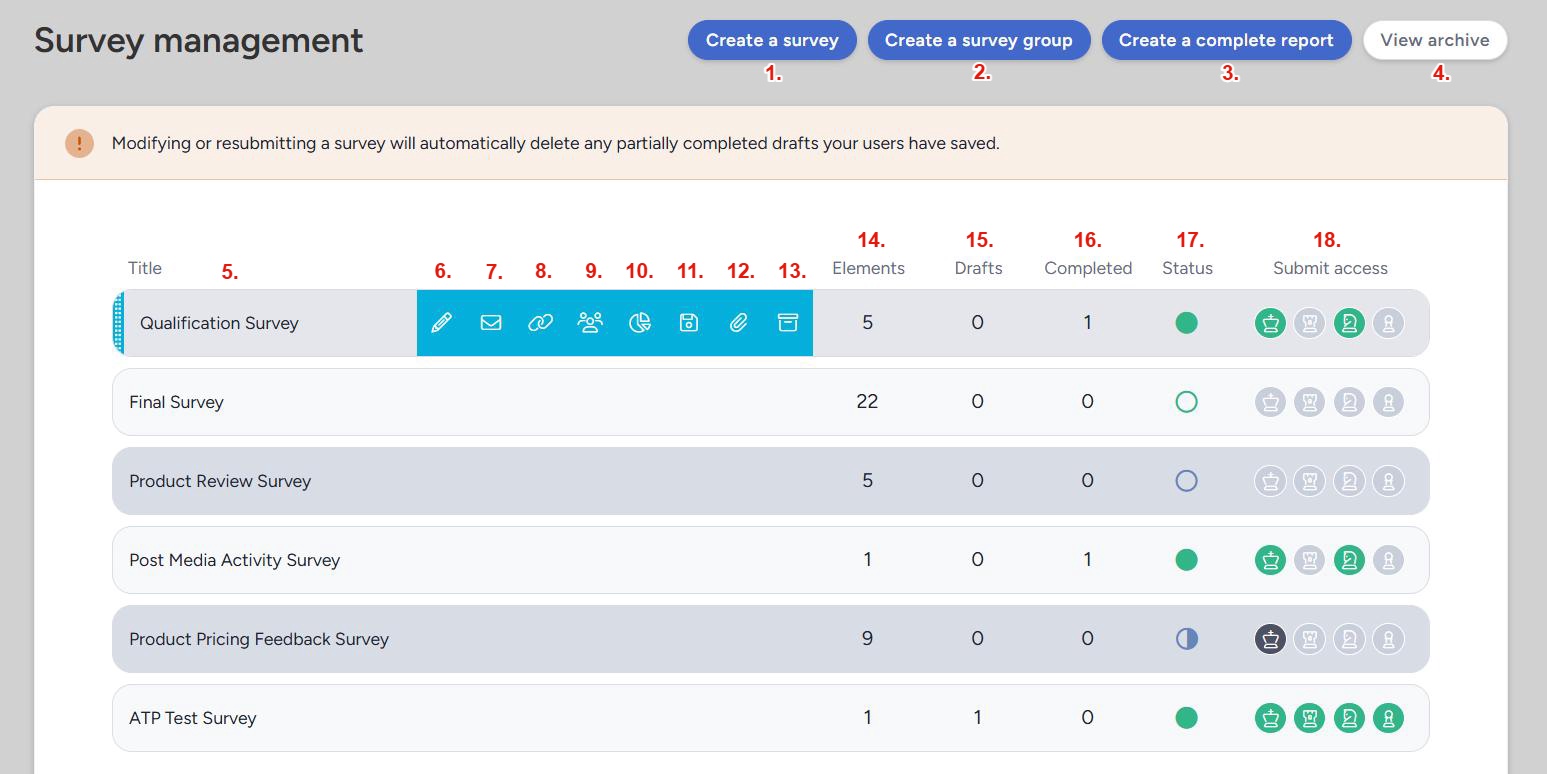
Create a survey: Use this button to create a new survey (more info here).Create a survey group: Create a survey group. Survey groups can be used to group your surveys for organizational purposes. They will be grouped and displayed together in the survey management page, and group together in a fly-out menu when displayed in the activities menu.Create a complete report: Generate a report on one (or multiple) of the surveys on your survey management page (more info here).View archive: View and manage your archived surveys.Access survey form: Clicking on the survey name will take you to the form view of the survey where you can add and customize the elements contained in the survey (more info here).Modify: Modify the basic settings for the survey (more info here).Notify users: Notify/remind users of a surveys availability (more info here).Survey link: Generate a link to a survey that can be given to users with appropriate survey accessCompleted user list: Automatically generate a filtered user list of users who have completed the surveyCreate report: Generate a report on the highlighted survey (more info here)Export: Generate a survey report set up to export your survey results as a CSV or XLS fileExport files: Generate and prepare a download link to a compressed file containing all files uploaded by users to File Attachment elements in your surveyArchive: Archive the survey, removing all tester access and hide it from the general Survey management viewElements: Lists the number of elements the survey containsDrafts: Lists the number of incomplete drafts of the survey between all usersCompleted: Lists the number of users who have completed the surveyStatus: Shows the access status of the survey (details below)Submit access: Quick view of which teams have submit access to the survey
What do the status icons mean?
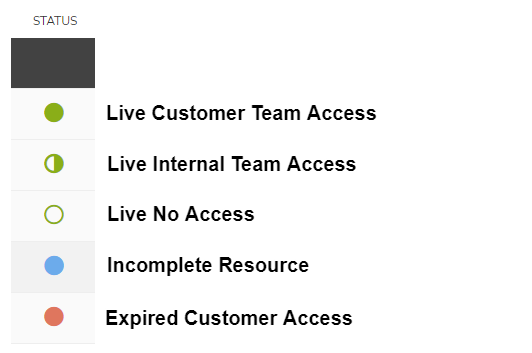
Resource status icon notes
- Status icons exist for all relevant resources (Content, Tasks, etc).
- The filled nature of each bulb indicates the general type of user who has access to it.
- Full bulbs are publicly accessible (meaning 1 or more Participants or Applicants have access)
- Half-full bulbs are internally accessible (meaning 1 or more Administrators or Internal Teams have access).
- Empty bulbs are not accessible by anyone (outside of the administrative interface).
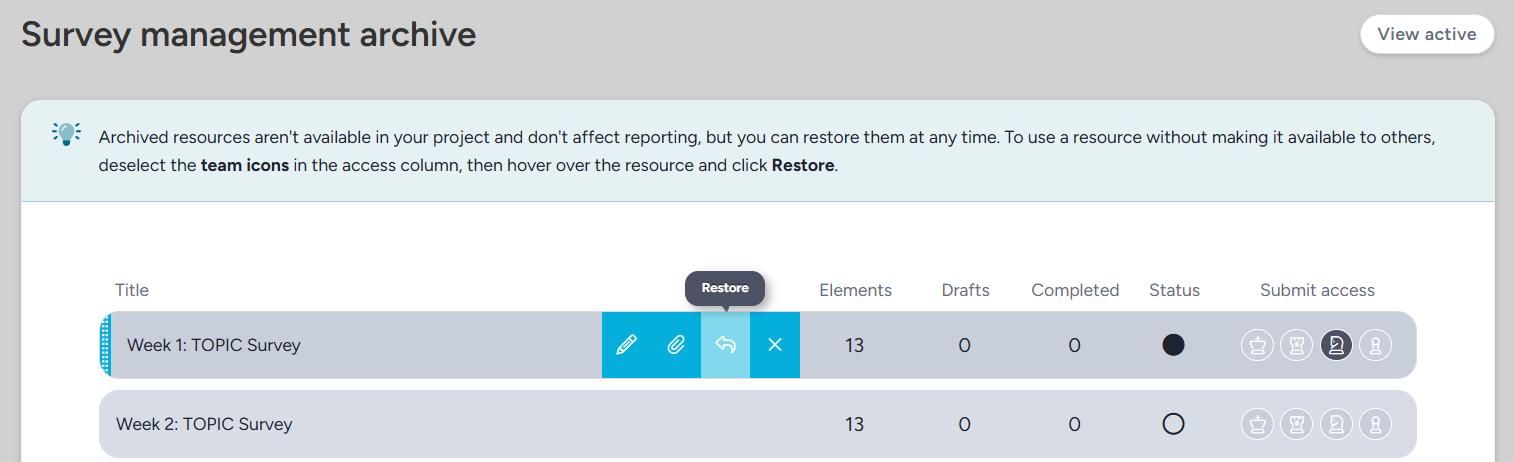
Notes
If you would like to restore access to an archived survey, navigate to your survey archive and use the Restore option when hovering over the desired survey