This article applies to Team and Legacy editions.
Invitation types are a key component of Centercode's recruiting system. They represent the various methods by which users can join your community or project. Invitation types also track how testers are added to your platform, and you can configure as many types as needed for your Recruitments.
To help keep track of everyone you've invited, each invitation type generates a Recruitment Pool - a compiled list of all the potential users associated with that recruitment. Use these to helping you track your invited candidates effectively.
For example, you might have multiple email lists provided from marketing, a couple URLs posted on your website or during events, and referrals routing users into your community or project. You can click into each of these different invitation types to see how many candidates were invited, how many remain, when they were last contacted, and how many times they've been contacted.
Accessing Invitation Types
For community level recruitments:
- In the top left of the navigation menu, click the community logo
- Click Community management
- Select Recruiting
- Hover over an existing recruitment and select Add an invitation type
For project level recruitments:
- Click Management in the navigation menu
- Select Recruiting
- Hover over an existing recruitment and select Add an invitation type
Invitation Types
The following are the various invitation types available within a given recruitment. Each have their own unique functions and benefits. You're able to click the invitation type's title for more information, potential use-cases, and helpful tips:

- Open invitation types: Provide a universal and sharable way for candidates to join your community or projects, typically via sharable URL.
- I’ll use an email list I already have to send users an invitation: Generate a recruitment pool of email addresses by adding a list manually or via uploaded CSV/XLSX.
- I’ll invite users based on a filtered list of my community members: Generate a recruitment pool of existing users who meet a custom community filter.
- I’ll provide users with single-use keys (e.g. beta keys): Generate single-use keys to distribute to potential users.
- I’ll create a referral campaign that lets users refer other users: Give existing users the ability to refer a set number of their friends or colleagues to the team(s) of your choice.
- I’ll grant users on specific community teams automatic access to the project: Select one or more community teams to give users on those teams immediate access to join your project.
- Import users via Centercode API: This allows you to use an API to add users to your community from a separate system, like your own app or CRM.
Open Invitation Types
Open invitation types allow you to various options to create a customizable URL to distribute to your users in order to join your Community or Project via a Recruitment. Having a unique URL is handy to post on your website, distribute through email, documentation, forums, advertisement, analogue materials, and general hyperlinking convenience.
All four Open invitation type buttons will take you to the same Create an open invitation screen, the only differences will be the options automatically selected that change the functionality of the open invitation type, which will be explained below.
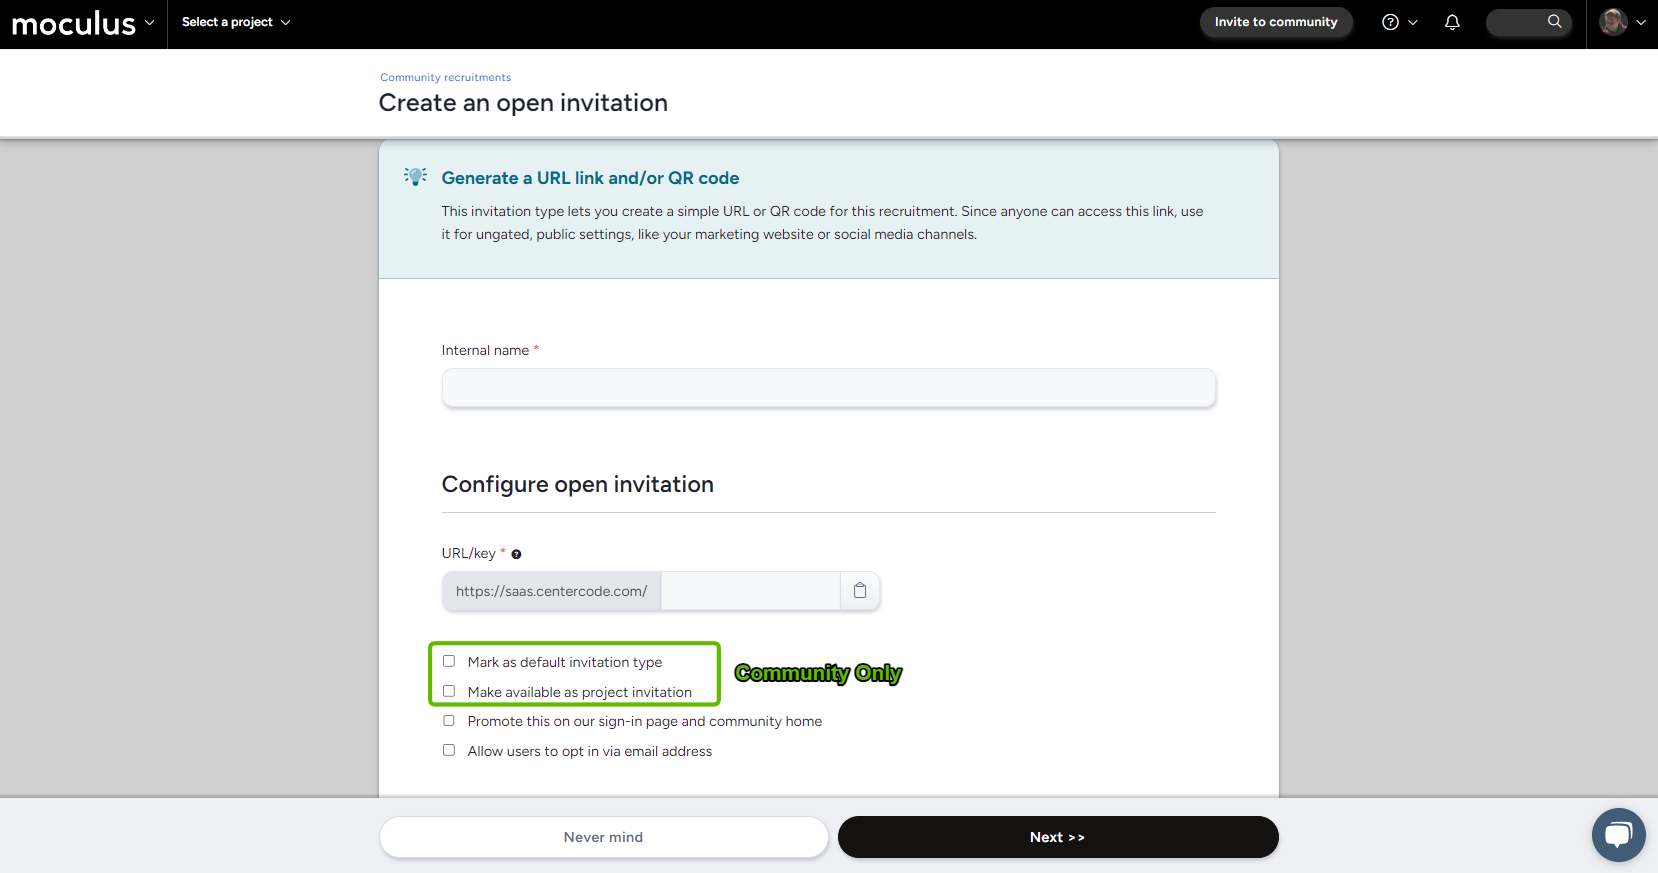
To create a Dedicated URL:
- Hover over the Recruitment click the + icon
- Select any Open invitation type
- Fill out Internal name and URL/Key
- Click Next to complete
- The Key field allows you to customize your invitation URL. The Key must be an alphanumeric value, which means no special characters may be used (however “-” and “_” are allowed). Any spaces that appear in your key will be automatically removed.
- Use the QR Code feature to invite candidates via banners, pamphlets, or other analogue marketing materials with a smartphone.
Mark as default invitation type (Community-level only)
This setting allows you to set a single Dedicated URL Source (indicated by a house icon ) as the standard recruiting path for any user who lands on your login page.
Make available as project invitation (Community-level only)
This setting allows for your Source to be selected at the Project level for new or existing users. It assigns users a specific recruiting path into the Community before joining a Project. Hover-over the tree icon to display where Project Opportunities are being used.
Promote this on our sign-in page and community home
This setting makes your Recruitment open to anyone (existing in your portal or not). The Recruitment will appear on your Community landing page.
Allow users to opt in via email address
This setting allows candidates to add their email address to a holding pool associated with the Dedicated URL Source. This option helps you gauge interest or get an early start building your panel before sending true invitation emails. To that end, with this setting enabled, users will not gain access or receive an invitation until you've deliberately sent the Dedicated URL's emails.
Please note that this is a niche setting that should not be used if you have a straight forward Recruiting scenario in mind.Notes
- When a Dedicated URL is deleted, the Key remains unique. You cannot reuse a Key even if its associated Source is deleted.
- If you're planning to announce a test to our Betabound Community, we ask that you have an active Recruitmentand Dedicated URL.
Targeted Invitation Types
Email List Invitation
The email list invitation type allows you to add email addresses to a Recruitment Pool by uploading a spreadsheet/CSV or by entering them manually. For example, you may have multiple email addresses provided by marketing or a list of tried and true testers you would want to take part in your upcoming test.
To create an email list invitation type:
- Select I’ll use an email list I already have to send users an invitation
- Fill out the Internal name
- Paste email addresses or attach a CSV of emails
- Click Next at the bottom of the page

Once you’ve clicked Next, the platform process your emails and provides you with intel on the list - accounts that are pre-existing, completely new, previously indicated they're "not interested", or blocked according to your Recruitment Limiting Filter.
Note: Users will not be emailed at this time. Instead they will be put into a recruitment pool to be emailed when you're ready.
Community Filter Invitation
At the project level, the community filter invitation type allows you to target candidates who meet specific criteria. After selecting the appropriate filter, Centercode will generate a list of matching candidates and provide status details for each one (e.g., already in the project, marked Not Interested, Blacklisted). You can then approve, modify, or discard the candidate list, or download it for further processing. Approved candidates are placed into a recruitment pool to be invited later.
To create a community filter invitation:
- Select I’ll invite users based on a filtered list of my community members
- Add an Internal name
- Select your Filter criteria
- Clicking Check filter will show you how many users meet your selected filter criteria
- Click Next
- Select the groups you want to include
- Click Approve or Modify the filter with the button at the bottom of the page
Consumable Key Invitation
Centercode's recruiting offers a unique invitation type for distributing single-use consumable keys. This is ideal for handing out access at live events in order to control the number of candidates joining while not tying the invitation to a specific person.
Keys can be downloaded to CSV for distribution and marked as available, delivered, or removed for tracking purposes. Key-holders can then navigate to your portal and enter their key on the login page.
To create a consumable keys invitation type:
- Select I’ll provide users with single-use keys (e.g. beta keys)
- Fill out the Internal name and number of keys
- Click Next to complete
To moderate your keys, either hover over the recruitment and click Manage keys or click on the invitation type. You can toggle the delivered status or remove a single key by mousing over the key and pressing the corresponding button. Alternatively, at the bottom of the page you can use the Mark all delivered, Mark all available, and Remove all keys, to affect all keys shown on screen at the same time. Use the “Limit # of results” field to control the number of keys you wish to affect.
Note: Providing consumable keys to participants in your tests (to be used as software keys, for example) is done using distributed values.
User Referral Invitation
User referral invitations types grant existing users the ability to refer others to your community or project. You control which teams can refer, how many referrals they have available, and the email message included in a referral. The recruitment associated with the referral invitation type determines which team(s) the referred users are added to. You can then track and give credit to those users who helped expand your program!
To create a user referral invitation type:
- Select I’ll create a referral campaign that lets users refer other users
- Add an Internal name
- Select which Referrer teams will be allowed to refer other users
- Set a Referral message shown to the referrer to provide them with some instructions
- Select or create an Email template which will be sent to the newly invited user(s)
- Clicking Next will complete the User Referral invitation setup
For teams with access to the referral invitation, the link is available in the community or project menu, depending where the recruitment was created. Once referred, invitees are sent an email invitation and one referral will be consumed.
Verifying your referrals
The Project users tool can be used to verify your referrals. To check on who has been recruited via referrals, use this filter criteria:

Your view criteria will vary based on your needs, but you'll want to at least include the Referer data point in your view criteria.
Verifying your referrers
To check who has done the referring, use this filter criteria:
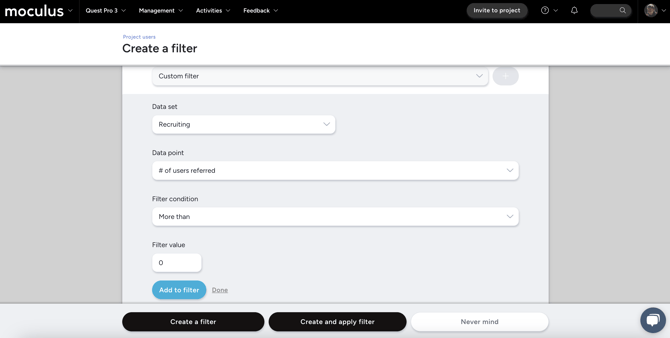
As with your referrer view criteria, what you want to see will vary based on your needs. We recommend to at least include # of users referred data point.
Link sharing
By default, referrers are provided with options for sharing their referral via social media or by copying the link. If the limit on referrals per user is set to 49 or under, these will be automatically disabled.
Note: If a referred user is blocked by your Recruitment Limiting Filter (if you've configured one) or if they fail the application process, the referral is consumed. If your users have a limited number of referrals, they'll have one less.
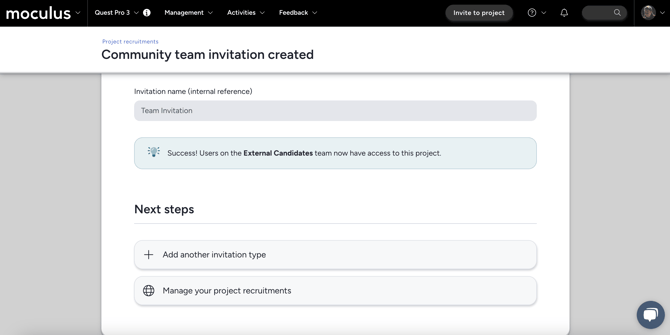
Team Access Invitation
Team access invitation types allows you to grant chosen community teams immediate access to your recruitment. Members of the chosen community teams see a link to your recruitment on their community homepage.
To create a team access invitation type:
- Select I’ll grant users on specific community teams automatic access to the project
- Add an Internal name
- Select the Community team(s) which will be granted access
- Click Next to complete
API Import
The API import invitation type allows you to seamlessly add users to your community from external systems, such as your app or CRM, using an API. This setup requires technical knowledge, so developer assistance may be necessary.
To create an API import:
- Select Our developers will use the Centercode API to add users
- Fill out the Internal name
- Set up a Key for your API endpoint
- Enabling Invite immediately automatically adds users to the community/project. Disabling this option adds them to the recruitment pool only and they'll need to be invited separately.
- Click Next to complete
Notes
- Team access invitation types will automatically be hidden from the community homepage if there is a URL invitation type associated with the same recruitment with the "Promote this on our sign-in page and community home" option selected.