This article applies to Pro, Team, and Legacy editions.
As an admin in Centercode, you can record or upload videos within Activities, Releases, or Content. This feature is an excellent way to communicate product requirements, showcase clear examples, or demonstrate product functionality.
You can also configure a Feature Activity to prompt testers to record a video interview or experience as part of the task. The recording interface is simplified for testers, but both admins and testers can record live videos (using a webcam or screen recording) or upload pre-recorded media files.
How to Require Testers to Provide Media for Feature Activities
How to Record or Upload Media in Content, Releases, and Activities
How to moderate recorded media with chapters, annotations, and tags
How to Require Testers to Provide Media for Feature Activities
If you’re interested in adding this feature to your existing license, please reach out to your account manager for further assistance!
Here are the steps to enable media capture for your testers:
- Navigate to Management > Test plan > New feature
- Select an engagement Phase or special feature type
- Complete the Feature, Feature description, and Feature value fields
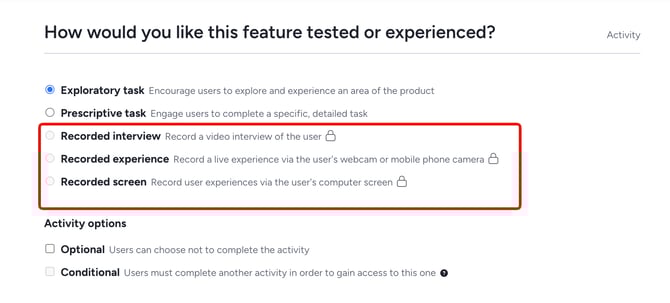
- In the section labeled How would you like this feature tested or experienced? select one of the following media capture options:
- Recorded interview, Recorded experience, or Screen recording, depending on the type of media you want your testers to provide
- When configuring the video capture settings, you can:
- Add specific video recording instructions
- Enable transcription for recorded videos (optional)
- Check the Should not contain PII box if the videos are considered non-PII and you want to keep them on tester opt-out or removal
- Choose how testers will report their Activity by selecting one of the following options:
- Centercode FSAT
- A custom survey from the Project
- None (no additional reporting)
- If you select none, you can choose to still collect the star rating and/or collect feedback relating to the feature
- Set Team view access to manage who can view the Feature Activity
How to Record or Upload Media in Content, Releases, and Activities
This section outlines capturing and recording media for all user types as the process is fundamentally the same. Admins have the additional ability to set chapter breaks, annotate, and otherwise moderate these media resources -- more details on moderating recorded media below.
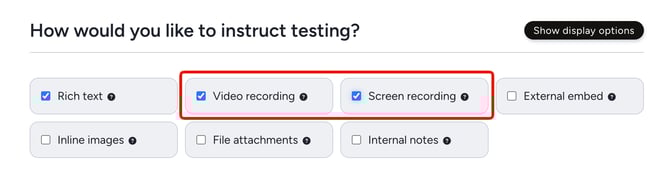
For admins: Navigate to the Content, Release, or Activity from the Community or Project Home Management menu > Select the Video recording option to either Record a video or Upload a video File or the Screen recording option to either Record your screen or Upload a video file.
Tester Experience for Capturing Media

All users will proceed to completing the steps below.
Grant Video and Microphone Access
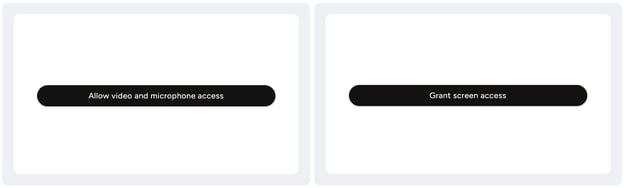
Begin Recording the Video or Screen Recording (or Upload a Video instead)

Review & Commit:
- After recording or uploading a video, you'll be able to review the media
- You can either:
- Use Recording: Save the video
- Record Again: If you're dissatisfied, you can start over and record a new video

- Once your recorded media is finalized, you can add chapters or annotate specific timestamps (For admins) and make it more navigable for viewers. Learn more below
- The transcript feature allows for automatic transcription, where users can interact with the video via the playhead or through the transcript itself
- Note: When viewing a transcript, any word highlighted in red is a word the system isn't sure it heard correctly, so keep an eye out for these!
What options are available to moderate video media?
Whether you're recording a video, recording your screen, or uploading a video file, you'll have the option to annotate it in a number of ways. These tools make it much easier for your team and your audience to consume video. The following options are available for moderating your videos:
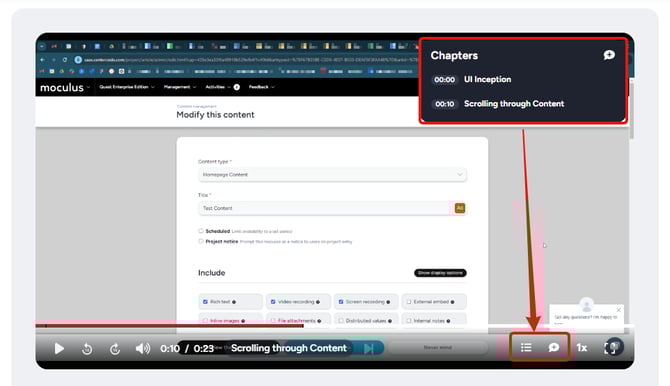
Chapters
Chapters are a great way to make video consumption and navigation easier for your testers. They act as labeled timestamps that visually identify parts of your video, as well as a quick way to jump to specific timestamps of the recording. Examples of chapters might be when your video covers specific features, addresses particular known issues, or simply changes topics.
Annotations
Annotations are very similar to chapters, but they become available when processing media provided by your participants. Annotations use the same UI as chapters but have added capabilities, including greater length and the ability to add Tags.
When a tester records their screen or uploads an unboxing video, for example, you (the admin) can use annotations to identify key parts of the video, add notes for colleagues, and even add tags to enable instant filtering to other videos with similar content.
Tags
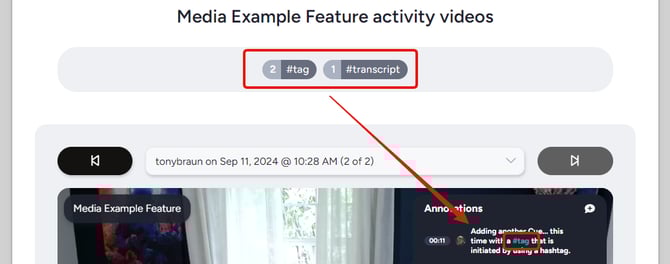
Tagging videos is incredibly useful to identify, categorize, and even quantify video contents. Did your tester upload a video that contained a particular bug? #tag it! Did the video exemplify a particular use case or trigger a valuable internal discussion? Make sure to #tag it!
Tagging is done by adding an annotation and using a hashtag (#) to initiate creating a tag. Once you complete the tag (ex: #bug, #review, #dev_radar), the tag will show up in your Video Review Dashboard, allowing you to quickly identify which and how many videos have the named tag, as well as filter to the relevant videos by clicking the desired tag(s).
How to moderate admin-sourced media
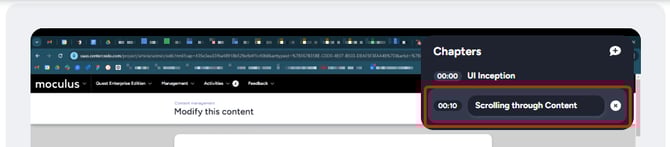
Admin-sourced media, available in Content, Releases, and Features, allows you to add chapters to make consuming the videos easier for your participants. To add a chapter to your recorded video:
After recording your video (more details here), begin moderating your video by simply playing it to display the video’s interface. The buttons to display and moderate chapters are available in the bottom right corner of the video UI. Simply click to add a chapter, type the chapter name or label, and you’re done!
To modify or remove an existing chapter, display the list of chapters in the video and double-click the chapter you want to edit. Change the text as desired, or click the X and confirm to remove the chapter entirely.
How to access and moderate tester-sourced media
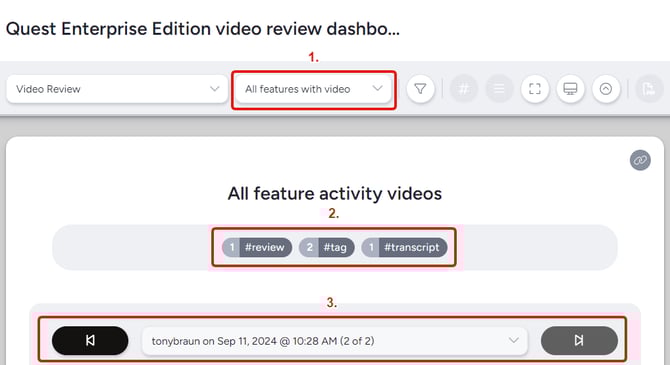
The ability to access and administrate videos recorded by your testers as part of their feature activities lives within the Video Review Dashboard, visible within your Project menu, as well as from your dashboard drop-down menu. Navigate to Management > Dashboards > Video Review or, from any dashboard, click the dashboard drop-down menu and select Video Review.

From within this dashboard, admins have the ability to moderate their videos in multiple ways. In addition to the standard dashboard filtering functionality, the Video Review Dashboard includes
- Filtering to specific features with media capture activities
- Filtering to a selected set of tags
- Navigating through the video recordings one by one
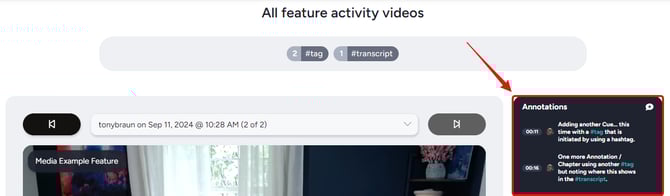
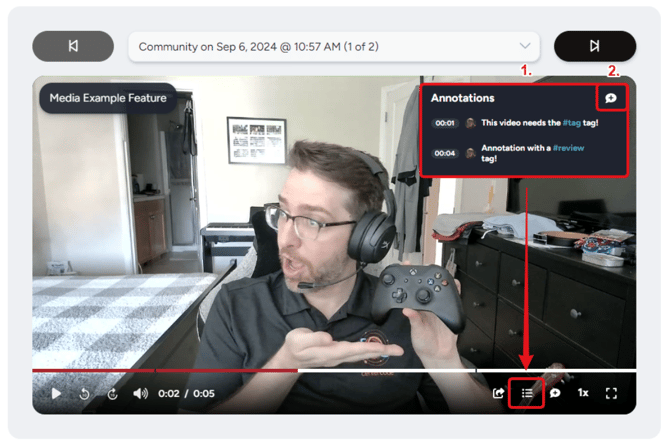
Further down the page, while reviewing individual videos, admins have the ability to add annotations and tags to the video. By initializing playback of the video, the player UI will display the Annotation buttons - displaying
- The list of current annotations
- The button to add a new annotation
Once your videos have all been annotated and tagged, you’re able to easily navigate through them, share specific video sets with colleagues (ex: link to a set of videos with both the #bug and #review tags), and more.
Notes:
Upload a Video (Alternative Option):
- Instead of recording, you may choose to upload a pre-recorded video by selecting Upload a video file instead.
- Uploaded videos have a hard limit of 20 minutes.
![]()
Regarding recording from Mobile devices:
- Based on device security concerns, screen video capture may not be available on most mobile devices. Users can still upload manually recorded video, but direct recording isn’t available through the Centercode App or browser UI.