Phases Overview
Set up and configure test phases to guide testers from onboarding to completion.
Test phases structure your testing process by organizing features and activities into defined timeframes. Each phase determines how testers engage with features, provide feedback, and progress through the project. This guide explains phase types, how to create a new phase, configure its settings, and assign team access.
Phase Types:
Onboarding: Onboarding focuses on preparing testers for the project. The purpose of the onboarding phase is to help testers get settled and familiarize themselves with the Centercode platform. During the phases users will not have access to feedback submission. As a project manager, you can use this time to ensure that the testers have received the product or software you intend to test and are ready to go when the first engagement phase begins. During this phase, if enabled, Ted will send out a series of introductory emails to your testers to help them prepare for the test.
Engagement: Engagement phases will comprise the bulk of your test and are where you will create the Features and Activities used to gather your tester's valuable feedback. Within an engagement phase, you will create Features (and their associated Activities). A standard project will generally contain multiple engagement phases. These engagement phases split your test into distinct periods of focus to keep your participants on track. During this phase, if enabled, Ted will contact testers frequently (more information available here), letting them know about their progress within the phase and pointing them towards areas they have not yet completed that need attention.
Closure: The closure phase focuses on wrapping up the project, allowing you time to coordinate the return of testing units and the distribution of incentives (if applicable). Users will still have the ability to submit feedback during the closure phase, and will be able to do so as long as they have access to the project. During this phase, if enabled, Ted will send a final summary email to testers giving them an overview of the activities they completed and thanking them for their participation.
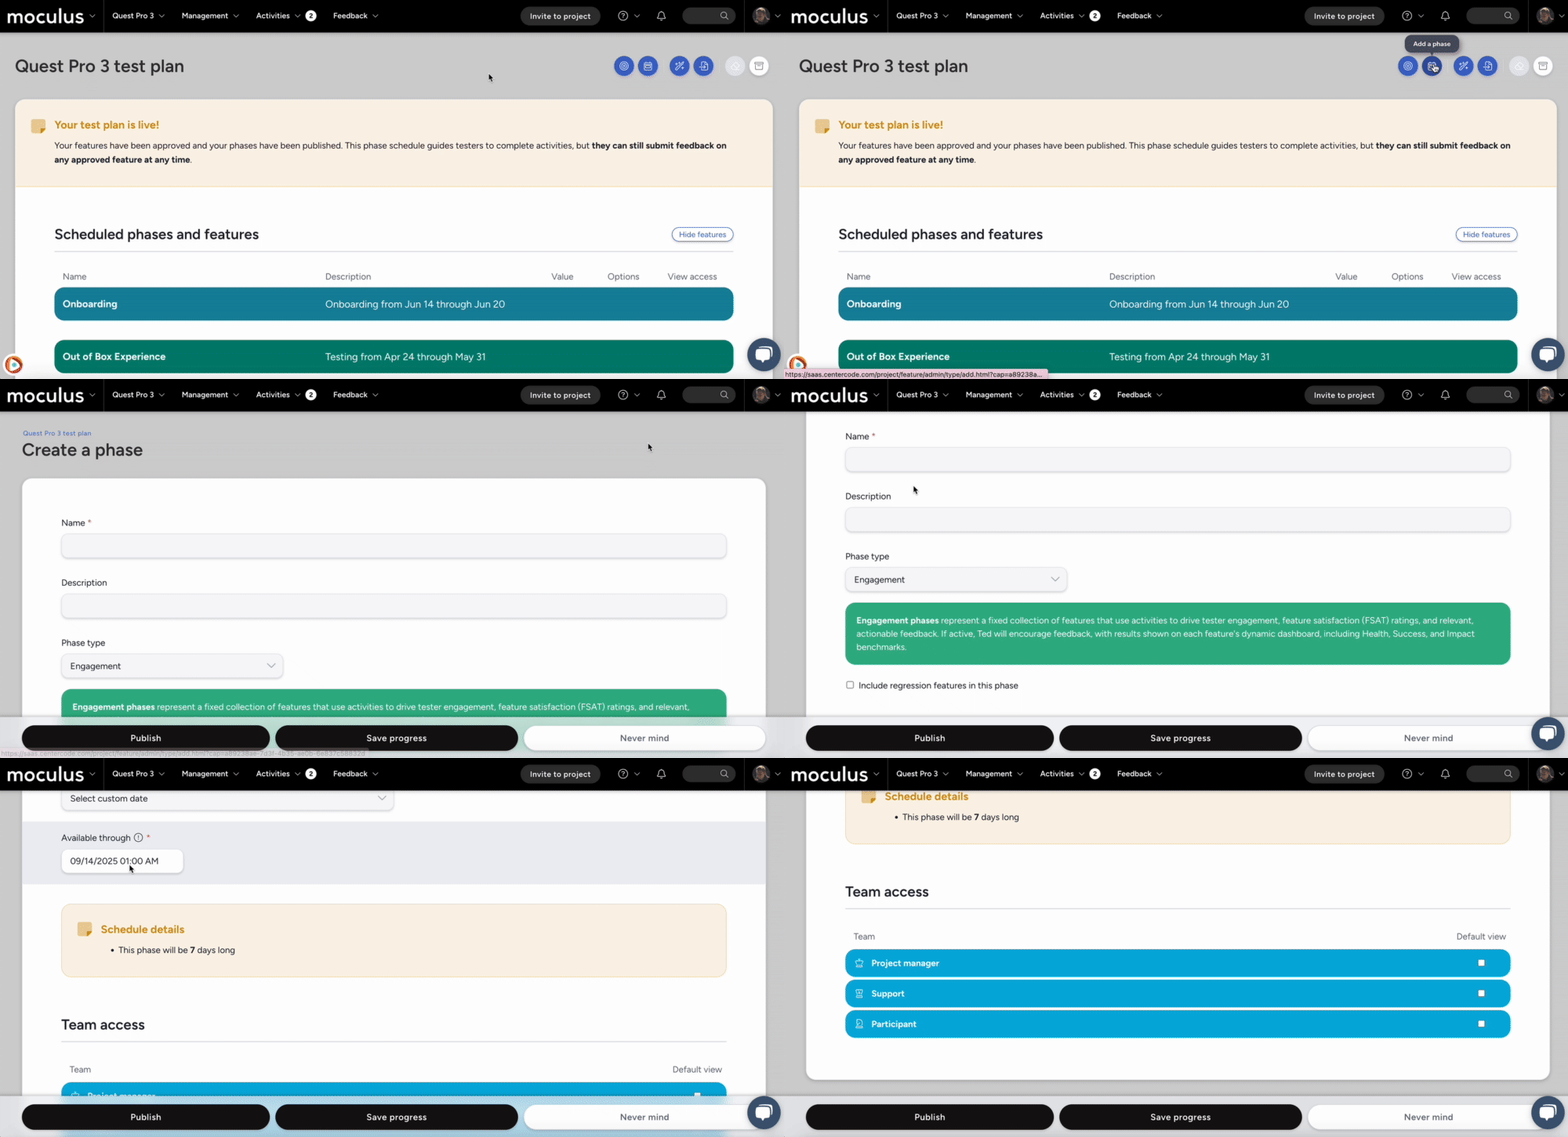
Configuring Phases
Name the phase: Provide a unique and descriptive name for the phase to clearly indicate its purpose. This field is internal only, your testers will not see the name of your phases.Add a description: Write a brief description that outlines the goal of the phase.Select a phase type: Choose the appropriate phase type based on how you plan to manage testing.
Onboarding: Introduces testers to the project, providing necessary instructions, guidelines, and initial setup tasks.Engagement: Focuses on active tester participation, collecting feedback, feature satisfaction ratings (FSAT), and insights through structured activities.
(Optional) Include regression feature in this phase: Allows specific features to be re-tested across multiple phases.Closure: Wraps up the test phase, finalizing feedback, summarizing results, and preparing insights for the next steps.
Schedule this phase: Define the phase's timeline by specifying its start and end dates.- Start Date: Choose when the phase begins. You can set it to start immediately after a previous testing phase ends (e.g., After ‘Testing phase’ ends, on Sep 8 @ 1:00 AM) or select a custom date.
- End Date: Select a custom end date or configure it to automatically end before another phase begins. The system provides an estimated duration, such as “This phase will be 7 days long.”
Assign team access: Determine which team members can view the phase.
After configuring the details, review the settings and publish the phase schedule. Once saved, the phase will appear in the test plan management timeline and relevant teams will have access based on their assigned roles.
Notes
- The phase schedule will use the dashboard timezone found in Project settings.
- Expired phases can't be extended. If you need to gather more data on a particular feature, hover over the feature and click Move. From there, you can put that feature into a different phase and continue testing.
