Build a recruitment landing page
This section allows you to configure the landing page that users see before deciding whether to join the project or community. There are a few different options you can configure here, and not all are required to complete your recruitment landing page.
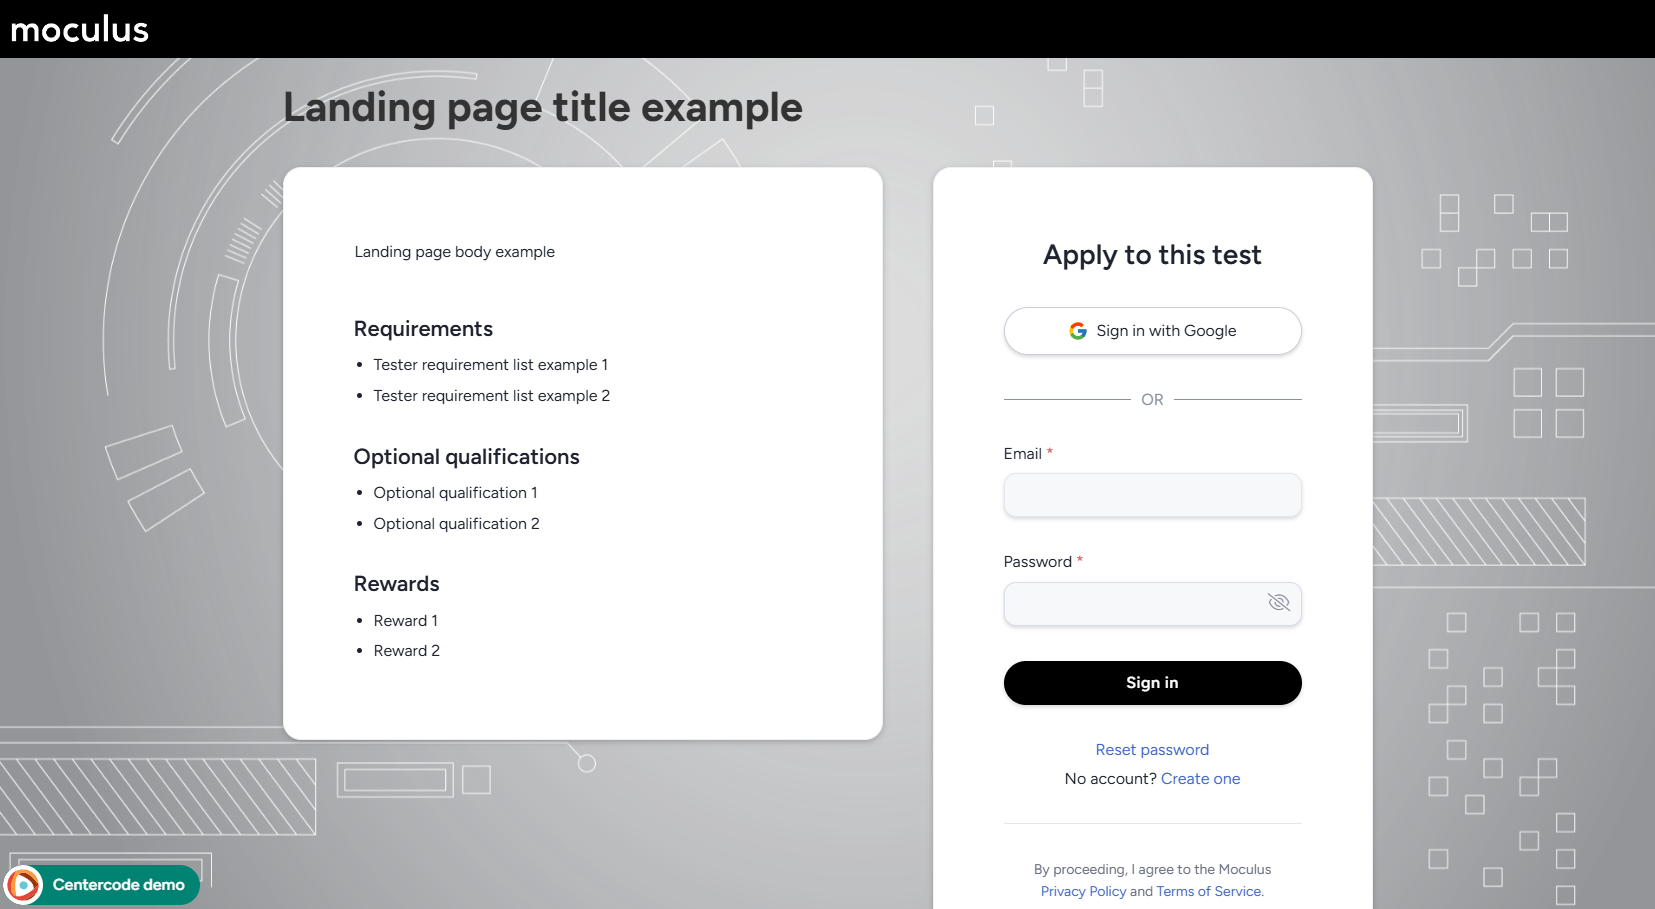
Page title: The page title is what will be shown at the top of your recruitment landing page. In addition, the page title determines the "name" of the project for any open opportunities or projects where the user is an applicant. This is so you can invite users without revealing the name of the project/product, if you choose. (Example)Page body: Give the potential applicants a brief description of your test and what it will entail.Tester requirements list: (Optional) List specific requirements you have for your testers. For example: "Must live in the continental US".Optional tester qualification list: (Optional) List additional qualifications that would make a user a strong fit for the test or community.Tester reward list: (Optional) List any incentives or rewards that may attract more participants.
Put incoming users on these teams
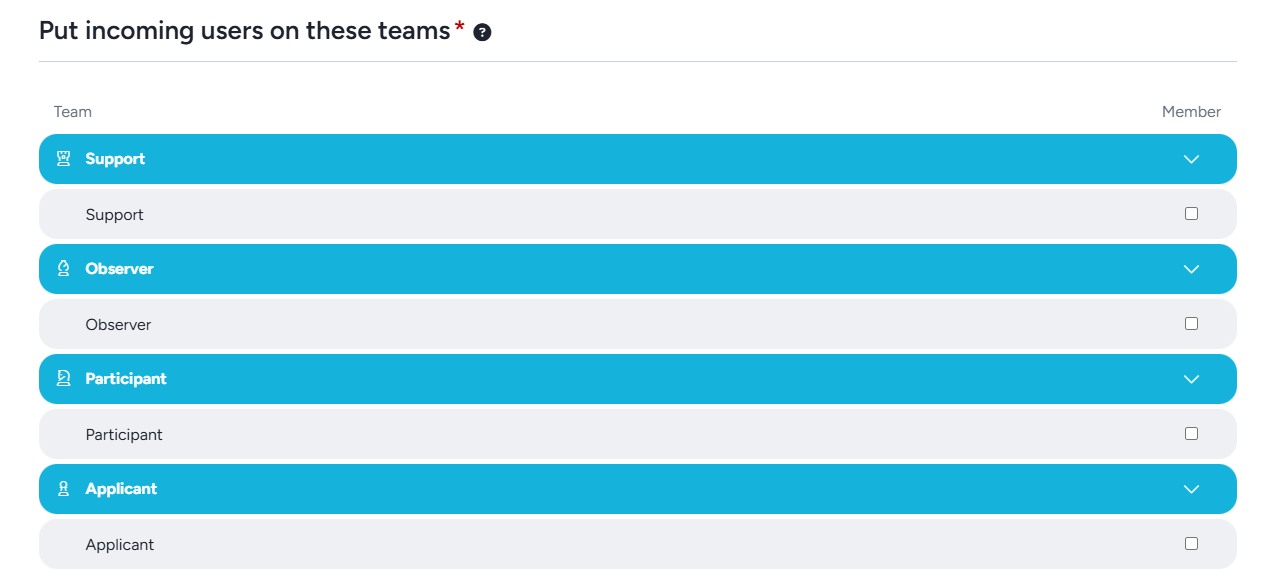
This section controls the team(s) users will be placed on if they follow any of the invitations attached to this recruitment/landing page. Generally you'll want to place candidates on an applicant team to complete additional screening. Alternatively, place them directly on a participant team if they have already been screened or if you're accepting all candidates as testers (i.e. skipping any qualification/screening steps).
Note: For platform security reasons recruitments can not place users directly onto an admin team. This can be done via the quick invite option, or by promoting users already in the community or project.
Preview onboarding
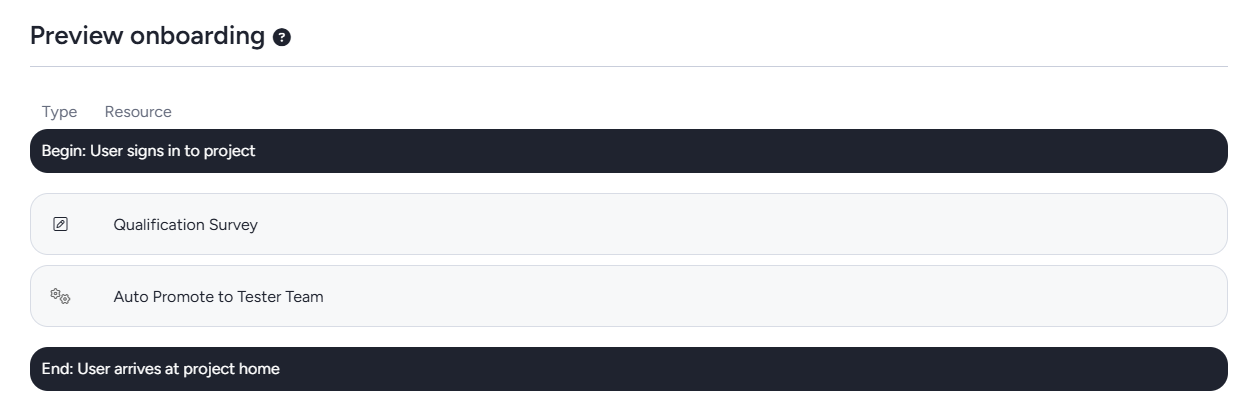
This section shows an overview of the project or community notices the user will pass through when they join via this recruitment. This is based on the team(s) your recruitment will add testers to and which notices those teams are subject to. If your notice chain for that team contains notice macros you will be able to preview the path users will take depending on if they meet the true or false conditions for that macro.
Advanced options
Recruitment summary: Set the message that will be seen on your community's "Opportunities" page, where active project recruitments with open URL invite types are listed. (Example)Inactive message: Displayed when users attempt to access an invite linked to a recruitment which has been toggled to inactive/disabled.Expiration: Set an expiration date for this recruitment. Any users who attempt to access it past the expiration date will see a default "recruitment is unavailable" message, unless you set a custom expiration message.User limit: Set a limit on the number of users who are allowed to join/apply through this recruitment. Any users who attempt to access it past the limit will see a default "recruitment is unavailable" message, unless you set a custom limit message.
Visual design
This section allows you to set custom visual elements for this landing page, which will not effect the rest of your site.
Background image: Upload a background image that will display only for this recruitment's landing page. This overrides the community background image.Custom CSS: Set custom CSS that will only be used on this recruitment's landing page.Hide page from search engines: Prevents your recruitment landing page from showing up in search engine results. It will be available via direct links/invitations.