This article applies to All editions.
Email templates let you build reusable email layouts that can be triggered manually, by macros, or through system processes. Each template captures the content, sender identity, and footer configuration for a specific type of outgoing message. Templates are available at both the community and project level, so you can maintain organization-wide defaults while customizing messaging per project.
This article covers the fields and options on the Create an email template page, including options that are unique to recruiting email templates.
Template Content
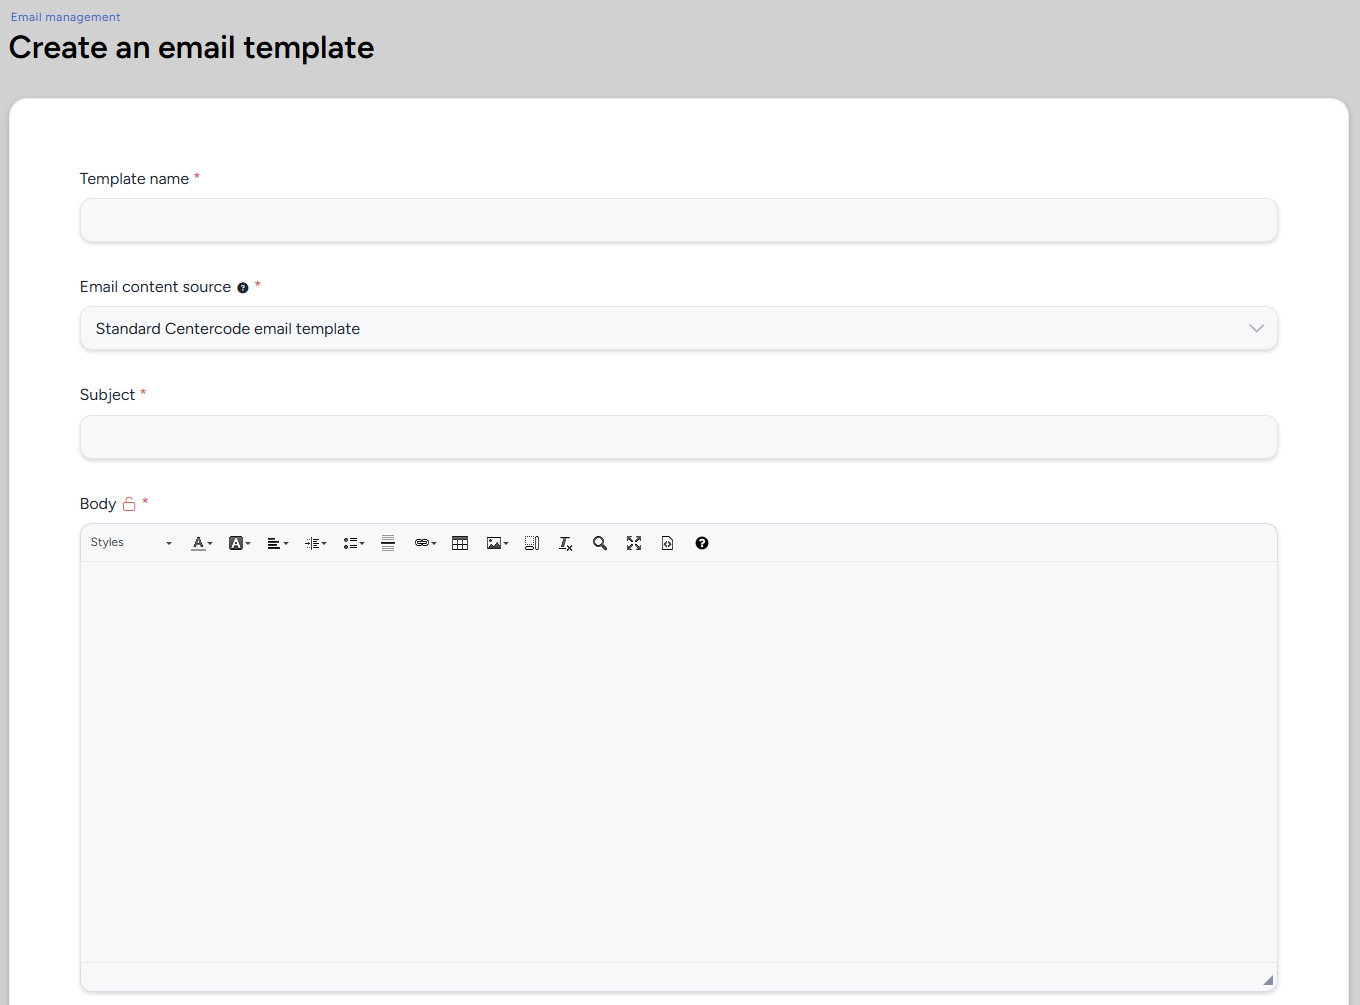
The top section of the template form captures the core content your recipients will see.
Template name: An internal label for identifying this template. Recipients won't see this name. Choose something descriptive so your team can find it later (e.g., "Welcome Email - Beta Launch" or "Survey Reminder - Weekly").Email content source: Controls the editing format for your template body. Standard Centercode email template provides the WYSIWYG editor with formatting tools. Select raw HTML if you need full control over the email markup.Subject: The subject line recipients see in their inbox. You can insert dynamic tags here to personalize the subject per recipient (e.g., including the project name or the recipient's first name).Body: The main content of your email. The WYSIWYG editor supports text formatting, images, tables, links, and dynamic tags. Use the toolbar to style your content or switch to source view for direct HTML editing.
💡 Ted Tip: I recommend keeping your subject line short and specific. A subject like "Your feedback on [Product Name] has been updated" outperforms vague lines like "Important update." Dynamic tags in the subject line are your friend here.
Email Footer

Below the body editor, you'll see a preview of the default email footer. This footer includes system-generated links and text that appear at the bottom of every outgoing email.
The standard footer displays:
- A message explaining why the recipient received this email
- Unsubscribe from email and Remove your account links
- A "Sent from Centercode" line with the company mailing address
To learn how to modify or blank out individual footer elements, see the Customizing the Footer via Custom Strings section below.
Customize
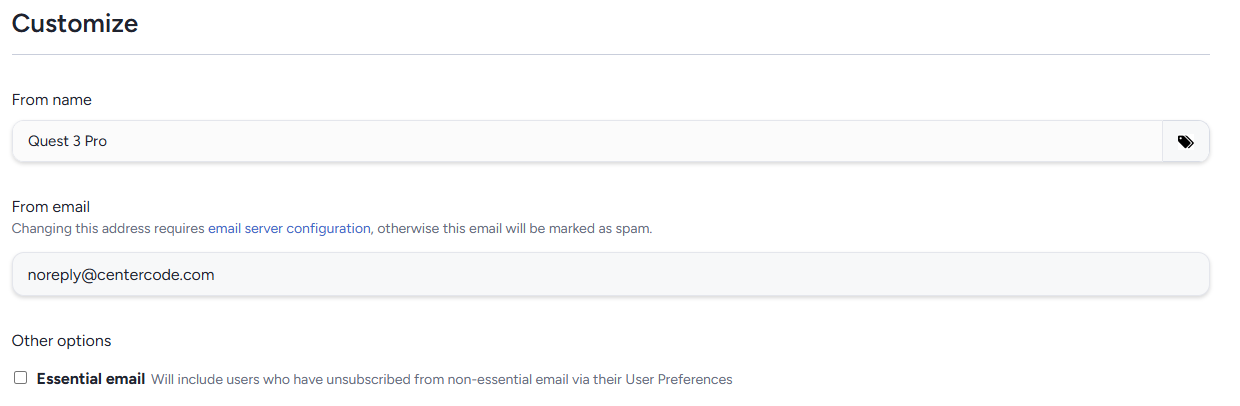
The Customize section controls sender identity and delivery behavior.
From name: The display name recipients see as the sender. Defaults to the project or community name. You can use dynamic tags here (note the tag icon beside the field). Changing this to your product's name or your company's name helps recipients recognize the email.From email: The email address shown as the sender. Defaults to noreply@centercode.com. If you change this to your own domain, you'll need to configure your email server and SPF record first. Without proper configuration, your email will likely be flagged as spam.Essential email: When checked, this email will be delivered even to users who have unsubscribed from non-essential email through their User Preferences. Reserve this for critical communications only (e.g., NDA updates, account-related notices, or test-critical announcements).
💡 Ted Tip: Use the "Essential email" option sparingly. If recipients start seeing marketing-style content marked as essential, they'll lose trust in your communication. Save it for messages they genuinely can't afford to miss.
Recruiting Email Template Options
When creating a Recruiting email template, you'll see additional options that don't appear on standard templates. These controls are specific to invitation and opportunity-based email.
Custom Footer
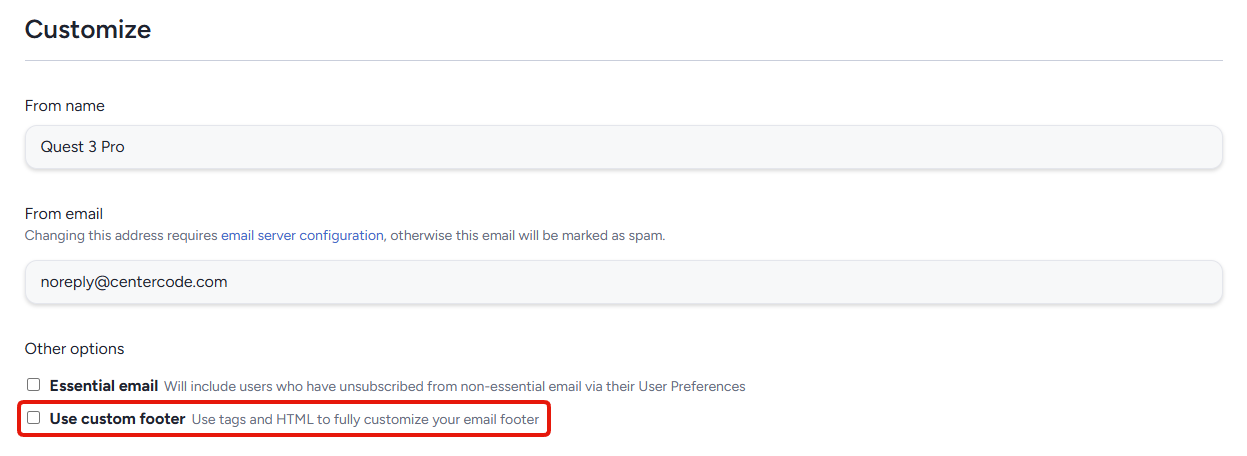
Recruiting templates include a Use custom footer checkbox. When enabled, the standard footer is replaced with a custom area where you control the footer content using tags and HTML. This also reveals the full list of available recruiting body tags (described below).
When using a custom footer, you can also check Allow email to send without an opportunity link (not recommended). By default, recruiting email requires an opportunity link so recipients have a way to respond. Only bypass this if you have a specific reason for sending a recruiting email without a direct link.
Recruiting Email Tags
Recruiting templates support a set of placeholder tags that resolve to dynamic links and text when the email is sent. These tags are available in the email body (and in the custom footer area, if enabled).
%%FIRST|Default Value%%: Inserts the recipient's first name. If the name isn't available, the default value you provide is used instead.%%OPPORTUNITYLINK%%: A clickable link to the opportunity. Either this tag or%%OPPORTUNITYURL%%is required in every recruiting email.%%OPPORTUNITYURL%%: The opportunity URL as plain text (not linked). Use this inside your own HTML<a>tag for custom link formatting.%%SHARE%%: Displays text indicating whether or not the recipient is allowed to share this invitation with others.%%NOTINTERESTEDLINK%%: A link and text for recipients to indicate they're not interested in this opportunity.%%NOTINTERESTEDURL%%: The "not interested" URL as plain text, for use inside a custom HTML<a>tag.%%OPTOUT%%: A link and text for recipients to remove their account and personal data from your community entirely.%%OPTOUTLINK%%: The opt-out URL as plain text, for use inside a custom HTML<a>tag.%%UNSUBSCRIBE%%: A link and text to either unsubscribe from email or to be notified that this is an essential email.%%UNSUBSCRIBELINK%%: The unsubscribe/essential email URL as plain text, for custom HTML link formatting.
💡 Ted Tip: You'll notice that several tags come in pairs: a "LINK" version (which renders as clickable text) and a "URL" version (which gives you the raw URL for custom HTML). Use the LINK versions if you want the default Centercode formatting. Use the URL versions when you're building your own styled buttons or links.
Customizing the Footer via Custom Strings

The default email footer text is controlled by custom strings. You can modify these strings to change what appears at the bottom of every outgoing email, or blank them out entirely to remove specific lines.
To find and edit these strings, navigate to Community configuration > Custom strings, open the appropriate string set, and use Enable find-replace to search for the string names below.
The relevant footer strings are:
em_EssentialEmail: The text displayed when an email is marked as essential (explaining why the user received it despite unsubscribing).em_UnsubscribeLinkNew: The "Unsubscribe from email" link text.em_OptOutLinkNew: The "Remove your account" link text.gw_FooterSentFrom: The "Sent from Centercode" text line.gw_FooterAddress: The mailing address line displayed in the footer.
For each of these strings, you can enter custom replacement text. To blank out a string entirely (removing that line from the footer), set its value to {empty}.
💡 Ted Tip: If you're white-labeling your community, updating gw_FooterSentFrom and gw_FooterAddress to reflect your own company name and address keeps email consistent with your branding. Just make sure you still comply with email regulations by including a valid mailing address somewhere in the footer.
Notes
- Once created, templates become available in the corresponding areas of the platform. A User Action email template will appear as an option when sending User Action email, for example.
- You can also create and save templates directly from the email sending workflow, not just from the Email Templates management page.
- Changes to custom strings that affect footer text are cached and refresh automatically at midnight (Pacific) each night. You won't see updates immediately.
- If you change the From email address, make sure your SPF record is configured correctly. Without it, recipient email servers may reject or spam-filter your messages.
- Recruiting email templates require either
%%OPPORTUNITYLINK%%or%%OPPORTUNITYURL%%when the custom footer option is enabled. Omitting both will result in an "Incomplete Form" error.